


7
8
Parking Brake Inhibit
• When the “BRAKE” cable is connected to
the brake switch, the display on the TFT
monitor will display video only when the
vehicle is applied.
• Parking brake function is overridden when
the video source is set to REVERSE.
• When the parking brake inhibit is active,
the front monitor displays “WARNING Do
not watch wideo while driving!”, preventing
the driver from watching content while
driving. Rear video screens are not
affected.
Mute
Press [
VOL / / MUTE
] knob or the [
MUTE ] button on remote control to mute
the volume from the unit. Press again to
restore the volume. [
] is displayed on
the LCD. Adjusting the volume or using any
of the audio setup features cancels the mute
function.
Power On / Off
Press the
[
VOL / / MUTE
]
knob on the
unit (or the [ POWER ] button on the remote
control) to turn the unit on. The current mode
status appears in the LCD.
Press and hold the
[
VOL / / MUTE
]
knob to power off the unit.
Audible Beep Confirmation
An audible beep tone confirms each function
selection. The Beep tone can be disabled
through the Setup menu.
Basic Operations
Playing Source Selection
Press the [ MENU] button on the front panel
or the [ SRC ] button on the remote to
change between available playing sources.
The playing mode is displayed on the screen.
4
3
2
1
3
5
3
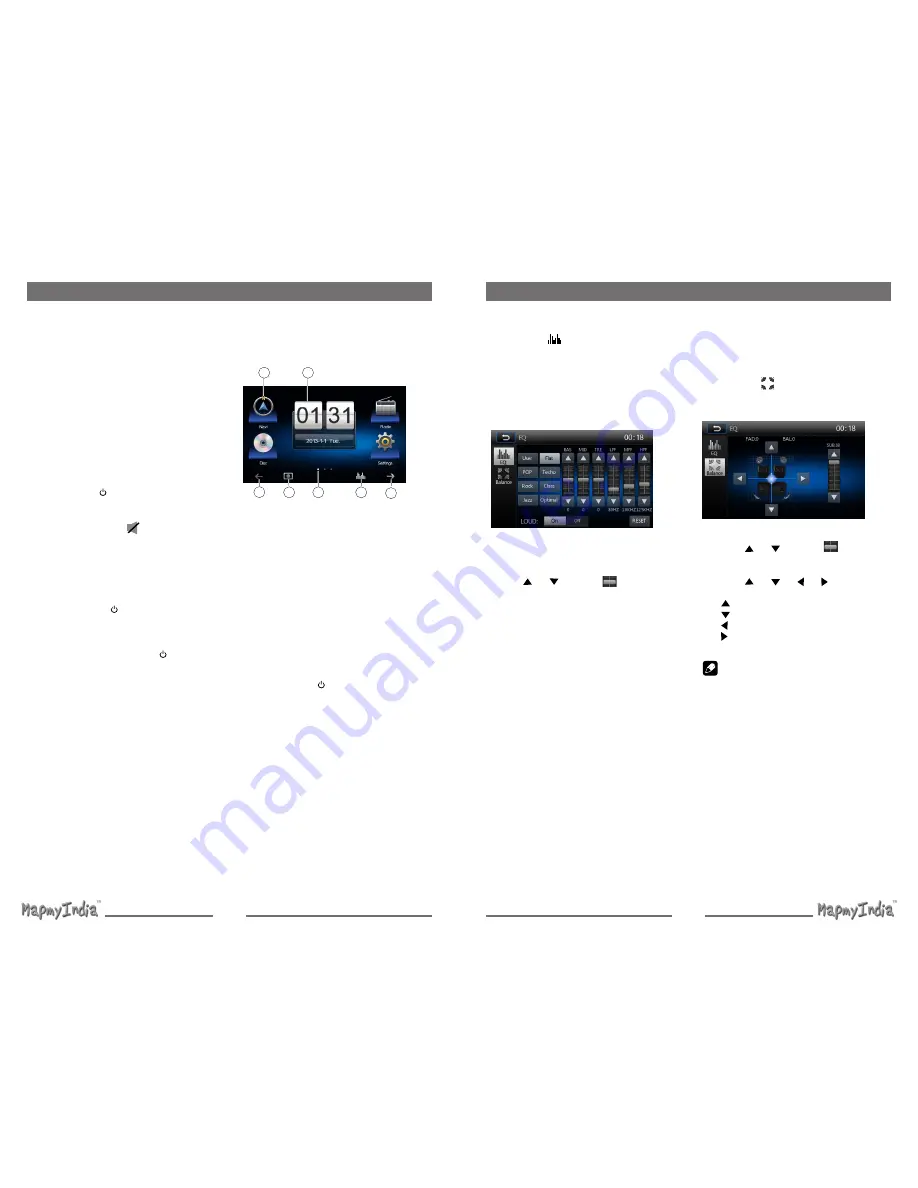
1. Date and Time display. Double click to
switch to Clock mode.
2. Function icons
3. 1/2 or 2/2: Touch this page button to view
the first or second page of on-screen
buttons. You also can drag left or right on
the blank area to switch the pages.
4. Touch repeatedly to change wall papers.
5. Touch for quick access to Equalizer level
settings.
Volume Adjustment
To increase or decrease the volume level,
turn the
[
VOL / / MUTE
]
knob on the
front panel or press the [ VOL+ ] / [ VOL ]
button on the remote control. The volume
ranges from “0”to “39”. The LCD or TFT
screen displays the volume level for 3
seconds.
EQ Menu
The Audio Control feature allows you to
easily adjust your audio system to meet the
acoustical characteristics of your vehicle,
which vary depending on the type of vehicle
and its measurements. Proper setting of the
Fader and Balance boosts the effects of the
cabin equalizer.
Basic Operations
Select Preset Equalizer
1. Enter the EQ setup mode
Touch the [
] icon in the user interface
and the EQ setup interface will display on
the screen.
2. Select EQ mode
∙ [User] ∙ [Rock]
∙ [Flat] ∙ [Class]
∙ [Pop] ∙ [Jazz]
∙ [Techno] ∙ [Optimal]
Adjust EQ Parameters
To adjust EQ parameters, touch and drag the
parameters adjustment bar.
Touch [ ] / [ ] or drag [
] to adjust the
parameters.
[ User ]: Set the desired audio effect.
∙ [BAS] bass range: -7 to +7
∙ [MID] middle range: -7 to +7
∙ [TRE] treble range: -7 to +7
∙ [LPH] low pass filter range: 60, 80, 100,
200
∙ [MPF] middle pass filter range: 0.5K, 1K,
1.5K, 2.5K
∙ [HPF] high pass filter rang: 10K, 12.5K,
15K, 17.5K
[ LOUD: On/Off ]: When listening to music
at low volumes, this featurewill selectively
boost certain bass and treble frequencies.
[ RESET ]: Cancel the equalizer function
settings.
Adjust Fader/Balance
You can adjust front/back/left/right balance
of the speaker and the subwoofer volume to
get balanced listening effect according to the
surroundings and your interest.
1. Enter the EQ setup mode
Touch the [
] icon in the user interface
and the EQ setup interface will display on
the screen.
2. Adjust subwoofer volume
Touch [ ] / [ ] or drag [
] to adjust
subwoofer volume from 0 to38.
3. Adjust fader / balance value
Touch [ ] / [ ] / [ ] / [ ] to adjust
fader / balance value
∙
[ ]: Front speaker,
fader range: 0 to 7.
∙
[ ]: Rear speaker,
fader range: 0 to 7.
∙
[ ]: Left speaker, balance range:
0 to 7.
∙
[ ]: Right speaker, balance range:
0
to 7.
Note:
1. The parameters of the EQ modes has
been preset and you can not change them
besides ‘User’.
2. The EQ mode will change to ‘User’
automatically when you adjust the
frequency value under the modes besides
‘User’.
3. The value of Sub is independent of EQ
mode and can be adjusted separately.
Summary of Contents for ICENAV 501
Page 15: ...P N 127075005483...


