background image

3


3

3.  Carefully place your hard drive in the 


  base of the enclosure so a solid  

  connection is made with the  

  22-pin SATA connector.

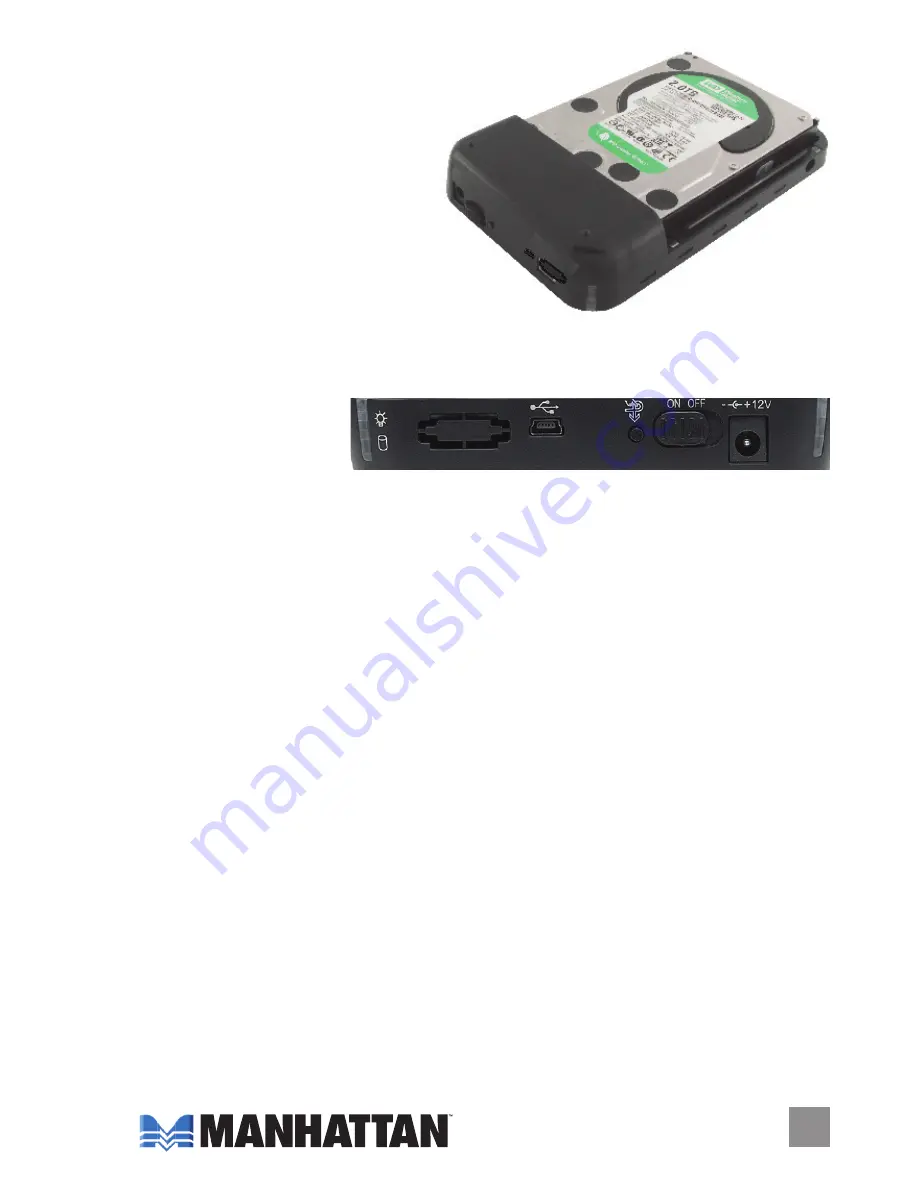
4.  Use the included screws  

  and screwdriver to secure  

  the hard drive in place (see  

  the image above), then slide the  

  cover of the enclosure back in place.  

  Place the device in the stand, if desired.

5.  Use the included USB cable to connect the enclosure to your computer.

6.  Use the included power adapter to connect the enclosure’s +12V jack to 

  a power source.

7.  Set the On/Off 


  switch to On when  

  you’re ready to use the device. The LEDs on either corner of the end


  panel will light to indicate either Power (top, as shown above) or Activity.

NOTE:

 Also shown is the One-Touch Backup button (to the left of the 

On/Off switch), which is explained in Software Installation.


OPTIONAL: Formatting a New Hard Drive

If you’re using a new hard drive with this device, you may need to format it


before initial use. If so, follow the procedure above, then continue with the


steps below. For more info on formatting drives, go to www.microsoft.com.

1.  On your desktop, go to My Computer and select “Manager.”

2.  When the Computer Manager screen displays, click “Disk Manager”


  in the left-side window.

3.  In the right-side window, recognition of the new hard disk will appear; 


  for example, “Seagate....”

4.  Right-click on the new hard drive listing, then select “Delete partition.”

5.  Right-click on the new hard drive listing, then select “New logical drive.”

6.  Right-click on the new hard drive listing a third time, then select 


  “Format disk drive.”

7.  Confirm that the new hard drive is listed in the My Computer window,

  indicating a proper formatting.

Summary of Contents for 709026

Page 1: ...hi Speed USB SATA 3 5 Drive Enclosure user manual Model 709026 MAN 709026 UM 0308 07...

Page 2: ...ual and you ll soon be enjoying these additional features Convenient one touch copy for easy data transfer Sturdy case protects drive and facilitates cooling Rear panel power switch and LED indicator...

Page 3: ...the left of the On Off switch which is explained in Software Installation OPTIONAL Formatting a New Hard Drive If you re using a new hard drive with this device you may need to format it before initia...

Page 4: ...t the new hardware and complete the setup confirmed when the representative Clone Me icon appears in your systems tray software installation These steps are for the installation of the convenient One...

Page 5: ...convenient One Touch Backup feature 1 Once the software install is complete a Clone Me icon will display on the desktop Double click the icon to display the initial function screen 2 Select where you...

Page 6: ...sequent prompt window then click Backup or press the Backup button on the device once 5 The Backing Up screen will display with a status bar to indicate that the process has begun 6 When the Back Up s...

Page 7: ...utput 12 V 2 A cable 1 5 m 4 9 ft USB mini B to type A cable 70 cm 2 3 ft Working temperature 0 45 C ABS construction Power activity LED indicator Enclosure stand 19 5 x 12 5 x 3 5 cm 7 75 x 4 75 x 1...

Page 8: ...rademarks or registered trademarks of their respective owners www manhattan products com MANHATTAN offers a complete line of PC Components Peripherals Cables and Accessories Ask your local computer de...

Reviews: