


THESE INSTRUCTIONS ARE IMPORTANT PLEASE READ THEM CAREFULLY
AND RETAIN FOR FUTURE REFERENCE.
The correct use and maintenance of your cot will ensure it gives long and trouble-free use. When somebody else
is using your cot, ensure they also know how to use it. The safety of your child is your responsibility.
BEFORE ASSEMBLY
• Unpack all the parts and identify them against the fittings and components lists.
• Do not discard any packaging until you are sure you have all the components and the pack of fittings.
• Read the instructions thoroughly before attempting to construct the cot.
• You may find the construction of your cot easier if you have the help of another person.
• Follow each stage of the construction step-by-step.
Item
Description
Qty.
F4
Base brackets
4
Item
Description
Qty.
F5
Base bracket nuts
4
Item
Description
Qty.
F6
Bottom guides
2
Item
Description
Qty.
F7
Middle guides
2
Item
Description
Qty.
F9
Top guides
2
Item
Description
Qty.
F8
Drop-side catches
2
Not shown to scale
Item
Description
Qty.
F10
Allen key
1
Not shown to scale
FITTINGS LIST
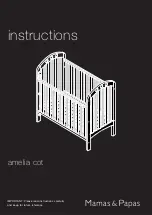
AMELIA COT
Item
Description
Qty.
F1
Long assembly screws
4
AFTER SALES SERVICE:
If when you receive your Mamas & Papas product you need assistance,
spare parts or if you are unhappy with any aspect of the goods please contact your retailer or our
Customer Care Helpline on: 01484 438222
. You can also e-mail us on
where one of our trained advisors will be able to help you, in
order to avoid you having to return your product to the retailer. You can also visit our website at
www.mamasandpapas.co.uk
for the latest product information.
– 2 –
Item
Description
Qty.
F2
Short assembly screws
6
Item
Description
Qty.
F3
Barrel nuts
4