


SECTION 3 - Network Configuration Options
3.0.1
© Copyright 2008
DN IS-IPPC101.1
® Registered trademark MAMAC SYSTEMS, Inc.
16 of 20
DHCP IP Assignment:
If during initial configuration
DHCP
was enabled, power down the
appliance and disconnect the crossover cable. Connect the Maverick to the ethernet as shown in
fig. 7. Three options are available-- 1) Use a CAT 5 patchcord and plug it into a hub or switch and
connect the hub/switch to a router on the web. 2) Use a CAT 5 cable to connect directly to the
router. 3) Configure an Ethernet Bridge and router and connect the appliance to the Bridge with a
CAT 5 cable. For more information on wireless 802.11 B/G configuration, please refer to AN
IP802.11.
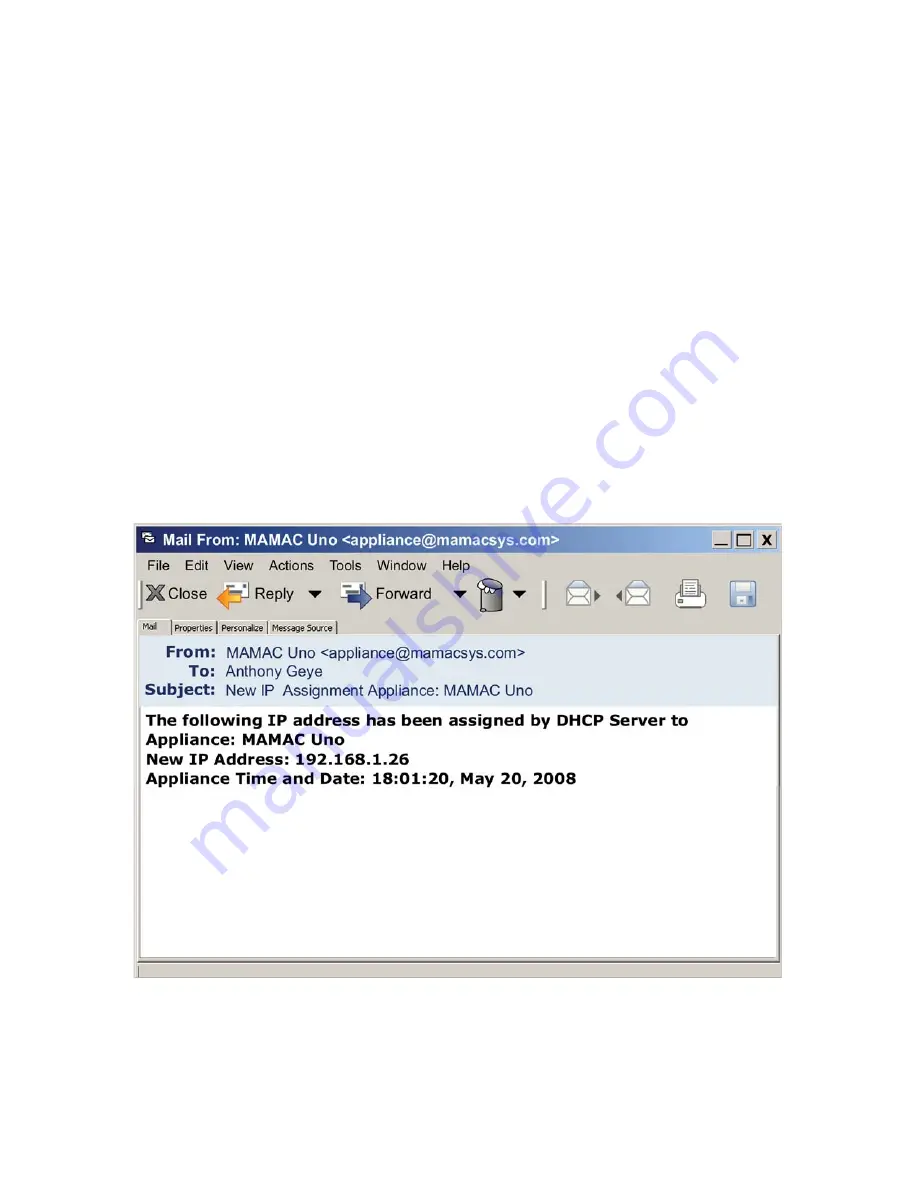
Terminate the sensors and outputs as shown in fig. 3 (Section 1.4.1). Power up the appliance. As
soon as the Maverick comes on line, it will search for a DHCP server and lease a new IP
assignment. As soon as it gets a new DHCP IP, it will send an email to one or both email addresses
with the new DHCP IP. Once you receive the email, connect a laptop/PC, PDA or web enabled
mobile/cell phone to the same network and launch the web browser. Enter the appliance internal
IP address and connect. Each time the DHCP server assigns a new IP to the appliance, an email will
be generated to keep the user abreast of the latest DHCP assigned internal IP of the Maverick.


