


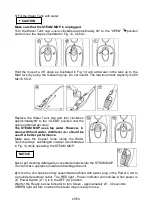


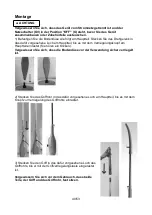

1)
Fill the Water Tank with water:
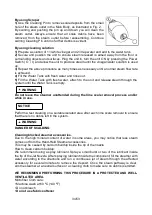
Make sure that the STEAM MOP is unplugged.
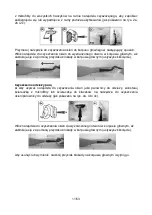
Turn the Water Tank cap
counter-
clockwise approximately 90
°
to the “OPEN”
position
and remove the cap as illustrated in Fig. 1a, b and c.
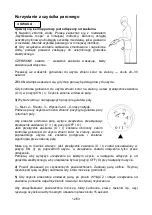
Hold the mop at a 45° angle as illustrated in Fig. 1d and add water in the tank up to the
MAX level by using the measuring cup. Do not overfill. The maximum tank capacity is 400
ML/13.5 OZ.
Replace the Water Tank cap and turn clockwise
approximately90° to the “CLOSE” position until the
cap is tightened securely.
The STEAM MOP uses tap water. However, in
areas with hard water, distilled
water
should be
used for better performance.
Make sure the Copper Cone inside the Water
Tank is always submerged in water (As illustrated
in Fig. 1i) while operating the STEAM MOP.
Never put cleaning detergents or scented products into the STEAM MOP.
This will make operation unsafe and damage the unit.
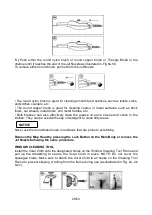
2)
Once the unit has been fully assembled and filled with water, plug in the Power Cord to
a grounded electrical outlet. The RED light - Power Indicator will indicate when power is
on. Power Switch (O / I) is in the OFF (O) position.
Wait for the Ready-to-Use indicator to turn Green - approximately 20 - 30 seconds.
GREEN light will turn on when the steam mop is ready for use.
25/53
CAUTION
NOTICE
Summary of Contents for SteamExpert HDS4500W
Page 1: ...Mop Parowy Czy cik SteamExpert HDS4500W Instrukcja Obs ugi...
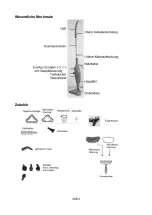
Page 4: ...Kluczowe cechy Akcesoria 4 53...
Page 19: ...Steam Mop Cleaner SteamExpert HDS4500W Instruction Manual 19 53...
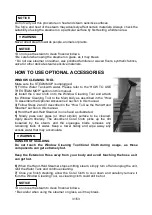
Page 22: ...KEY FEATURES ACCESSORIES Glider Microfiber Cloth Measuring Cup Cleaning Pin Jet Nozzle 22 53...
Page 36: ...Dampfreiniger SteamExpert HDS4500W Bedienungsanleitung 36 53...


