background image

7   ENGLISH

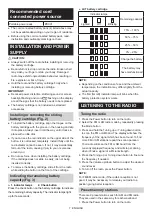
Recommended cord 

connected power source

Portable power pack

PDC01


● The cord connected battery pack (s) listed above may 

not be available depending on your region of residence.


Before using the cord connected battery pack, read 
instruction and cautionary markings on them.

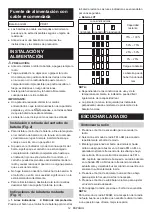
INSTALLATION AND POWER 

SUPPLY


CAUTION:


Always switch off the radio before installing or removing 
the battery cartridge.


Be careful not to drop or strike the radio. Broken shell 

may slash your finger or stab your body. Damaged 
radio may exhibit unpredictable behaviour resulting in 
fire, explosion or risk of injury.


● Hold the tool and the battery cartridge firmly when 

installing or removing battery cartridge.

IMPORTANT:


Reduced power, distortion, stuttering sound or screen 

backlight flashing and icon 

 flashing on the display 

are all the signs that the battery needs to be replaced.


The battery cartridge is not included as standard 
accessories.

Installing or removing the sliding 

battery cartridge (Fig. 2) 


To install the battery cartridge, align the tongue on the 
battery cartridge with the groove in the housing and slip 
it into place. Always insert it all the way until it locks in 
place with a little click.


If you can see the red indicator on the upper side of the 
button, it is not locked completely. Install it fully until the 
red indicator cannot be seen. If not, it may accidentally 
fall out of the radio, causing injury to you or someone 
around you.


Do not use force when installing the battery cartridge. 
If the cartridge does not slide in easily, it is not being 
inserted correctly.


To remove the battery cartridge, slide it from the radio 
while sliding the button on the front of the cartridge.

Indicating the remaining battery 

capacity (Fig. 3)


1. Indicator lamps        2. Check button

Press the check button on the battery cartridge to indicate 
the remaining battery capacity. The indicator lamps light 
up for few seconds.


LXT battery cartridge

Indicator lamps

Remaining capacity

Lighted

Off

Blinking

75% ~ 100%

50% ~ 75%

25% ~ 50%

0% ~ 25%

Charge the battery

The battery may 

have malfunctioned

NOTE:


Depending on the conditions of use and the ambient 
temperature, the indication may differ slightly from the 
actual capacity.


● The first (far left) indicator lamp will brink when the 

battery protection system works.

LISTENING TO THE RADIO

Tuning the radio

1. Press the Power button to turn on the radio.
2. Select the FM or AM radio mode by repeatedly pressing 

the Mode button.

3. Press and hold the Tuning up or Tuning down button 

to scan the FM or AM band. The display will show the 

frequency of the signal which has been found. To find 

more FM or AM stations repeat the scan operation. 
Your radio will scan the FM or AM band from the 
currently displayed frequency and will stop scanning 

when it finds a signal of sufficient strength.

4. Press the Tuning up or Tuning down button to fine-tune 

the frequency if needed.

5. Press the Volume up/down button to adjust the desired 

sound level.

6. To turn off the radio, press the Power button.

NOTE: 

For FM/AM radio mode, if the radio's reception is not 
good, it may be necessary to relocate your radio to a 
position giving better reception. 

Preset memory stations

There are 9 preset stations each for AM and FM radio. 
They are used in the same way for each waveband.
1. Press the Power button to turn on the radio.

Summary of Contents for XRM12

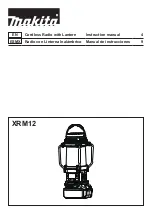
Page 1: ...EN Cordless Radio with Lantern Instruction manual 4 ESMX Radio con Linterna Inalámbrico Manual de instrucciones 9 XRM12 ...

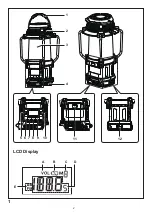
Page 2: ...2 1 1 3 4 2 11 12 6 7 8 9 5 10 E A B C D LCD Display ...

Page 3: ...3 2 4 3 1 2 LXT ...

Page 4: ...may cause sparks burns or a fire 8 Avoid body contact with grounded surfaces such as pipes radiators ranges and refrigerators There is an increased risk of electric shock if your body is grounded 9 Under abusive conditions liquid may be ejected from the battery avoid contact If contact accidentally occurs flush with water If liquid contacts eyes additionally seek medical help Liquid ejected from t...

Page 5: ...y cartridge remove it from the tool and dispose of it in a safe place Follow your local regulations relating to disposal of battery 13 Use the batteries only with the products specified by Makita Installing the batteries to non compliant products may result in a fire excessive heat explosion or leak of electrolyte If the tool is not used for a long period of time the battery must be removed from t...

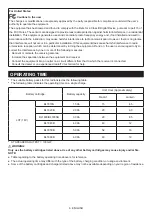
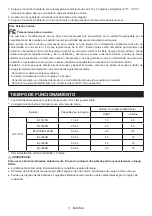
Page 6: ...e by one or more of the following measures Reorient or relocate the receiving antenna Increase the separation between the equipment and receiver Connect the equipment into an outlet on a circuit different from that to which the receiver is connected Consult the dealer or an experienced radio TV technician for help OPERATING TIME The suitable battery packs for this radio listed as the following tab...

Page 7: ...ted correctly To remove the battery cartridge slide it from the radio while sliding the button on the front of the cartridge Indicating the remaining battery capacity Fig 3 1 Indicator lamps 2 Check button Press the check button on the battery cartridge to indicate the remaining battery capacity The indicator lamps light up for few seconds LXT battery cartridge Indicator lamps Remaining capacity L...

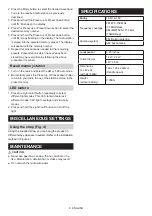
Page 8: ...or Preset down button to tune to your radio to one of the stations stored in the preset memory LED lantern 1 Press the Light on off button repeatedly to select different light modes This LED lantern features 2 different modes 360 light coverage and side carry modes 2 Press and hold the Light on off button to turn off the light MISCELLANEOUS SETTINGS Using the strap Fig 4 Using the supplied strap y...

Page 9: ...ía no esté en uso manténgala alejada de otros objetos metálicos como clips monedas llaves clavos tornillos u otros objetos metálicos pequeños que pudieran crear conexiones de un terminal a otro El contacto entre sí de los terminales de las baterías puede provocar chispas quemaduras o fuego 8 Evite contacto corporal con superficies conectadas a tierra como tuberías radiadores estufas y refrigerador...

Page 10: ...eben respetarse los requisitos especiales del embalaje y etiquetado Para la preparación del artículo para su envío se requiere consultar a un experto en materiales peligrosos Acate también las posiblemente más detalladas regulaciones nacionales Cubra los contactos abiertos y empaquete la batería de tal manera que no se pueda mover en el embalaje 12 Al tirar la batería retírela de la herramienta y ...

Page 11: ... este equipo no causa interferencia perjudicial a la recepción de la señal de radio o televisión lo cual se puede determinar al encender y apagar el equipo entonces se anima al usuario a tratar de corregir la interferencia mediante una o más de las siguientes medidas Reorientar o reubicar la antena receptora Aumentar la separación entre el equipo y el receptor Conectar el equipo en un tomacorrient...

Page 12: ... Si el cartucho no entra con suavidad significa que no lo está instalando correctamente Para retirar la batería deslícela de la radio mientras desliza el botón en la parte frontal de la radio Indicaciones de la batería restante Fig 3 1 Luces indicadoras 2 Botón de comprobación Presione el botón en el cartucho de batería para mostrar la batería restante Las luces indicadoras se encenderán por unos ...

Page 13: ...ras de memoria 1 Encienda la radio y seleccione el modo de radio AM o FM 2 Presione momentáneamente el botón de presintonía arriba o abajo para sintonizar la radio a una de las emisoras de radio presintonizadas en memoria Linterna LED 1 Presione el botón de encender apagar la luz repetidamente para seleccionar diferentes modos de luz Esta linterna LED cuenta con 2 modos diferentes cobertura de luz...

Page 14: ...SJN 3A81eV5Z20000 2021 12 30 XRM12 NA2 2109 www makita com Makita Corporation 3 11 8 Sumiyoshi cho Anjo Aichi 446 8502 Japan ...

Reviews: