


10 ENGLISH
3. Press and hold the Tuning control knob
to carry
out an auto-tune. Your radio will scan up the AM/FM
band from the currently displayed frequency and will
stop scanning automatically when it finds a station of
sufficient strength.
4. After a few seconds the display will update. The display
will show the frequency of the signal found.
5. To find other station, press and hold the Tuning control
knob
as before.
6. When the end of the waveband is reached your radio
will recommence tuning from the opposite end of the
waveband.
7. Rotate the Tuning control knob
to adjust the sound
level as required.
Note:
While adjusting the volume, make sure the FM/AM
is NOT flashing on the screen.
If AM/FM is flashing on the screen, it allows you
to tune the stations manually (see the section of
“Manual tuning – AM/ FM” for more detail).
8. To switch off your radio press the Power button
.
Manual tuning – AM/FM
1. Press the Power button
to switch on your radio.
2. Press the Source button
to select AM or FM radio
mode.
3. Press the Tuning control knob
and you will see the
FM or AM is flashing on the display.
Note:
FM/AM will flash approx. 10 seconds. Within this
period, only manual tuning is allowed.
If volume adjustment is desired while FM/AM is
flashing, press the Tuning control knob to stop the
flash and you can rotate the Tuning control knob to
adjust sound level.
4. Rotate the Tuning control knob
to tune to a station.
5. When the end of the waveband is reached your radio
will recommence tuning from the opposite end of the
waveband.
6. Use the Tuning control knob
to adjust the sound
level as required.
Presetting stations in AM/FM mode
There are 5 preset stations each for AM and FM radio.
They are used in the same way for each waveband.
1. Press the Power button
to switch on your radio.
2. Press the Source button
to select the desired
waveband. Tune to the required radio station as
previously described.
3. Press and hold the required Preset button (1 to 5)
until the display shows “P4” for example
after the frequency. The station will be stored using the
preset number. Repeat this procedure for the remaining
presets as you wish.
4. Preset stations which have already been stored may
be overwritten by following the above procedure if
required.
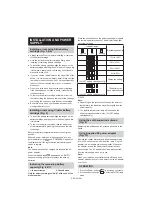
Display modes – FM
Your radio has a range of display options for FM radio
mode.
1. Repeatedly press the Menu/Info button
to view
the RDS information of the station you are listening to.
a. Station name
Displays the name if the station
being listened to.
b. Program type
Displays the type of station being
listened to such as Pop, Classic,
News, etc.
c. Radio text
Displays radio text message such
as new items etc.
d. Year/Day
Displays the year and day of the
week according to the date
setting of your radio.
e. Date/Day
Displays the date and day of the
week according to the date
setting of your radio.
f.
Frequency
Displays the frequency of the FM
for the station listened to.
FM stereo (auto)/mono
If the FM radio station being listened to has a weak signal
some hiss may be audible. It is possible to reduce this
hiss by forcing the radio to play the station in mono rather
than stereo.
1. Press the Power button
as needed to select the
FM band and tune to the desired FM station as
previously stated.
2. Press and hold Menu/Info button
to enter the
menu setting.
3. Rotate the Tuning control knob
until the FM Auto/
mono setting shows on the display. If the setting is Auto
press the Tuning control knob to switch to Mono mode
to reduce the hiss. Press the Tuning control knob to
select the option.
Recalling a preset in AM/FM mode
1. Press the Power button
to switch on your radio.
2. Press the Source button
to select AM or FM radio
mode.
3. Momentarily press the required Preset button
to cause your radio to tune to one of the
stations stored in the preset memory.
Setting the time and date format
The clock display used in stand-by mode and on the
playing mode screens can be set to different format. The
selected format is then also used when setting the alarms.