


26
3. Using the application
This chapter explains how to connect the application to a Makita product and configure the product’s settings.
3-1. Connecting a Makita Product
Connect the Makita product to the PC to change the product settings.
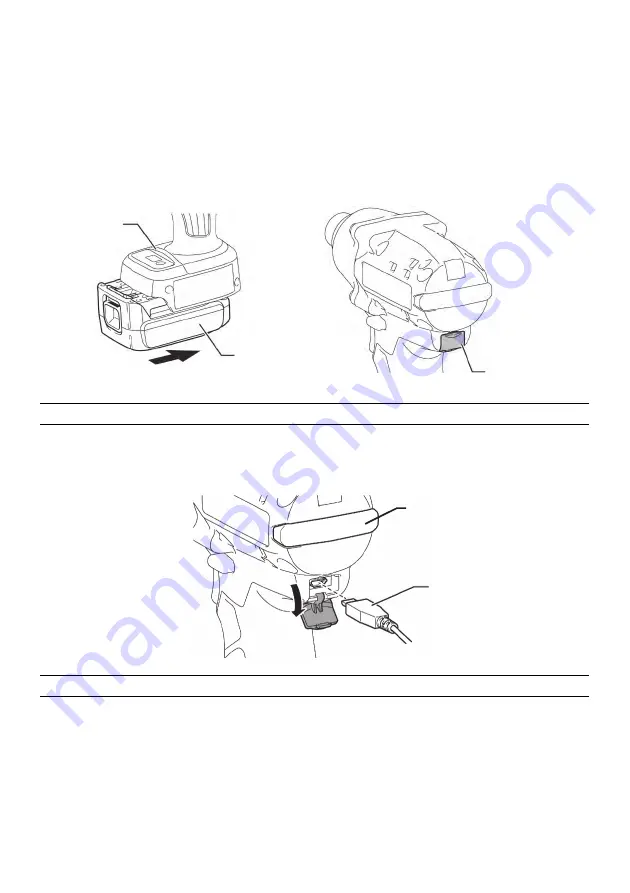
First, insert the battery into the product.
Refer to the User’s Manual for the location of the USB terminal.
Note! Make sure the battery is fully charged, or close to fully charged.
Next, use the supplied USB cable to connect the Makita product to the PC (when the application is not
running).
When the product is connected, the LED indicator will flash yellow, and you can proceed to the next step.
Note! Please connect the product after installing the application on your PC.
Product
USB port cover
Battery
LED indicator
USB cable
Summary of Contents for TD Series
Page 4: ...4 2 インストール Makita Industry Tool Settings フォルダ内の Install Manual pdf を参照してください ...
Page 14: ...14 1 2 3 3 1 3 2 3 2 2 3 2 3 3 2 4 3 2 1 3 3 4 5 ...
Page 17: ...17 ...
Page 22: ...22 3 13 マキタ製品の取り外し 設定変更を終了するには 製品の USB ケーブルを外してください ...
Page 35: ...35 1 2 3 3 1 3 2 3 2 2 3 2 3 3 2 4 3 2 1 3 3 4 5 ...
Page 38: ...38 ...
Page 42: ...42 1 2 ...
Page 59: ...59 ...
Page 80: ...80 ...
Page 101: ...101 ...
Page 122: ...122 ...
Page 143: ...143 ...
Page 149: ...149 ...
Page 150: ...150 ...
Page 151: ...151 ...