Continuous Rating (W)
Voltage (V)
Stroke per minute: min-
1
Variable speed control
Net weight: kg (lbs)
Power supply cord: m (ft)
For North America:
Recipro saw blade for steel ...................... 1
Recipro saw blade for composites.......... 1
For countries other than North America:
Recipro saw blade No.21 for steel ................................. 1
Recipro saw blade No.22 for steel ................................. 1
Recipro saw blade No.23 for wood and plywood .......... 1
Capacity
*Wood: mm (")
Pipe: dia. mm (")
Length of Stroke: mm (")
Cycle (Hz)
Input
Output
Max. Output(W)
110
0 - 2,800
28 (1-1/8)
255 (10)
130 (5-1/8)
3.2 (7.1)
Europe: 4.0 (13.1)
Australia: 2.0 (6.6)
Other countries: 2.5 (8.2)
Yes
120
220
230
240
9.0
9.0
4.8
4.6
4.4
50 / 60
50 / 60
50 / 60
50 / 60
50 / 60
940
1,010
1,010
1,010
1,010
390
460
550
550
550
950
950
950
950
950
Models No.
Description
PRODUCT
Current (A)
T
ECHNICAL INFORMATION
C
ONCEPT AND MAIN APPLICATIONS
S
pecification
S
tandard equipment
O
ptional accessories
Note: The standard equipment for the tool shown above may differ by country.
P 1 / 12
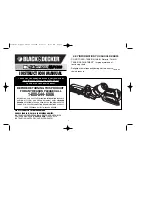
JR3050T
Recipro Saw
Dimensions: mm (")
Width (W)
Height (H)
Length (L)
452 (17-3/4)
97 (3-13/16)
170 (6-11/16)
Recipro saw blade No.21 for steel
Recipro saw blade No.22 for steel
Recipro saw blade No.24 for steel
Recipro saw blade No.23 for wood and plywood
Recipro saw blade No.23B for wood and plywood
Model JR3050T has been developed as a successor model of
Model JR3000V/VT, featuring the following main advantages;
1. Cutting efficiency higher than competitions and the
predecessor models of Makita recipro saws.
2. Great convenience provided by;
*Tool-less blade change
*Tool-less adjustable heavy duty shoe
*when cutting with the supplied 300mm (11-3/4") length recipro saw blade.
H
L
W