6
ASSEMBLY
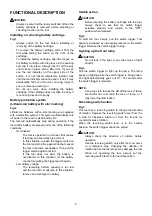
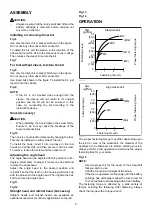
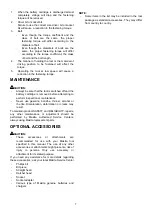
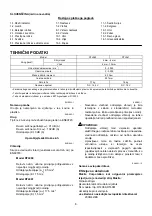
CAUTION:
•
Always be sure that the tool is switched off and the
battery cartridge is removed before carrying out
any work on the tool.
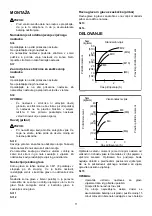
Installing or removing driver bit
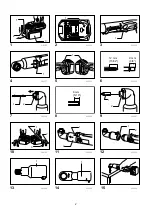
Fig.6
Use only the driver bit or socket bit shown in the figure.
Do not use any other driver bit or socket bit.
To install the bit, pull the sleeve in the direction of the
arrow and insert the bit into the sleeve as far as it will go.
Then release the sleeve to secure the bit.
Fig.7
For tool without sleeve to retain the bit
Fig.8
Use only the driver bit or socket bit shown in the figure.
Do not use any other driver bit or socket bit.
Use insert bits shown in the figure. To install the bit, just
insert it into the spindle.
Fig.9
NOTE:
•
If the bit is not inserted deep enough into the
sleeve, the sleeve will not return to its original
position and the bit will not be secured. In this
case, try re-inserting the bit according to the
instructions above.
Hook (Accessory)
CAUTION:
•
When installing the hook, tighten the screw firmly.
Failure to do so may cause the breakage of the
tool or personal injury.
Fig.10
The hook is convenient for temporarily hanging the tool.
This can be installed on either side of the tool.
To install the hook, insert it into a groove in the tool
housing on either side and then secure it with a screw.
To remove, loosen the screw and then take it out.
Adjusting the angle head
The angle head can be adjusted 360°(8 positions in 45-
degree increments). To adjust it, loosen the hex bolt and
remove the angle head.
Adjust the angle head to the desired position and
reinstall it so that the teeth on the housing will match up
with the grooves in the angle head. Then tighten the hex
bolt to secure the angle head.
Fig.11
Fig.12
Straight head and ratchet head (Accessory)
Straight heads and ratchet heads are available as
optional accessories for various applications on the job.
Fig.13
Fig.14
OPERATION
5
0
40
3
0
2
0
1
0
0
0
1
2
3
M
12
(
M
12)
M
1
0
(
M
1
0
)
M
8
(
M
8)
(
40
8)
(2
04
)
(51
0
)
(3
0
6)
(1
0
2)
Standard bolt
N
m
Fastening torque
Fastening ti
m
e
Proper fastening torque
(
kgf c
m)
(
S
)
008339
High tensile bolt
N
m
Fastening torque
Fastening ti
m
e
Proper fastening torque
(
kgf c
m)
(
S
)
40
3
0
2
0
1
0
0
0
1
2
3
M
8
M
6
(
M
8)
(
M
6)
(
40
8)
(3
0
6)
(2
04
)
(1
0
2)
008340
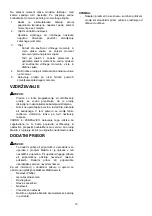
The proper fastening torque may differ depending upon
the kind or size of the screw/bolt, the material of the
workpiece to be fastened, etc. Before starting your job,
always perform a test operation to determine the proper
fastening time for your screw.
Fig.15
NOTE:
•
Use the proper bit for the head of the screw/bolt
that you wish to use.
•
Hold the tool pointed straight at the screw.
•
If the tool is operated continuously until the battery
cartridge has discharged, allow the tool to rest for
15 minutes before proceeding with a fresh battery.
The fastening torque is affected by a wide variety of
factors including the following. After fastening, always
check the torque with a torque wrench.
Summary of Contents for DTL060
Page 57: ...57 ...
Page 58: ...58 ...
Page 59: ...59 ...
Page 60: ...60 Makita Corporation Anjo Aichi Japan www makita com 885276 969 ...

