background image

Switch action 

1


008817 

CAUTION: 

• 

Before inserting the battery cartridge into the tool, 
always check to see that the switch trigger actuates 
properly and returns to the "OFF" position when 
released. 

To start the tool, simply pull the switch trigger. Tool speed 
is increased by increasing pressure on the switch trigger. 
Release the switch trigger to stop. 

Electric brake 

This tool is equipped with an electric brake. If the tool 
consistently fails to quickly stop after switch trigger 
release, have tool serviced at a Makita service center. 

Turning on the front lamp 

1


008820 

CAUTION: 

• 

Do not look in the light or see the source of light 
directly. 

Pull the switch trigger to turn on the light. The lamp keeps 
on lighting while the switch trigger is being pulled. The 
lamp turns off 10 -15 seconds after releasing the trigger. 


NOTE: 

• 

Use a dry cloth to wipe the dirt off the lens of lamp. 
Be careful not to scratch the lens of lamp, or it may 
lower the illumination. 


Reversing switch action 

1

A

B


008818 

This tool has a reversing switch to change the direction of 
rotation. Depress the reversing switch lever from the A 
side for clockwise rotation or from the B side for 
counterclockwise rotation. 
When the reversing switch lever is in the neutral position, 
the switch trigger cannot be pulled. 


CAUTION: 

• 

Always check the direction of rotation before 
operation. 

• 

Use the reversing switch only after the tool comes 
to a complete stop. Changing the direction of 
rotation before the tool stops may damage the tool. 

• 

When not operating the tool, always set the 
reversing switch lever to the neutral position. 

ASSEMBLY 


CAUTION: 

• 

Always be sure that the tool is switched off and the 
battery cartridge is removed before carrying out 
any work on the tool. 

Installing or removing driver bit or socket bit 

12 mm 
(15/32”)

9 mm 
(3/8”)


001266 

Use only the driver bit or socket bit shown in the figure. 
Do not use any other driver bit or socket bit. 
To install the bit, pull the sleeve in the direction of the 
arrow and insert the bit into the sleeve as far as it will go. 
Then release the sleeve to secure the bit. 

1. Reversing 

switch lever 

1. Lamp 

1. Switch trigger 

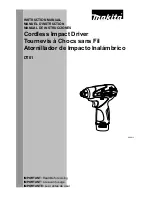
Summary of Contents for DT01

Page 1: ...NUEL D INSTRUCTION MANUAL DE INSTRUCCIONES IMPORTANT Read Before Using IMPORTANT Lire avant usage IMPORTANTE Leer antes de usar Cordless Impact Driver Tournevis à Chocs sans Fil Atornillador de Impacto Inalámbrico DT01 008813 ...

Page 2: ...c shock 5 Avoid body contact with earthed or grounded surfaces such as pipes radiators ranges and refrigerators There is an increased risk of electric shock if your body is earthed or grounded 6 Do not expose power tools to rain or wet conditions Water entering a power tool will increase the risk of electric shock 7 Do not abuse the cord Never use the cord for carrying pulling or unplugging the po...

Page 3: ...ructions taking into account the working conditions and the work to be performed Use of the power tool for operations different from those intended could result in a hazardous situation Battery tool use and care 24 Recharge only with the charger specified by the manufacturer A charger that is suitable for one type of battery pack may create a risk of fire when used with another battery pack 25 Use...

Page 4: ...ery cartridge can explode in a fire 8 Be careful not to drop or strike battery 9 Do not use a damaged battery SAVE THESE INSTRUCTIONS Tips for maintaining maximum battery life 1 Charge the battery cartridge before completely discharged Always stop tool operation and charge the battery cartridge when you notice less tool power 2 Never recharge a fully charged battery cartridge Overcharging shortens...

Page 5: ...ing switch action 1 A B 008818 This tool has a reversing switch to change the direction of rotation Depress the reversing switch lever from the A side for clockwise rotation or from the B side for counterclockwise rotation When the reversing switch lever is in the neutral position the switch trigger cannot be pulled CAUTION Always check the direction of rotation before operation Use the reversing ...

Page 6: ...urn the tool on to start operation NOTE Use the proper bit for the head of the screw bolt that you wish to use When fastening screw M8 or smaller carefully adjust pressure on the switch trigger so that the screw is not damaged Hold the tool pointed straight at the screw If you tighten the screw for a time longer than shown in the figures the screw or the point of the driver bit may be overstressed...

Page 7: ...tched off and the battery cartridge is removed before attempting to perform inspection or maintenance Never use gasoline benzine thinner alcohol or the like Discoloration deformation or cracks may result To maintain product SAFETY and RELIABILITY repairs any other maintenance or adjustment should be performed by Makita Authorized or Factory Service Centers always using Makita replacement parts ACC...

Page 8: ...ES FROM THE SALE OR USE OF THE PRODUCT THIS DISCLAIMER APPLIES BOTH DURING AND AFTER THE TERM OF THIS WARRANTY MAKITA DISCLAIMS LIABILITY FOR ANY IMPLIED WARRANTIES INCLUDING IMPLIED WARRANTIES OF MERCHANTABILITY AND FITNESS FOR A SPECIFIC PURPOSE AFTER THE ONE YEAR TERM OF THIS WARRANTY This Warranty gives you specific legal rights and you may also have other rights which vary from state to state...

Page 9: ...tact desquelles la poussière ou les vapeurs peuvent s enflammer 3 Assurez vous qu aucun enfant ou curieux ne s approche pendant que vous utilisez un outil électrique Vous risquez de perdre la maîtrise de l outil si votre attention est détournée Sécurité en matière d électricité 4 Les fiches d outil électrique sont conçues pour s adapter parfaitement aux prises de courant Ne modifiez jamais la fich...

Page 10: ...z le régime pour lequel il a été conçu il effectuera un travail de meilleure qualité et de façon plus sécuritaire 18 N utilisez pas l outil électrique s il n est pas possible de mettre sa gâchette en position de marche et d arrêt Un outil électrique dont l interrupteur est défectueux représente un danger et doit être réparé 19 Débranchez la fiche de la source d alimentation et ou retirez le bloc p...

Page 11: ...EMPLOI AVERTISSEMENT NE VOUS LAISSEZ PAS tromper au fil d une utilisation répétée par un sentiment d aisance ou de familiarité avec le produit en négligeant les consignes de sécurité qui accompagnent le produit UNE UTILISATION INCORRECTE ou le non respect des règles de sécurité énoncées dans le présent manuel d instructions peut provoquer des blessures graves USD302 1 Symboles Les symboles utilisé...

Page 12: ... qu elle se verrouille avec un léger bruit sec Autrement elle risque de vous blesser ou de blesser une personne près de vous en tombant accidentellement de l outil N appliquez pas une force excessive lors de l insertion de la batterie Si la batterie ne glisse pas aisément c est qu elle n est pas insérée correctement Interrupteur 1 008817 ATTENTION Avant d insérer la batterie dans l outil vérifiez ...

Page 13: ...bout ou l embout à douille 12 mm 15 32 9 mm 3 8 001266 Utilisez exclusivement l embout ou l embout à douille du modèle indiqué sur la figure Pour installer l embout tirer le manchon dans le sens de la flèche et introduire l embout dans le manchon jusqu au fond Lâchez alors le manchon pour immobiliser l embout 1 2 008815 NOTE Si l embout n est pas inséré assez profondément dans le manchon celui ci ...

Page 14: ...ique 1 Lorsque la batterie est presque complètement déchargée la tension tombe et le couple de serrage diminue 2 Embout ou embout à douille L utilisation d un embout ou un embout à douille de mauvaise dimension entraînera une réduction du couple de serrage 3 Boulon Même si le coefficient du couple et la catégorie du boulon sont les mêmes le couple de serrage variera en fonction du diamètre de boul...

Page 15: ...fabrication et de vice de matériau pour une période d UN AN à partir de la date de son achat initial Si un problème quelconque devait survenir au cours de cette période d un an veuillez retourner l outil COMPLET port payé à une usine ou à un centre de service après vente Makita Makita réparera l outil gratuitement ou le remplacera à sa discrétion si un défaut de fabrication ou un vice de matériau ...

Page 16: ...esencia de líquidos gases o polvo inflamables Las herramientas eléctricas crean chispas que pueden prender fuego al polvo o los humos 3 Mantenga a los niños y curiosos alejados mientras utiliza una herramienta eléctrica Las distracciones le pueden hacer perder el control Seguridad eléctrica 4 Las clavijas de conexión de las herramientas eléctricas deberán encajar perfectamente en la toma de corrie...

Page 17: ... herramienta eléctrica adecuada hará un trabajo mejor a la velocidad para la que ha sido fabricada 18 No utilice la herramienta eléctrica si el interruptor no la enciende y apaga Cualquier herramienta eléctrica que no pueda ser controlada con el interruptor es peligrosa y debe ser reemplazada 19 Desconecte la clavija de la fuente de energía y o la batería de la herramienta eléctrica antes de reali...

Page 18: ...tituya la estricta observancia de las normas de seguridad para dicho producto El MAL USO o el no seguir las normas de seguridad establecidas en este manual de instrucciones puede ocasionar graves lesiones personales USD302 1 Símbolos A continuación se muestran los símbolos utilizados para la herramienta volts o voltios corriente directa velocidad en vacío sin carga revoluciones o alternaciones por...

Page 19: ... el cartucho Siempre inserte por completo hasta que se fije en su lugar con un pequeño clic Si no podría accidentalmente salirse de la herramienta y caer al suelo causando una lesión a usted o alguien a su alrededor No emplee fuerza cuando inserte el cartucho de batería Si el cartucho no se desliza al interior fácilmente será porque no se está insertando correctamente Accionamiento del interruptor...

Page 20: ... realizar cualquier trabajo en la misma Instalar o quitar las puntas para atornillar 12 mm 15 32 9 mm 3 8 001266 Utilice solamente las puntas para atornillar que se muestran en la figura No utilice nunguna otra más que la indicada Para instalar la punta de atornillar tire del mandril en la dirección que indica la flecha e insértela dentro del mandril hasta que haga tope Luego suelte el mandril par...

Page 21: ...terminar la torsión de apriete apropiada para su tornillo La torsión de apriete se ve afectada por una amplia variedad de factores incluyendo los siguientes Después del apriete compruebe siempre la torsión de apriete con una llave de torsión 1 Cuando el cartucho de batería esté casi completamente descargado caerá la tensión y se reducirá la torsión de apriete 2 Puntas para atornillar El no utiliza...

Page 22: ...de defectos de mano de obra y materiales por el periodo de UN AÑO a partir de la fecha de adquisición original Si durante este periodo de un año se desarrollase algún problema retorne la herramienta COMPLETA porte pagado con antelación a una de las fábricas o centros de servicio autorizados Makita Si la inspección muestra que el problema ha sido causado por mano de obra o material defectuoso Makit...

Page 23: ...23 ...

Page 24: ...s tipos de polvo creados por el lijado serrado amolado taladrado y otras actividades de la construccion contienen sustancias quimicas reconocidas por el Estado de California como causantes de cancer defectos de nacimiento y otros peligros de reproduccion Algunos ejemplos de estos productos quimicos son plomo de pinturas a base de plomo silice cristalino de ladrillos y cemento y otros productos de ...

Reviews: