19
After refilling the tank, always screw the provided oil tank
cap on the chain saw.
CAUTION:
• When filling the chain saw with chain oil for the first
time, or refilling the tank after it has been completely
emptied, add oil up to the bottom edge of the filler neck.
The oil delivery may otherwise be impaired.
• As a saw chain oil, use oil exclusively for Makita chain
saws or oil available in market.
• Never use oil including dust and particles or volatile oil.
• When pruning trees, use botanical oil. Mineral oil may
harm trees.
• Never force the chain saw when pruning trees.
• Before cutting out, make sure that the provided oil tank
cap is screwed in place.
Hold the chain saw away from the tree. Start it and wait
until lubrication on saw chain is adequate.
Bring the tip guide/lower guide into contact with the
branch to be cut before switching on. Cutting without
bringing the tip guide/lower guide into contact with the
branch may cause the guide bar to wobble, resulting in
injury to operator.
Saw the wood to be cut by just moving it down.
Pruning trees
CAUTION:
• Keep all parts of the body away from the saw chain
when the motor is operating.
• Hold the chain saw firmly with both hands when the
motor is running.
• Do not overreach. Keep proper footing and balance at
all times.
Bring the tip guide/lower guide into contact with the
branch to be cut before switching on. Cutting without
bringing the tip guide/lower guide into contact with the
branch may cause the guide bar to wobble, resulting in
injury to operator.
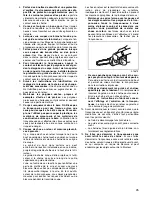
(Fig. 14 & 15)
When cutting thick branches, first make a shallow under-
cut and then make the finish cut from the top.
(Fig. 16)
If you try to cut off thick branches from the bottom, the
branch may close in and pinch the saw chain in the cut. If
you try to cut off thick branches from the top without a
shallow undercut, the branch may splinter.
(Fig. 17)
If you cannot cut the timber right through with a single
stroke:
Apply light pressure to the handle and continue sawing
and draw the chain saw back a little; then apply the spike
a little lower and finish the cut by raising the handle.
(Fig. 18)
Carrying tool (Fig. 19)
Always remove the battery cartridge from the tool and
overlap the guide bar with the scabbard before carrying
the tool. Also cover the battery cartridge with the battery
cover.
MAINTENANCE
CAUTION:
• Always be sure that the tool is switched off and the bat-
tery cartridge is removed before attempting to perform
inspection or maintenance.
• Always wear gloves when performing any inspection or
maintenance.
• Never use gasoline, benzine, thinner, alcohol or the
like. Discoloration, deformation or cracks may result.
Sharpening the saw chain
CAUTION:
• Always remove the battery cartridge and wear safety
gloves when performing work on the saw chain.
Sharpen the saw chain when:
– Mealy sawdust is produced when damp wood is cut;
– The chain penetrates the wood with difficulty, even
when heavy pressure is applied;
– The cutting edge is obviously damaged;
– The saw pulls to the left or right in the wood. The rea-
son for this behaviour is uneven sharpening of the saw
chain, or damage to one side only.
(Fig. 20)
Sharpen the saw chain frequently, but remove only a
little material each time.
Two or three strokes with a file are usually sufficient for
routine resharpening. When the saw chain has been
resharpened several times, have it sharpened in a
MAKITA specialist repair shop.
File and file guiding (Fig. 21)
– Use a special round file (optional accessory) for saw
chains, with a diameter of 4 mm, to sharpen the chain.
Normal round files are not suitable.
– The file should only engage the material on the for-
ward stroke. Lift the file off the material on the return
stroke.
– Sharpen the shortest cutter first. The length of this
cutter is then the gauge dimension for all other cutters
on the saw chain.
– Guide the file as shown in the figure.
– The file can be guided more easily if a file holder
(accessory) is employed. The file holder has markings
for the correct sharpening angle of 30° (align the
markings parallel to the saw chain) and limits the
depth of penetration (to 4/5 of the file diameter).
Guide the file as shown in the figure.
(Fig. 22)
– After sharpening the chain, check the height of the
depth gauge using the chain gauge tool (optional
accessory).
– Remove any projecting material, however small, with a
special flat file (optional accessory).
– Round off the front of the depth gauge again.
– Wash away dust and particles from saw chain after
adjusting the height of depth gauge.
Cleaning guide bar (Fig. 23)
Chips and sawdust will build up in the guide bar groove,
clogging it and impairing oil flow. Always clean out the
chips and sawdust when sharpening or replacing the saw
chain.
Cleaning the oil filter at the oil discharge hole
Small dust or particles may be built up in the oil filter at
the oil discharge hole during operation.
Small dust or particles built up in the oil filter may impair
the oil discharge flow and cause an insufficient lubrica-
tion on the whole saw chain.
When a poor chain oil delivery occurs at the top of guide
bar, clean the filter as follows.
Remove the battery cartridge from the tool.
Remove the sprocket cover and saw chain from the tool.
(Refer to the section titled “Installing or removing saw
chain”.)
Remove the push nut using a slotted bit screwdriver with
a slender shaft or the like.
(Fig. 24)
Summary of Contents for BUC121
Page 5: ...5 4 1 2 3 4 5 9 10 11 7 8 5 6 1 2 3 012143 012128 008572 008566 008568 ...
Page 6: ...6 6 7 8 9 10 11 1 2 14 15 7 12 10 13 12 013715 013716 008569 008570 008587 008570 ...
Page 8: ...8 20 21 22 23 24 25 26 27 24 24 22 23 008633 006927 006929 008578 008579 008580 008581 008582 ...
Page 9: ...9 28 29 30 31 32 28 29 27 25 13 26 13 25 008635 008584 008586 008585 001145 22 ...
Page 102: ...102 ...
Page 103: ...103 ...
Page 104: ...Makita Corporation Anjo Aichi Japan www makita com 884778E998 IDE ...


