background image

Summary of Contents for 9300

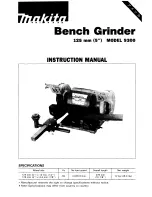
Page 1: ... 9300 INSTRUCTION MANUAL SPECIFICATI0NS Wheel size 1 Hz 1 No load speed 1 Overall length I Net weight Manufacturer reserves the right t o change specifications without notice Note Specifications may differ from country to country ...

Page 2: ... and safer at the rate for which it was designed 9 USE RIGHT TOOL Don t force tool or attachment to do a job for which it was not designed 10 WEAR PROPER APPAREL Wear no loose clothing gloves neckties rings bracelets or other jewelry which may get caught in moving parts Nonslip footwear is recommended Wear protective hair coveringto contain long hair 11 ALWAYS USE SAFETY GLASSES Also use face or d...

Page 3: ...blade or cutter against the direction of rotation of the blade or cutter only 21 NEVER LEAVE TOOL RUNNING UNATTENDED TURN POWER OFF Don t leave tool until it comes to a complete stop 22 PROPER GROUNDING This tool should be grounded while in use to protect the operator from electric shock 23 EXTENSION CORDS Use only three wire extension cords which have three prong grounding type plugs and three po...

Page 4: ...e equipment grounding conductor to a live terminal Check with a qualified electrician or serviceman if the grounding instructions are not completely understood or if in doubt as to whether the tool is properly grounded Grounded cord connected tools intended for use on a supply circuit having a nominal rating less than 150volts This tool is intended for use on a circuit that has an outlet that look...

Page 5: ...il gas glue bond paint etc 9 Replace cracked chipped or damaged wheels immediately Install carefully in accordance with the instruction manual IO Use only wheels of specified dimensionsindicatedon the bench grinder label The inside and outside of the grinding wheel flange contacting portions should have a label or the wheel should not be used Use only a grinding wheel with a maximum safe speed ove...

Page 6: ...equippedeyeshields in position at all times 17 Before switching on the grinder turn the grinding wheel by hand to make 18 Be very careful how you attach or remove work from the tool rests and also 19 Unplug the tool and hold by means of the base when carrying 20 Replace cracked wheel immediately 21 Always use guards and eye shields 22 Do not overtighten wheel nut 23 Use only flanges furnished with...

Page 7: ...re packed together with the bench grinder Always install the eyeshields before operation see explan atory figure 2 Fit eyeshields in between wheel cover and adjust plate fitting small screws into installation holes on eyeshields Secure tightly with P H screws Eyeshleld Aajust _ _ plate 7 ...

Page 8: ...nding wheel under 1 6 mm 1 16 Screw in securely the P H screws as soon as you have adjusted the adjust plate P H Screw Under 1 6 m Installing and removing the grinding wheel 1 Use a screwdriver to remove the I P H screws from the side cover Toggle switch I I 8 ...

Page 9: ...he wheel Thumb screw M5 x 10 Blade gauge E side r I4 1 1 q I Ease gauge Blade aauae A side Slider c a n e r olade holder Tool rest 3 To adjust the fine adjustment slide use the adjust screw Keep the tool rest at the same angle as the grindingwheel during operation How to use the groove cutter gauge assembly Fit the groove cutter onto the gauge shaft with one cutter edge flush with the side of the ...

Page 10: ...Now slide rod for mounting saw blade holder and set nut into hole below on cross point Secure with thumb screw Note flat side of rod should be on the bottom Set blade holder for circular saw into hole for it on sliding rod Then set nut screws into the blade holder hole Actual sharpening procedure 1 Unscrew set nut and set circular saw blade on holder Secure carefully to holder with the set nut 10 ...

Page 11: ...ght side work the slidingrod side ways until the tip of the saw blade just contacts the side of the grinding wheel Secure blade with adjust screws so that uniform stock teeth tips removal will result 3 Rotate the saw blade in clockwise direc tion after switching on the tool cutting blade teeth to uniform height This jointing step evens up the circumference of the blade Switch off grinder 11 ...

Page 12: ...el angle or an angle of 15 degrees release the thumb screw below on the inclining tool rest Tilt rest to desired angle and secure with thumb screw Now proceed to sharpen blade by grind ing every other tooth After sharpening on side readjust inclin ing tool rest for the same angle for the opposite side teeth Turn blade over after releasing set nut set blade on blade holder and secure with set nut S...

Page 13: ...ies or attachments should be used only in the proper and intended manner 125 15 J x 1 3 11 29x 12 711 2 l WAGOK Saw blade sharpening kit Part No 122174 8 741004 0 Grinding wheels Sire mml I Grit I Part No 0 Eyeshield Part No 122203 7 Cutter gauge set Part No 123002 0 Planer blade holder set Part No 123019 3 0 Tool rest C Part No 311071 5 Sleeve 13 For a 5 8 arbor hole Part No 25751 7 6 Offset wren...

Page 14: ...125 mm 5 BENCH GRINDER Model 9300 Note The switch and other part configurations may differ from country to cointry 14 ...

Page 15: ...er P H Screw M4x18 Wnh Warherl Strain Relief Cord Guard MnC 40 41 42 43 44 45 46 47 48 49 50 51 52 53 54 55 56 57 58 59 60 61 62 63 64 65 66 67 60 69 70 71 72 73 74 75 70 UE 1 1 1 1 1 1 3 1 1 1 1 1 1 1 1 2 1 1 1 1 1 2 1 2 1 1 1 1 1 1 1 1 1 2 1 1 1 CORD ASSEMBLY IAsrmbled Cord Plug Cord Gusrdl P H Screw M4x0 IWnhWasher Side Cover ILI H Nut W112 21 Left hand Screw Outer Flange 50 Inner Flange 50 P H...

Page 16: ...d or improperly maintained alterationshave been made to the tool IN NO EVENT SHALL MAKITA BE LIABLE FOR ANY INDIRECT INCIDENTAL OR CON SEQUENTIAL DAMAGES FROM THE SALE OR USE OF THE PRODUCT THIS DISCLAIMER APPLIESBOTH DURING AND AFTER THE TERM OF THISWARRANTY MAKITA DISCLAIMS LIABILITY FOR ANY IMPLIED WARRANTIES INCLUDING IMPLIED WARRANTIES OF MERCHANTABILITY AND FITNESS FOR A SPECIFIC PURPOSE AFT...

Reviews: