4
ENGLISH (Original instructions)
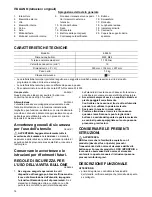
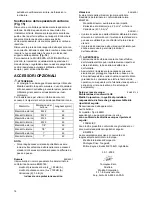
Explanation of general view
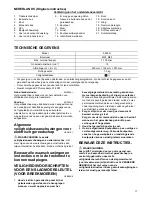
SPECIFICATIONS
• Due to our continuing programme of research and development, the specifications herein are subject to change without
notice.
• Specifications may differ from country to country.
• Weight according to EPTA-Procedure 01/2003
Intended use
ENE038-1
The tool is intended for fastening “tor-shear type” high
tensile bolts.
Power supply
ENF002-2
The tool should be connected only to a power supply of
the same voltage as indicated on the nameplate, and can
only be operated on single-phase AC supply. They are
double-insulated and can, therefore, also be used from
sockets without earth wire.
General Power Tool Safety
Warnings
GEA010-1
WARNING Read all safety warnings and all
instructions.
Failure to follow the warnings and
instructions may result in electric shock, fire and/or
serious injury.
Save all warnings and
instructions for future reference.
SHEAR WRENCH SAFETY RULES
GEB006-6
1.
Hold power tool by insulated gripping surfaces,
when performing an operation where the fastener
may contact hidden wiring or its own cord.
Fasteners contacting a “live” wire may make exposed
metal parts of the power tool “live” and could give the
operator an electric shock.
2.
Always be sure you maintain good balance and
firm footing.
Be sure no one is below when using the tool in
high or elevated locations.
3.
Hold the tool firmly.
4.
Use care and common sense when disposing of
sheared bolt tips. Falling tips from high locations
or scattered tips can cause severe injury.
SAVE THESE INSTRUCTIONS.
WARNING:
DO NOT let comfort or familiarity with product (gained
from repeated use) replace strict adherence to shear
wrench safety rules for the subject product. MISUSE
or failure to follow the safety rules stated in this
instruction manual may cause serious personal
injury.
FUNCTIONAL DESCRIPTION
CAUTION:
• Always be sure that the tool is switched off and
unplugged before adjusting or checking function on the
tool.
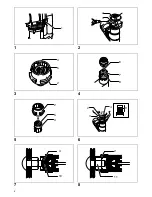
Switch action (Fig. 1)
CAUTION:
• Before plugging in the tool, always check to see that
the switch trigger actuates properly and returns to the
“OFF” position when released.
To start the tool, simply pull the switch trigger. Release the
switch trigger to stop.
1.
Switch trigger
2.
Outer sleeve
3.
Screw
4.
Inner sleeve
5.
Pin
6.
Tip rod
7.
Tip rod spring
8.
Inner sleeve spring
9.
There should be no gap between
the outer sleeve and the tool.
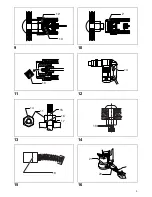
10. Bolt tip
11. Nut
12. Notched portion
13. Tip ejector (Tip lever)
14. Identification mark
15. Bolt
16. Chamfer
17. Washer
18. Remaining length
19. Limit mark
20. Screwdriver
21. Brush holder cap
Model
6924N
Bolt size
M22, M24
Max. normal torque
1,100 N•m
No load speed (min
-1
) 19
Dimensions (L × W × H)
330 mm × 104 mm × 257 mm
Net weight
7.5 kg
Safety class
/II

