


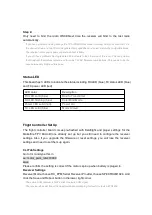


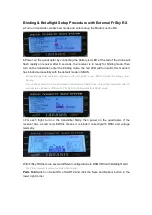


Step 4:
Only need to bind the radio ONCE.Next time the receiver will bind to the last radio
automatically.
If you have problems binding change the TX to DSM2/22ms mode. Normally what you set on the TX is
the desired mode and the TX+RX negotiate their capabilities and select a mutually compatible mode.
The receiver in this quad seems unable to do that reliably.
If you still have problems binding take the TX and walk to the other side of the room. This is a solution
that Spektrum themselves recommend for some TX+RX firmware combinations. This seems to be the
case between my DX8 and this quad
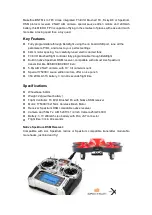
Status LED
This board has 3 LEDs to indicate the status,including RX LED (blue),FC status LED (blue)
and FC power LED (red) .
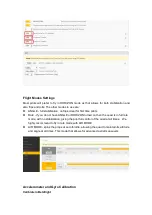
Flight Controller Set Up
The flight controller board comes pre-flashed with Betaflight and proper settings for the
Makerfire FPV Micro Drone already set up but you still need to configure the receiver
settings. Also if you upgrade the firmware or reset settings, you will lose the receiver
settings and need to set them up again.
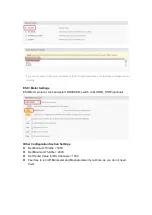
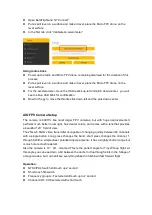
CLI Tab Settings
Go to CLI and type this in
set motor_pwm_rate=10000
save
Please confirm the setting is correct if the motors spin up when battery is pluged in.
Receiver Settings
Receiver Mode,choose RX_PPM;Serial Receiver Provider,choose SPEKTRUM1024. And
click the Save and Reboot button in the lower right corner.
The native DSM receiver is NOT serial. It outputs PPM signal.
The receiver does not follow the Spektrum channel mapping. Instead it outputs AETR1234.
LED color
Description
RX LED solid (blue)
Bind to Transmitter
RX LED flashing (blue)
Enter Bind Mode
Power LED solid (red)
Power On
FC LED solid (blue)
Motor Armed


