background image

Rev. 1.01 

P/N: 99875478 


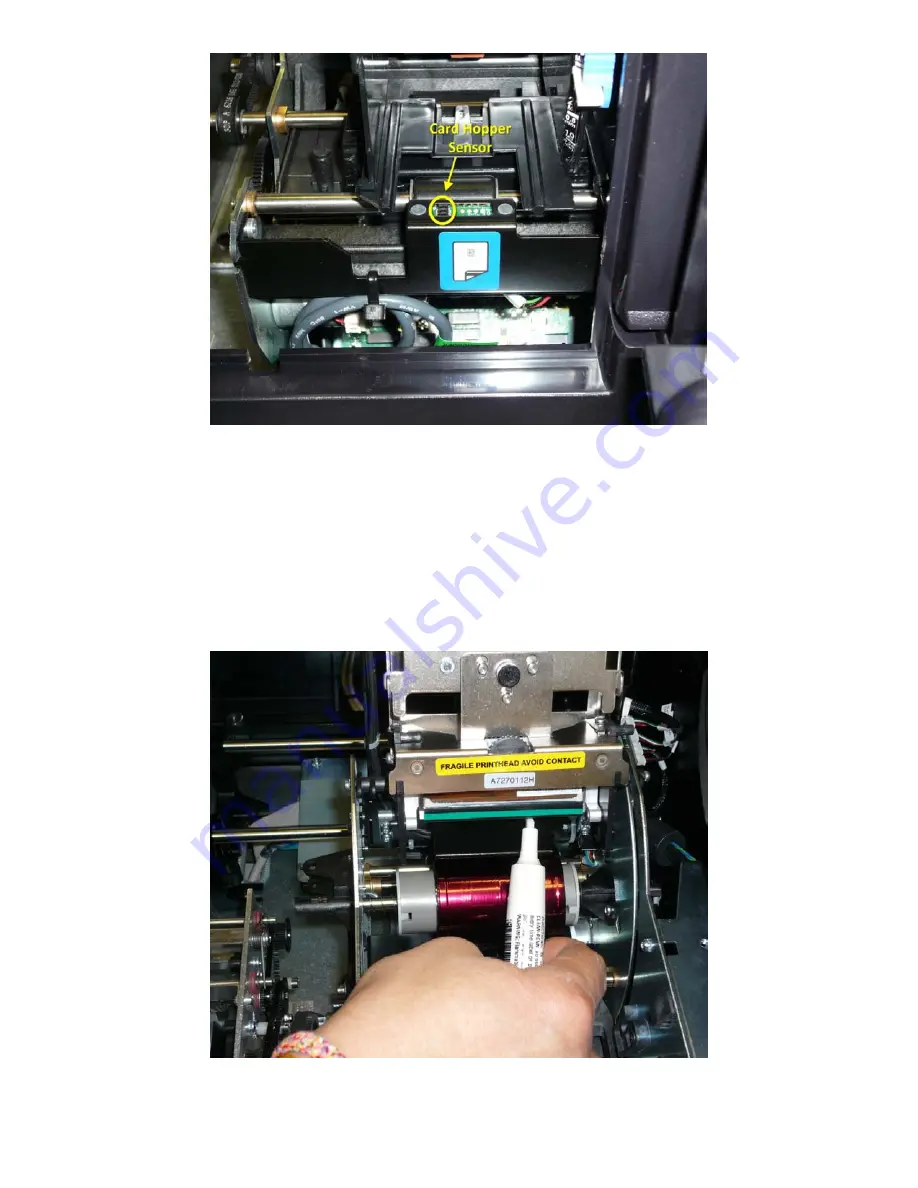
Figure 8 

Print Head Cleaning 

To clean the print head of the ExpressCard printer perform the following steps: 

1)


Open the ExpressCard 1000’s top cover, and then open up the print head assembly. 

2)


Firmly wipe the print head cleaning pen back and forth across the surface of the print head. 

3)


Once the print head is completely dry, close the printer. 

4)


Print a test card. If streaks are present after the cleaning process contact the MagTek Help desk. 


Figure 9 


Summary of Contents for EXPRESSCARD 1000

Page 1: ...Rev 1 01 1 P N 99875478 EXPRESSCARD 1000 ANNUAL MAINTENANCE GUIDE Component Identification Figure 1 Figure 2...

Page 2: ...Rev 1 01 2 P N 99875478 Figure 3 Figure 4...

Page 3: ...chor point 8 Main power switch and plug 9 Ethernet Data port 10 Rear Cooling Fans 11 Manual Swipe Rail MSR 12 Cylindrical Lock Top Cover 13 Card Access Door 14 Exception Feed Slot 15 Card Hopper Numbe...

Page 4: ...lp screen is displayed press the Version Information button to display the current software and firmware installed on the unit as shown in the figure below Note The serial number of the unit is always...

Page 5: ...Rev 1 01 5 P N 99875478 Figure 6 Figure 7...

Page 6: ...en the ExpressCard 1000 s top cover and then open up the print head assembly 2 Firmly wipe the print head cleaning pen back and forth across the surface of the print head 3 Once the print head is comp...

Page 7: ...Cleaning Cartridge from the Printer to perform this procedure 2 Get a printer cleaning card P N 96700020 3 Make sure the Card Hopper Door is closed Then from the Status screen select Menu 4 When the M...

Page 8: ...Roller completely remove the cards from the hopper and locate the Card Feed Roller Use a cleaning pad from the Printer Cleaning Kit to wipe the roller clean 13 Then press the FORWARD and BACK buttons...

Page 9: ...hand corner of the screen and insert an encoder cleaning card P N 96700004 into the card exception slot located on the card access door to clean the encoder Note The card should be opened and ready fo...

Page 10: ...g on the inner rail of the XY assembly see figure 12 after cleaning the transport rod and check for damage or unusual wear If the bushing is in excptable condition apply a small amount of Tri Flow lub...

Page 11: ...r and damage the sensor Embosser Hardware Embosser Home Position To visually verify that the first embosser character Zero is in the home position by looking through the window of the embosser bridge...

Page 12: ...es button on the Settings Menu screen Four sample options will be presented as shown below sample images may vary select the sample type you wish to create The ExpressCard will produce the desired sam...

Reviews: