7-6
Maintenance
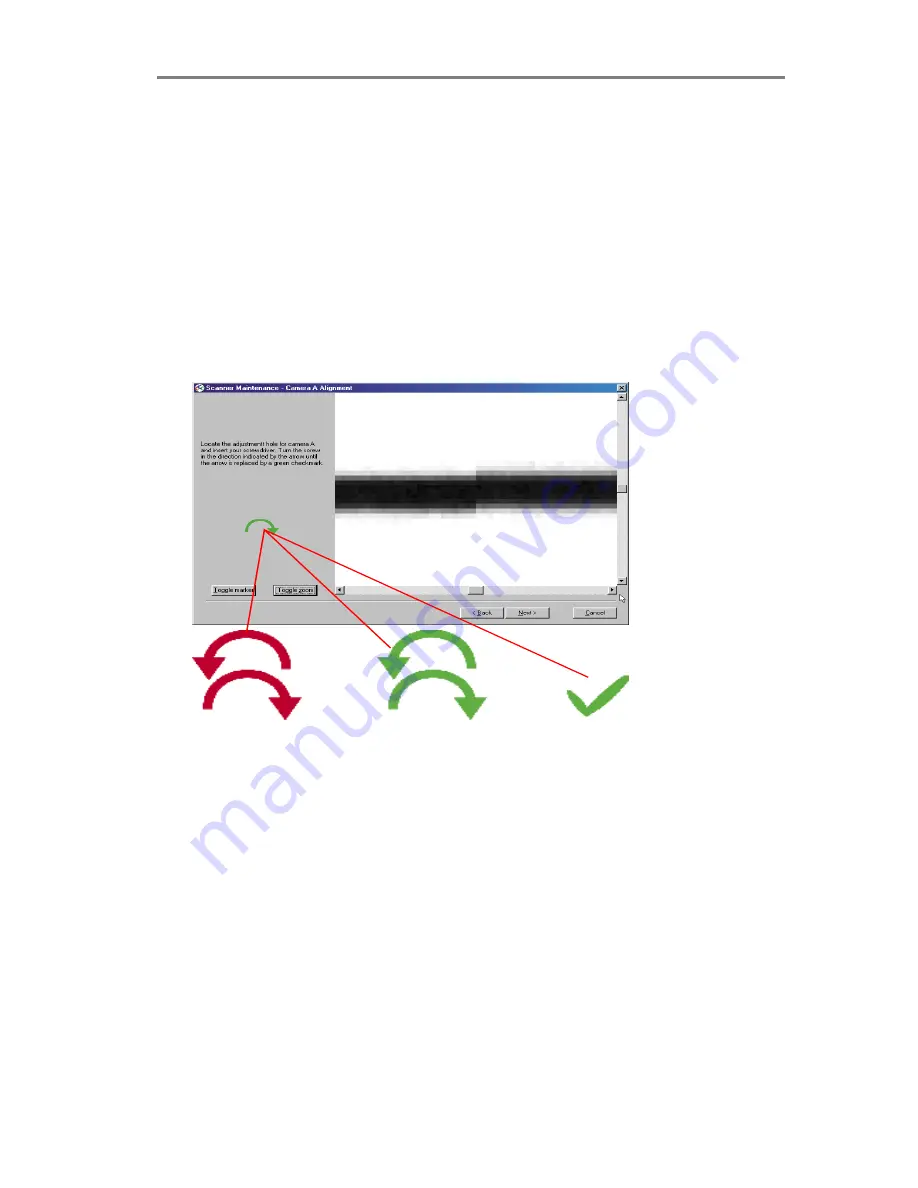
6 Use the arrow indicators to adjust the camera.
The wizard
shows you how to adjust the current camera. The arrow on the left
shows you which direction to turn the screw with your screwdriver.
Red arrows indicate that you are far from your target and can
make large turns of the screw. Green arrows indicate that you are
close and should make very delicate turns for fine adjustment.
Turn the screw as indicated and continuously check your screen
as fresh views of the alignment status are loaded. Make sure you
let the wizard update the screen between each turn of the screw.
The camera is aligned when the arrow turns to a green
checkmark.
7 Move on to the next camera.
Select Next in the wizard and
repeat the step above to align the cameras. The Wizard will take
you through each of the scanner’s cameras until they are aligned.
Note
: Camera B is static, used as a reference for the other
cameras and will be bypassed by the wizard.
8 Stitching
. The wizard immediately starts the stitching process
when you click Next after aligning the last camera. The process is
fully automatic and you do not have to do anything but wait for it to
finish after which you have the option to check the results for each
camera.
9 Replace the front streamer.
After performing Camera Alignment and Stitching, leave the
Maintenance Sheet in the scanner. It will be used for Camera
Calibration in the next step


