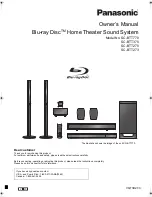
background image

Summary of Contents for MHT843n

Page 1: ......

Page 2: ...paration between the equipment and receiver Connect the equipment into an outlet on a circuit different from that to which the receiver is connected Consult the dealer or an experienced radio TV technician for help FCC WARNING To assure continued compliance follow the attached installation instructions and use only shielded cables when connecting to other devices Modifications not authorized by th...

Page 3: ...e provided plug does not fit into your outlet consult an electrician for replacement of the obsolete outlet 10 Protect the power cord from being walked on or pinched particularly at plugs convenience receptacles and the point where they exit from the apparatus 11 Only use attachments accessories specified by the manufacturer 12 Use only with the cart stand tripod bracket or table specified by the ...

Page 4: ...termine that the product is in proper operational condition The product should be mounted to a wall or ceiling only as recommended by the manufacturer Unplug this product from the wall outlet and refer service to qualified service personnel under the following conditions a When the power supply cord or plug is damaged b If liquid has been spilled or objects have fallen into the product c If the pr...

Page 5: ...UNE VOL Skip 4 STANDBY SOURCE Button 5 Play Pause Button 6 RESET Button 7 Remote Sensor 8 Indicator 9 Speakers 10 FM ANT FM wire antenna 11 LINE IN Jacks 12 DC IN Jack RESET LINE IN L R FM ANT DC IN DC 9V 1 3A LOCATION OF CONTROLS backward Tuning down Volume down Button 3 TUNE VOL Skip forward Tuning up Volume up Button ...

Page 6: ...illustrated on the right RELEASE PUSH OPEN R2025 C SN Fig 1 Fig 2 Fig 3 First Time Use If the button cell is drained replace it by a new one as below 1 Push and slide out the button cell holder as Fig 1 below 2 Replace the button cell with a new CR2025 button cell as the polarity markings on the rear of the Remote Control as Fig 2 below 3 Close the button cell holder as Fig 3 below 5 TUNE Skip bac...

Page 7: ...he device is not to be used for a long period of time remove the batteries to prevent damage or injury from possible battery leakage 5 Do not try to recharge the battery not intended to be recharged it can overheat and rupture Follow battery manufacturer s instructions 8 This product contains a coin button cell battery If the coin button cell battery is swallowed it can cause severe internal burn ...

Page 8: ...60Hz To AC outlet AC DC Adapter To the DC IN jack on the rear of the unit LINE IN L R FM ANT DC IN DC 9V 1 3A NOTES If you will not use the unit for an extended period of time unplug the AC DC Adaptor from wall outlet The AC DC Adaptor is intended to be correctly orientated in a vertical or floor mount position The Red Standby Indicator on the top of unit will illuminate ...

Page 9: ...ent with your selection see list below Playback Mode Color of Indicators BT Bluetooth Blue and blinking FM Radio Green LINE IN Purple Red Blue AUX IN Orange Red Green 4 During playback Press the Tune VOL or Tune VOL buttons on the unit or the VOL buttons on the Remote Control to adjust volume level as desired Press the MUTE Button on the Remote Control to turn off the sound temporary press again t...

Page 10: ...E Button on the Remote Control to turn off the sound temporary press again to turn it back Press the buttons on the unit or the VOL buttons on the Remote Control to adjust volume level as desired Press and hold the buttons on the unit or press the Tune or Tune buttons on the Remote Control to skip tracks Notes When the external BT Device searched the unit our model number MHT843n will appear on th...

Page 11: ... to search and play the next previous available FM station 4 Repeat the same procedures until the desired station was search and play 5 If you want researching the stations from beginning 87 5MHz press the RESET Button on the unit or Remote Control then search the Radio station as point 3 above again Antennas This unit has a FM wire antenna on the rear of unit which provides adequate reception in ...

Page 12: ...ted earlier 4 Press the STANDBY SOURCE Button on the top of unit or press the SOURCE Button on the Remote Control repeatedly until the color of the indicator turn to Orange Red Green 5 Plays the music on the connected external Audio Player as usual Make sure the volume level of the external Audio Player is in high level Otherwise sound from this unit may weak Mobile Phone Connect to the Phones AUX...

Page 13: ... on the unit as the instructed earlier 4 Press the STANDBY SOURCE Button on the top of unit or press the SOURCE Button on the Remote Control repeatedly until the color of the indicator turn to Purple Red Blue 5 Plays the video music on the connected external Video Audio Player as usual Make sure the volume level of the external Video Audio Player is in high level Otherwise sound from this unit may...

Page 14: ...in low level No sound Rise the volume level of the paired connected device Volume level is too high Press the Tune VOL button on the unit or the VOL button on the Remote Control Reduce the volume level of the paired connected device Sound distortion Radio weak reception Volume level of paired connected device is too high Unwound and extended the wire antenna to its full length or reassemble the ot...

Page 15: ...ual 1 x AC DC Adapter 15 Audio Power 5W per channel Total 10 W RMS FM radio frequency 87 5 108 0MHz Bluetooth version V4 2 Bluetooth working range 32 feet in open area 1 x Audio Connection Cable with 3 5mm plugs 1 x Remote Control Uses 1 x CR2025 Button Cell included Input 100 240V 50 60Hz 0 5A Output 9V 1300mA ...

Page 16: ......

Reviews: