background image

EG

EB

GN

VQT5J42

2014/04/03

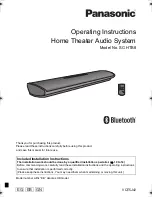
Operating Instructions

Home Theater Audio System

Model No. SC-HTB8

Thank you for purchasing this product.
Please read these instructions carefully before using this product,
and save this manual for future use.

Model number suffix “EB” denotes UK model.

Included Installation Instructions

The installation work should be done by a qualified installation specialist. (

>

10 to 14)

Before commencing work, carefully read these installation instructions and the operating instructions 
to ensure that installation is performed correctly.
(Please keep these instructions. You may need them when maintaining or moving this unit.)

SC-HTB8EG_EB_GN_VQT5J42.book  1 ページ  2014年3月7日 金曜日 午後8時32分

Summary of Contents for SC-HTB8

Page 1: ...r future use Model number suffix EB denotes UK model Included Installation Instructions The installation work should be done by a qualified installation specialist 10 to 14 Before commencing work care...

Page 2: ...type battery out of reach of children to prevent swallowing Unit Do not place sources of naked flames such as lighted candles on this unit This unit may receive radio interference caused by mobile tel...

Page 3: ...tion below are punishable by law in some countries j Taking apart or modifying the unit j Removing specification indications Restrictions of use Wireless transmission and or usage with all Bluetooth e...

Page 4: ...th the TV 8 Connection with other devices 8 AC mains lead connection 8 Bluetooth connection 9 Step 2 Placement 10 Safety Precautions 10 Wireless interference 10 Selecting the placement method 11 When...

Page 5: ...t These operation instructions are applicable to model SC HTB8 for variety of regions Unless otherwise indicated illustrations in these operating instructions are of the model for the United Kingdom a...

Page 6: ...D DVD terminal is the audio source C Bluetooth indicator Lights amber when the Bluetooth device is the audio source 6 Sound mode indicators 1 D CLEAR VOICE indicator Lights amber when clear voice is t...

Page 7: ...emote control signal sensor The remote control signal sensor is located on the main unit Use the remote control within the correct operation range Distance Within approx 7 m directly in front Angle Ap...

Page 8: ...ction with other devices AC mains lead connection C To a household mains socket D AC mains lead This system consumes a small amount of AC power 19 even when it is turned off In the interest of power c...

Page 9: ...is connected the indicator stops flashing and lights up You can register up to 8 devices with this system If a 9th device is paired the device that has not been used for the longest time will be repl...

Page 10: ...US INJURY INCLUDING DEATH RESULTING FROM IMPROPER INSTALLATION OR INCORRECT HANDLING Be sure to install the main unit as indicated within this operating Instructions Attach using techniques suited to...

Page 11: ...or is blocked by the main unit Try using the TV s remote control from a different angle Do not use the main unit in a metal cabinet If irregular colouring occurs on your TV turn the TV off for about 3...

Page 12: ...he cord cannot be threaded through the holes try bending the cord in 2 locations about 5 mm apart from the tip at an angle of 45o as illustrated above Place the main unit in the desired position and a...

Page 13: ...condary safety measure Additionally required accessories commercially available Screws for wall mounting k 2 Fall prevention cord k 1 Screw eye to attach the fall prevention cord k 1 Use a cord that i...

Page 14: ...uccessfully Be sure to use a level to insure that both mounting holes are level to each other Front view semi transparent image Fit the main unit securely onto the screw s Secure the cord to the wall...

Page 15: ...an hear dialogs clearer Press CLEAR VOICE To cancel press the button again To mute the sound Press MUTE While muting all the indicators blink simultaneously To cancel press the button again or adjust...

Page 16: ...ting is maintained until it is changed again Default setting of this function is on To turn on dimmer mode repeat the operation above After performing the operation the indicator for the current condi...

Page 17: ...audio cannot be heard through this system For some built in Bluetooth devices you have to set the audio output to SC HTB8 manually Read the operating instructions for the device for details The sound...

Page 18: ...t either by disposal or transfer then follow the procedure to return all the settings to the factory presets to delete the user settings 17 To return to the factory defaults The operation history may...

Page 19: ...h Version 3 0 Wireless equipment classification Class 2 2 5 mW Supported profiles A2DP with SCMS T Supported codec SBC Frequency band 2 4 GHz band FH SS Operating distance approx 10 m Line of sight TE...

Page 20: ...duker gardiner eller lignende Disposal of Old Equipment and Batteries Only for European Union and countries with recycling systems These symbols on the products packaging and or accompanying document...

Page 21: ...acija AD Bendrov Panasonic Corporation patvirtina kad is gaminys tenkina direktyvos 1999 5 EB esminius reikalavimus ir kitas taikytinas nuostatas M s R TTE gamini originalios atitikties deklaracijos k...

Page 22: ...ta societatea Panasonic Corporation declar c produsul este conform cu cerin ele esen iale i cu alte norme corespunz toare Directivei 1999 5 EC Clien ii pot desc rca o copie a DoC ului original al prod...

Page 23: ...re Locator In addition to your rights under this warranty Panasonic products come with consumer guarantees that cannot be excluded under the Australian Consumer Law If there is a major failure with th...

Page 24: ...ur product with ease and confidence by phoning our Customer Communications Centre Monday Friday 9 00 am 5 00 pm Excluding public holidays Or go on line through our Internet Accessory ordering applicat...

Reviews: