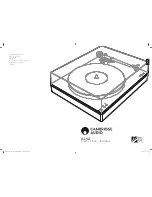
Page 1: ......
Page 2: ...e the receiving antenna Increase the separation between the equipment and receiver Connect the equipment into an outlet on a circuit different from that to which the receiver is connected Consult the...
Page 3: ...rounding prong The wide blade or the third prong are provided for your safety If the provided plug does not fit into your outlet consult an electrician for replacement of the obsolete outlet 10 Protec...
Page 4: ...vice or repairs to this product ask the service technician to perform safety checks to determine that the product is in proper operating condition 3 2 4 Damage requiring service Unplug this product fr...
Page 5: ...four 4 upper side legs to the bottom of unit with the supplied screws as illustrated below 2 Insert the lower side leg to the upper side leg as illustrated below 3 Turn the lower side leg 90 clockwis...
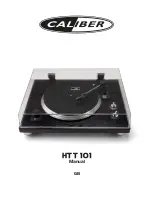
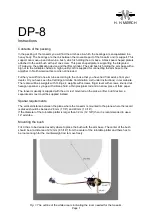
Page 6: ...ck 11 AUX IN Jack 14 Function selector 16 Tuning knob 11 17 Power ON OFF Volume control knob 1213 12 Headphone Jack 13 Red indicator 21 15 Blue indicator 7 8 Stylus Cartridge Front View Rear View FM M...
Page 7: ...C Adapter To the DC IN jack on the rear of the unit Operation General Operation 1 Connect the unit to AC power as instructed previously 4 Turn the Function selector to the desired position the unit Th...
Page 8: ...illuminate and blink 1 Turn the Power ON OFF Volume knob clockwise to power on the unit and set the volume to the desired level 3 Turn the Function selector to BT position The Blue indicator will ill...
Page 9: ...d Release the 8 When finished playback the unit will automatically stop turning if you want to stop immediately adapter to the center spindle then place the record on it raise the Lever above the Tone...
Page 10: ...ition The Red indicator will illuminate 1 Turn the Power ON OFF Volume knob clockwise to power on the unit and set the volume to the desired level The FM wire antenna on the rear of unit is for FM rec...
Page 11: ...io player as usual player is set to high Otherwise sound from this unit may weak Listening from external audio amplifier 1 Connect one end of the RCA audio connection cable not supplied to the Line IN...
Page 12: ...ool dry place To avoid dust and scratches keep records in their sleeves and jackets when not in use Store records upright on their edges Records stored horizontally will eventually bend and ward Do no...
Page 13: ...lector to the correct posit 33 45 or 78 as the record The stylus ma after long time used Replace the supplied BT BT not functioning The BT Device had not paired to the unit Pair the BT Device to the u...
Page 14: ...ble Type of Stylus CSC 015 1 x Ow er s Manual 1 x AC DC Adaptor Input AC 100 240V 50 60 Hz 0 5A Output DC 2 x Stylus one pre mounted 1 x 45 RPM Adaptor 1 x Audio connect cable with 3 5 mm stereo plugs...