background image

Summary of Contents for Piccolo

Page 1: ......

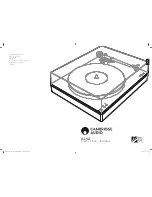
Page 2: ...I A V Piccolo ITALIAN PRESTIGE TURN TABLE Owner s Manual...
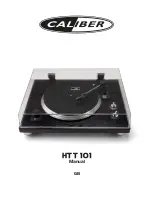
Page 3: ...stige Rigid Turntable Table Of Contents Congratulations Introduction 3 Box Content 4 Construction Features 4 Set Up Instructions 5 Positioning 6 Operating the Piccolo 6 Specifications 6 Warranty Custo...

Page 4: ...vey the quality of I A V turntables or the pride of owning one The turntable bases are made entirely from skillfully crafted sheets of pure acrylic The platter itself is in extruded acrylic tuned The...

Page 5: ...for ensuring greater insensitivity to vibrations The turntable platter is in extruded acrylic a deaf that is even ideal for regularity and stability The spindle is a very well made stainless steel on...

Page 6: ...in this foam you will find 1 platter 1 two piece spindle 1 small jar of spindle bearing oil and 1 baggie with 1 black belt and 1 small Allen wrench Please remove this layer of foam containing these it...

Page 7: ...e feet under the Piccolo deck Notice that the aluminium coned feet have a small pointed steel spike in the center This spike is where the height adjustments need to be made You should be able to grab...

Page 8: ...1 3 rpm or 45 rpm By positioning the belt in the smaller groove of the synchronous pulley motor the PICCOLO turntable be set at 33 1 3 rpm while in the larger groove it will be set at 45 rpm This posi...

Page 9: ...e of this it is possible that problems may emerge which non specialist users cannot resolve In this case contact your dealer who will advise you on how to resolve the problem Do not return any object...

Page 10: ...nternal capacitor filters the AC voltage and add the newer Teflon washer at the motor spindle bottom The Motor produces a buzz noise during playing The 3 stainless steel screws of the gold plated moto...

Page 11: ...ieces Spindle and fit the bottom part of the spindle into the acrylic platter flat hole side then clamp the Spindle tip into the above side of the platter screwing it strongly using a metal pin to get...

Page 12: ...ble ACTION DESCRIPTION HOW TO DO ADJUST IT DUST COVER FRICTION ADJUSTMENT The Dust Cover is hard or slack during open close adjustment Adjust the single screw present on each hinge till you reach your...

Page 13: ...ex bolts of the collar then once all the other adjustment are properly set fix well but not too tighten all the 3 hex bolts CLEANING THE TURNTABLE The Turntable is dirty and needs to be cleaned With E...

Reviews: