background image

20

U

SING THE

A

UTO

L

OCK

™ R

EVIEW

S

CREEN

CH

VOL

MENU

SURF

1

3

2

4

6

5

7

9

8

0

SMART

A/CH

STATUS/EXIT

CC

CLOCK

RECORD

TV/VCR

SLEEP

SMART

SOUND

PICTURE

MUTE

POWER

TV

VCR

ACC

Movie Rating

-
-
-
R
NC-17
X

TV Rating

-
Y7
TV-G
TV-PG
TV-14
TV-MA

 Block Unrated

Off

No Rating

Off

AutoLock DISABLED

1

2

Movie Rating

-
-
-
R
NC-17
X

TV Rating

-
TV-Y7
TV-G
TV-PG
TV-14
MA

 Block Unrated

Off

No Rating

Off

T

o remind you wich rating you have locked
and which Block Options you have selected,

a review screen is available to review your
AutoLock

TM

settings. To access this screen follow

the steps below.                                                  

1

Press the STATUS/EXIT button 

on the

remote control TWICE.  Your
AutoLock™ settings will appear on the
screen. 

NOTE: If you have blocked specific subratings,
such as V for violence in the TV-PG category,
these blocked subratings will not appear in the
review. The subratings however are still blocked
according to your selections.

2

After a few seconds, the settings will
leave the screen automatically, or you can

press the STATUS/EXIT button 

a third

time to remove them from the screen.  

The AutoLock™ status screen will only
appear if the Block option is set to On.  See
previous page for details.       

AutoLock is set to Off by default. 

H

ELPFUL

H

INT

This display will appear after Step One

(above) is completed if the AutoLock™

Block Option is set to 

On

This display will appear after Step One

(above) is completed if the AutoLock™

Block Option is set to 

Off

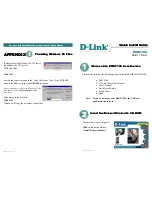
Summary of Contents for 27MS5402/17

Page 1: ...uct more enjoyable If you have read your instructions and still need assistance you may access our online help at www magnavox com or call 1 800 705 2000 while with your product 3121 235 21821 Model N...

Page 2: ...ing the enclosed card guarantees that your date of purchase will be on file so no additional paperwork will be required from you to obtain warranty service Product Safety Notification By registering y...

Page 3: ...aged 17 Tilt Stability All televisions must comply with recommended international global safety standards for tilt and stability properties of its cabinet design Do not compromise these design standar...

Page 4: ...t to the CABLE option AUTOPROGRAM can be set to program all the available channels on your cable signal into the televi sion s memory CABLE TV OUTPUT INPUT b P 5 6 3 4 Direct Cable Connection Cable Bo...

Page 5: ...change the other onscreen text features such as Closed Captioning CC with TV shows HELPFUL HINT TUNER MODE The Tuner Mode allows you to change the Tv s signal input to Cable Antenna or Auto Mode It s...

Page 6: ...Quick Use Guide for making connections HELPFUL HINT CH VOL MENU SURF 1 3 2 4 6 5 7 9 8 0 SMART A CH STATUS EXIT CC CLOCK RECORD TV VCR SLEEP SMART SOUND PICTURE MUTE POWER TV VCR ACC 3 5 7 2 4 6 8 1...

Page 7: ...tions 7 Press the CURSOR UP or CURSOR DOWN buttons to scroll through a list of options 8 After you have selected a name for the channel press the CURSOR RIGHT button to save the name in the TV s memo...

Page 8: ...roll through a list of options for the first character A through Z 0 through 9 Press the CURSOR RIGHT but ton and repeat for the second third fourth and fifth characters 8 Press the STATUS EXIT button...

Page 9: ...The Tint Controls will not be available for adjustments when tuned to the AV1 AV2 AV3 Inputs Brightness adds or subtracts light from the darkest part of the picture Color adds or eliminates color Cont...

Page 10: ...CORD TV VCR SLEEP SMART SOUND PICTURE MUTE POWER TV VCR ACC 3 4 5 2 4 5 2 4 5 6 5 1 Menu Picture Brightness Sound Color Features Contrast Install Sharpness Color Temp Menu Sound Treble 65 Bass Balance...

Page 11: ...ERED buttons or the CH or CH buttons to enter the desired start up channel You can also press the CUR SOR RIGHT or CURSOR LEFT buttons to enter the desired start up channel Activate Set the timer to t...

Page 12: ...y local channel that transmits the current time You can also use the CURSOR RIGHT or CURSOR LEFT but tons to change channels one at a time If TIME FOUND appears the process is finished If not follow t...

Page 13: ...e of pro gramming contains one or more of the follow ing Moderate violence V some sexual situa tions S infrequent coarse language L or some suggestive dialogue D TV 14 Parents Strongly Cautioned This...

Page 14: ...ntering your new code Correct will flash on the screen briefly and the highlight bar goes back to AutoLock Press the STATUS EXIT button to remove the menu from the screen SETTING UP AN AUTOLOCK ACCESS...

Page 15: ...the onscreen menu 2 Press the CURSOR UP or CURSOR DOWN button to highlight Features 3 Press the CURSOR RIGHT button to display the Features menu 4 Press the CURSOR DOWN button to highlight the AutoLo...

Page 16: ...by using the Clear All control or by entering your access code 1 Press the MENU SELECT button on the remote control to show the onscreen menu 2 Press the CURSOR UP or CURSOR DOWN button to highlight...

Page 17: ...OR UP or CURSOR DOWN button to highlight Features 3 Press the CURSOR RIGHT button to display the Features menu 4 Press the CURSOR DOWN button to highlight the AutoLock control 5 Press the CURSOR RIGHT...

Page 18: ...tton to display the Features menu 4 Press the CURSOR DOWN button to highlight the AutoLock control 5 Press the CURSOR RIGHT button again to highlight Access Code 6 Enter your four digit Access Code Co...

Page 19: ...enu 4 Press the CURSOR DOWN button to highlight the AutoLock control 5 Press the CURSOR RIGHT button again to highlight Access Code 6 Enter your four digit Access Code Correct will flash very briefly...

Page 20: ...he remote control TWICE Your AutoLock settings will appear on the screen NOTE If you have blocked specific subratings such as V for violence in the TV PG category these blocked subratings will not app...

Page 21: ...e 1 Press the MENU SELECT button on the remote control to show the on screen menu 2 Press the CURSOR UP or CURSOR DOWN twice to highlight Features 3 Press the CURSOR RIGHT and the menu will shift to t...

Page 22: ...ow dialogue and conversa tions while the TV program is in progress 1 Press the MENU SELECT button on the remote control to show the on screen menu 2 Press the CURSOR UP or CURSOR DOWN twice to highlig...

Page 23: ...screen might show slightly tilted one way or another The Tilt Adjust control will allow you to correct the problem by adjusting the screen in a clockwise or counterclockwise direction 1 Press the MENU...

Page 24: ...n the pic ture 1 Press the MENU SELECT button on the remote control to show the onscreen menu 2 Press the CURSOR UP or CURSOR DOWN twice to highlight Features 3 Press the CURSOR RIGHT button to displa...

Page 25: ...displayed with the word ADD to the right 3 Press the button to ADD the chan nel to the Surf list The display will change from ADD to DELETE Repeat steps 1 through 3 to add additional channels up to e...

Page 26: ...up to 90 minutes then 60 minute increments up to 240 minutes 1 Press the SLEEP button on the remote control The SLEEP timer onscreen display will appear in the upper part of the screen 2 Within five s...

Page 27: ...nditions that you may have in your home The Movies Sports Weak Signal and Multimedia SmartPicture controls have been preset at the factory to automatically adjust the TV s brightness color picture sha...

Page 28: ...tailor the TV sound so as to enhance the particular program you are watching You can change the Personal setting to your preference Follow these steps to select any of the options 1 Press the SMART SO...

Page 29: ...e control at the device and press the POWER button 3 Does the remote turn the device ON If YES stop and try other function buttons on the remote If they also work the device then the remote is ready a...

Page 30: ...the SMART SOUND button on the remote within 30 seconds then release 4 Press the Number buttons to enter the THREE DIGIT CODE for your desired device The remote is now ready to oper ate the device 5 P...

Page 31: ...listed below Please read steps 1 4 before beginning 1 Press the POWER button on the accessory device to turn it ON 2 Place the TV VCR ACC Mode Switch in the proper position for the device you want to...

Page 32: ...297 320 321 Okano 346 Olympus 035 226 Optimus 037 048 058 104 162 432 454 Optonica 062 Orion 004 295 348 352 479 Panasonic 035 077 162 225 226 378 454 Penney 035 037 038 040 042 065 105 Pentax 042 06...

Page 33: ...Network System 749 Jerrold 627 Magnavox 722 724 Memorex 724 Panasonic 701 Philips 722 724 Primestar 627 RCA 566 Sony 639 Toshiba 790 Uniden 724 SATELLITE CODE NO AST 351 Akai 515 Alba 352 515 613 Ald...

Page 34: ...n up or down through the VCR channels A CH RECORD BUTTON Press and hold to begin a VCR recording TV VCR ACC SWITCH Set to VCR to send commands to the VCR PLAY BUTTON Press to play a videotape REWIND B...

Page 35: ...batteries Remote Does Not Work Continued Clean the remote control and the remote control sensor window on the TV Check the TV power cord Unplug the TV wait 10 seconds then reinsert the plug into the o...

Page 36: ...neven aging of the picture tube Stock market tickers presented at the bottom of the TV screen Shopping channel logos and pricing displays bright and shown constantly or repeatedly in the same location...

Page 37: ...ble for adjustment On screen Displays OSD The wording or messages generat ed by the television to help the user with specific feature con trols color adjustment programming etc Remote Sensor A window...

Page 38: ...e Highlights 4 Format Controls 21 Glossary 38 Incr edible Surround Control 10 Index 39 Language Control 5 Name Conrol 7 8 Permanent OSD 24 Picture Control 9 Registration of TV Information 2 Remote Con...

Page 39: ...39 NOTES...

Page 40: ...nt because of improper installation connections to improper voltage supply abuse neglect misuse accident unauthorized repair or other cause not within the control of Magnavox A product that requires m...

Reviews: