M A G M A
4 Chapter 2 Hardware Installation
Before you Begin
The 400W redundant power supply is auto-switching. These means that
it will automatically switch to match whatever source power you are
using. Since all products ship with a US Standard 115V power cord, you
will need to use a power cord adapter for non-US Standard 115V power
sources.
Install PCI Host Interface Card
Begin the installation of your PCI expansion host card by first powering
down the host computer. Use the procedures for shutting down your
operating system and shutting off power to your system provided in your
owner’s manual or system documentation.
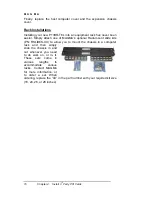
The PCI Host Interface Card includes a voltage switch in the top right
corner of the board that may need to be adjusted for proper installation.
It is an easy process to determine if the voltage switch needs to be
adjusted for your configuration.
1. Insert the PCI Host Interface Card into a vacant PCI slot by
gently pushing the card until it is firmly seated.
2. Secure the card in the PCI slot opening with a mounting screw.
3. Turn on power to the host computer.
4. If both LEDs shown below are lit,
DO NOT
adjust the dip
switch, simply power down and continue to step two.
5. If only the +5V LED is lit, shut down your computer, then flip
the switch to the ON position before continuing to the next
step. When you power up the computer again, both LEDs
should now be lit.
Summary of Contents for PCI Expansion System P13RR-TEL
Page 59: ......


