background image

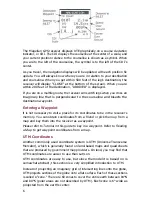
Backlight Brightness. 

 The intensity of the backlight can be adjusted. This 

is most easily done when the backlight is on. (Default is high.) 

1. 

From the SETUP menu, highlight "LIGHT BRT." and press 
ENTER. 

2.  Press the UP/DOWN ARROW  to toggle between LOW and 

HIGH. 

lt is best to select LOW on extremely dark nights, when you 

want to preserve your night vision. 

3. 

Press ENTER to return to the SETUP menu. 

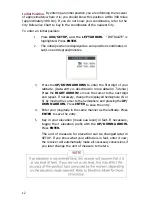
Contrast. 

 Contrast the difference in intensity between the characters and 

the display's background. You may select low, medium, or high contrast. 
(Default is medium.) 

1. 

From the SETUP menu, highlight "CONTRAST" and press 
ENTER. 

2.  Press the UP/DOWN ARROW to toggle between LOW, ME-

DIUM, and HIGH. 

3. 

Press ENTER to return to the SETUP menu. 

THE AUXILIARY FUNCTIONS 

Auxiliary functions are miscellaneous operating features. In general, these 
are features that are not used as often as navigation or position. 

To access an AUX function: 

1. 

Press AUX/SETUP, then the RIGHT ARROW. 

2.  The receiver displays the AUX menu. Press the  UP/DOWN 

ARROW to select the desired option, then press ENTER. 

Any changes made to an auxiliary function are retained until the receiver's 
memory is lost or cleared, or until the setting is changed by the user. 

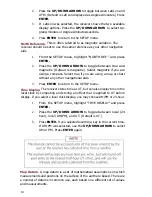
Softlock

TM

 W hen activated, softlock prevents the receiver from  being

turned on unless a specific key sequence (AUX, RIGHT ARROW, CLEAR) is
pressed on power-up. (This key sequence is displayed on power-on when
Softlock has been turned on.) This prevents the receiver from being turned
an accidentally.

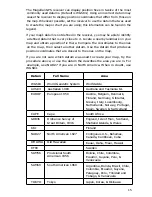
Sampling. 

Sampling causes the receiver to turn itself on every 10 minutes,

compute a position fix, store the fix in the buffer, and turn itself off. Sampling
will continue until it is turned off or until the battery warning is displayed.

In order to use this feature, the receiver must remain in an open area with the
antenna upright and fully visible to the sky. If the antenna can't see enough

17

Summary of Contents for Trailblazer

Page 1: ...Magellan GPS Satellite Navigator Reference Guide...

Page 2: ...the Magellan GPS receiver the Field Guide is tough and ready to go where ever your adventures take you Printed on waterproof paper its purpose is to explain how to operate the receiver in any weather...

Page 3: ...tenna 10 Initialization 11 Setup 13 The Auxiliary Functions 17 Map Reading 19 Tutorial 22 Waypoints 23 Routes 24 Reading the Pointer Display 26 Direct To 26 Backtrack 28 MOB 28 Entering UTM Coordinate...

Page 4: ...s can be affected by the periodic adjustments to GPS satellites made by the U S Government and is subject to change in accordance with the Department of Defense civil GPS user policy and the Federal R...

Page 5: ...lly with a GPS receiver even at sites that do not permit leaving physical marks such as on a lake You can mark a path even in featureless terrain by making electronic blazes called waypoints and stori...

Page 6: ...s to one minute written as 60 So a Lat Lon position coordinate can be expressed in two ways which your Magellan GPS receiver displays as 25 47 50 or 25 47 30 The Magellan GPS receiver can also display...

Page 7: ...inlet where you tie up your skiff and save another position fix as waypoint INLET The position fixes that are saved as waypoints CAMP DOCK BUOY and INLET can be used as electronic markers to record w...

Page 8: ...s on a flat surface When projected back to the globe it is apparent that the rhumb line measurement is both less direct and longer than the great circle measurement though the difference between the t...

Page 9: ...r units called legs Navigating with a Route To be sure that you avoid shallow or rocky areas you must stay on course Any time you stray from the courseline of the current leg the Magellan GPS receiver...

Page 10: ...necessary to visit a place for its coordinates to be in the receiver s memory You can obtain coordinates from a friend or pick them up from a map and key them into the receiver as a waypoint Please re...

Page 11: ...into a zone a position is in meters Eastings are an east west measurement and correspond roughly to longitude Northings are a north south measurement and corre spond to latitude This chart shows Magel...

Page 12: ...mportant landmarks as waypoints You will then be able to reach any of these waypoints or return to base even before dawn or in poor weather Fishing salt or fresh water save your favorite fishing spots...

Page 13: ...up to 30 minutes if alkaline batteries are being used When the batteries no longer hold enough power to operate the receiver the receiver turns itself off The batteries will still be able to maintain...

Page 14: ...order to provide the best signal reception possible the antenna must be vertical If attached to the receiver rotate the antenna from its storage position to the upright position If detached from the...

Page 15: ...the initial position time and date Once they have been entered the receiver will check its internal almanac to determine which satellites are likely to be visible at its location An almanac is a sche...

Page 16: ...igit of your latitude Data entry is described in more detail in Tutorial Press the RIGHT ARROW to move the cursor to the next digit and repeat If necessary change the displayed hemisphere N or S by mo...

Page 17: ...ER The date can also be displayed as month day year that format is selected in SETUP SETUP Much of the information the receiver displays can be changed to suit your specific needs All customizing is d...

Page 18: ...are using a map or chart without any other navigational aids 3 Press ENTER to return to the SETUP menu Time Display The receiver stores time as UT but can also display time in the local clock by comp...

Page 19: ...hich datum was used to create your map try the procedure above or use the datum the describes the area you are in For example use NAD27 if you are in North America When in doubt use WGS84 Datum Full N...

Page 20: ...accurate position fixes 1 From the SETUP menu highlight ELEV MODE and press ENTER 2 Press the UP DOWN ARROW to select the desired operating mode 3 Press ENTER to return to the SETUP menu 4 Press the...

Page 21: ...as often as navigation or position To access an AUX function 1 Press AUX SETUP then the RIGHT ARROW 2 The receiver displays the AUX menu Press the UP DOWN ARROW to select the desired option then pres...

Page 22: ...time If the receiver is being carried in a pack or the carrying case always be sure the keys face a hard surface that is unlikely to press against the keys in this manner the Field Guide should be ad...

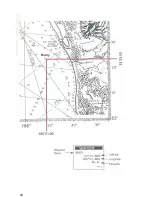
Page 23: ...n low dynamic environments where immediate changes in COG aor SOG are relatively unimportant such as hiking MAP READING Knowing how to read maps and charts will allow you to locate the position coordi...

Page 24: ...20...

Page 25: ...1 BLACK NUMBERED LINES PROJECTION TRANSVERSE MERCATOR VERTICAL DATUM NATIONAL GEODETIC VERTICAL DATUM OF 1929 HORIZONTAL DATUM 1927 NORTH AMERICAN DATUM CONTROL BY USGS NOS NOAA AND USCE PRINTED BY DE...

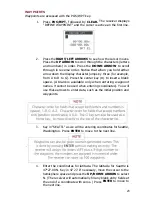
Page 26: ...set a Direct To route set an MOB route lt is easiest to use this tutorial if the receiver has no waypoints or route in memory The receiver should be initialized or have obtained a position fix If you...

Page 27: ...D to G Press the center key 0 to insert a blank space A blank is available only when entering waypoint names lt cannot be used when entering coordinates You will use these arrows to enter data such as...

Page 28: ...s VNCOUV and press ENTER The cursor moves into the coordinates If you like you can change any of the displayed values now by using the arrows Press ENTER to move the cursor from line to line In fact s...

Page 29: ...n the TO field the receiver shows bearing and distance from the FROM waypoint to the displayed waypoint lf the waypoints were entered correctly above bearing and distance from waypoint SEATTL to waypo...

Page 30: ...s both a compass and a direction indicator that will graphically point you toward your destination The example on the following page illustrates how to use this display when navigating on a route DIRE...

Page 31: ...27...

Page 32: ...are ready to return to camp choose BACKTRACK from the Route menu The receiver will create a multi leg route that retraces your path from the present position to the oldest position fix in the buffer...

Page 33: ...destination will be jumpy ENTERING UTM COORDINATES You may occasionally have to enter waypoints using UTM coordinates Maybe someone will give them to you or the only available map of the area you are...

Page 34: ...d Positioning Service SPS code All commercial and consumer GPS receivers are SPS receivers HOW DOES GPS WORK Each GPS satellite transmits its precise location position and elevation and the start time...

Page 35: ...vier call Magellan at 909 394 5000 and ask for Customer Service General information on the Global Positioning System and satellite status is available from the Civil GPS Information Center GPSIC in Vi...

Page 36: ...ating Characteristics Accuracy position 1 2 meters RMS in 3D Operation without SA velocity 0 5 meters second RMS Speed limit up to 951 miles per hour 1 530 kilometers per hour Elevation limit 57 414 f...

Page 37: ...Cable and the Antenna Suc tion Cup Mount The Extension Cable and Suction Cup Mount are required to operate with the quadrifilar an tenna detached Do not alter the length of the antenna extension cable...

Page 38: ...power the receiver may not have been hooked up correctly or the external power source is not operating Check the connec tions and be sure the external power source is operating correctly position fix...

Page 39: ...changes in the position coordinates and elevation are normal They are caused by several variables including the geometric quality of the fix and the effects of SA Geometric quality is a measurement o...

Page 40: ...mechanical including photocopying and recording for any purpose other than the purchaser s personal use without the written permission of Magellan Systems Corporation 1994 by Magellan Systems Corpora...

Page 41: ...960 Overland Court San Dimas CA 91773 909 394 5000 22 60005 012...

Reviews: