Magellan eXploristPro 10 Quick Start Manual Download Page 5

The Magellan eXplorist Pro 10 can be connected to a personal computer or 

external power using the USB connector located at the bottom of the receiver in 

the back.  It has a rubber cover to protect the connector from water or dirt and 

should always be closed firmly when not being used to connect the receiver to a 

remote device.

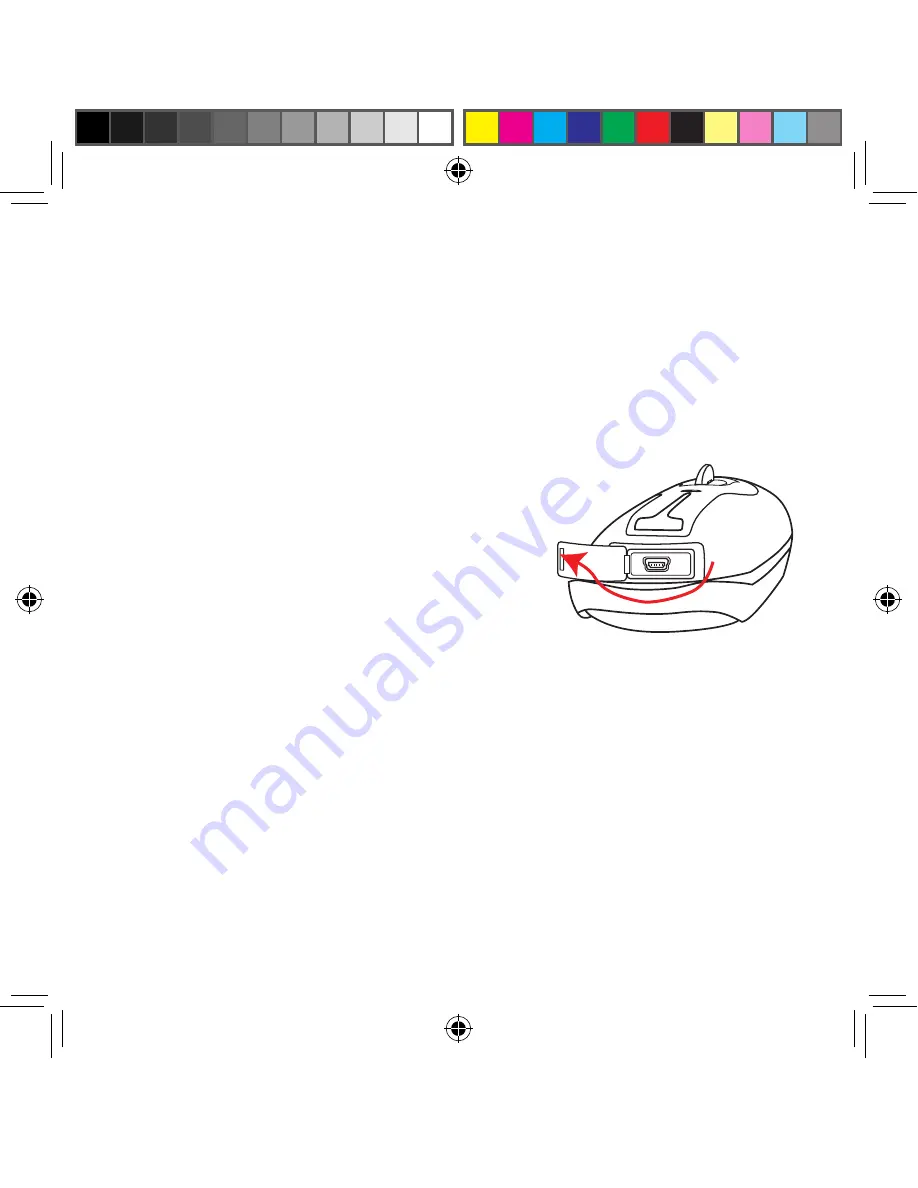
Accessing the USB Connector

Using your fingernail at [B], open the USB 

Port cover.  When done, be sure to close 

the cover firmly to prevent water or dirt from 

entering the USB port.   (Note that the USB 

connector is angled up slightly.)

Applying External Power

The receiver can be powered from an external 12 VDC source using a 

Magellan-approved VPA (Vehicle Power Adapter) or by connecting it to a 

personal computer using a standard USB cable.  If connecting to a vehicle 

receptacle, connect the VPA to the USB connector on the receiver and the other 

end to a vehicle 12 VDC power receptacle.  (Note: Some power receptacle’s 

apply 12 VDC only when the vehicle ignition is on.)

Connecting to the USB Port

B

Touch Pro 10 QSG.indd   5

1/11/2011   10:11:40 AM

Summary of Contents for eXploristPro 10

Page 1: ...Quick Start Guide MiTAC Digital Corporation 471 El Camino Real Santa Clara CA 95050 USA www magellanGPS com Magellan eXplorist Pro10 Touch Pro 10 QSG indd 1 1 11 2011 10 11 39 AM...

Page 2: ...ntenance of the GPS network The accuracy of position fixes can be affected by the periodic adjustments to GPS satellites made by the U S government and is subject to change in accordance with the Depa...

Page 3: ...n down for 5 seconds will reset the receiver Suspend turns the display off but your track will still be recorded This reduces battery life consumption but does not eliminate it entirely B Back Button...

Page 4: ...or until the pivot point at the bottom releases allowing the door to become free from the receiver Install two AA batteries observing the polarity as shown in the battery tray When reinstalling the ba...

Page 5: ...ose the cover firmly to prevent water or dirt from entering the USB port Note that the USB connector is angled up slightly Applying External Power The receiver can be powered from an external 12 VDC s...

Page 6: ...tteries Slide the silver micro SD card retaining plate towards the top of the receiver Lift the retaining plate up with your fingernail Insert a micro SD card with the contacts down pointing towards t...

Page 7: ...g the bottom button the Pictures Video application built in to Windows Mobile opens Use the display as the viewfinder and point the camera towards the area you want to photograph Press the bottom butt...

Page 8: ...e registered trademarks of MiTAC International Corporation and are used under license by MiTAC Digital Corp All rights reserved Microsoft Windows and the Windows Mobile logo are trademarks of the Micr...

Reviews: