40
HOW TO RIDE THE MOTORCYCLE
HOW TO RIDE THE
MOTORCYCLE
To start the motorcycle, see Ignition switch
on page 22.
Engaging drive and neutral
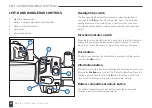
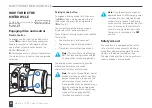
Neutral button
To engage neutral, with the ignition switch
in the
ON
position, allow the speedometer
needle to complete a full sweep, and then
apply either of the brakes and press the
Neutral (
N
) button (1).
N
is displayed on the instrument panel when
the motorcycle is in neutral (no driving mode
selected).
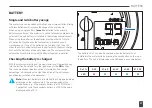
Driving mode button
To engage a driving mode, turn the key to
the
ON
position, and then apply either of
the brakes and press the driving mode
(
D
) button (2).
The currently selected driving mode is
displayed on the instrument panel.
Three different driving modes are available
for selection:
• One press selects driving mode 1.
• Two presses selects driving mode 2.
• Three presses selects driving mode 3.
Note
: The L1 variant of the Maeving
RM1 has two driving modes and the
L3 variant has three driving modes.
The driving modes conveniently provide
differing performance and speed
characteristics for your motorcycle.
Note
: Using the three different power
modes will have an effect on battery
power consumption, range, and the
performance of your motorcycle.
Driving modes may be altered, at any
time, by pressing the driving mode
(
D
) button. However, the new driving
mode will not engage until the
throttle has been fully closed.
Note
: Once the battery charge has
depleted down to 40% charge, power
(not speed) in your selected driving
mode starts to reduce. The driving
mode must be reselected at the start
of each journey, as the motorcycle
resets to driving mode 1 each time
the ignition is switched to the
OFF
position.
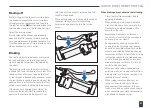
Safety cut-out
The motorcycle is equipped with a safety
cut-out switch, which prevents a driving
mode from being selected whilst the side
stand is in the down (parked) position.
The side stand must be in the up position in
order to engage a driving mode.
!
!
!
!
!
!
!
!
!
2
1
Summary of Contents for RM1
Page 1: ......
Page 76: ...Maeving RM1 Owner s Handbook 76 SERVICE AND MAINTENANCE General repair notes...
Page 83: ......
Page 84: ......

