Macurco GD Operation Manual
REV – 1.0.0
[34-2900-0027-6 ]
22
|
P a g e
4.5.7
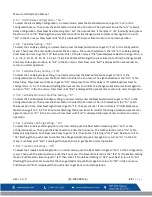
Alarm Relay Configuration – “Arc”
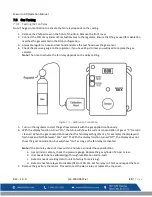
To select the Alarm Relay Configuration, in normal mode, press the Next button twice to get to “Con” or the
Configuration menu. Then press the Enter button to enter the Con menu. The sixth selection is the “Arc” or Alarm
Relay Configuration. Press Next five times to get to “Arc” then press Enter. If the relay is “nO” (normally open) press
Next to turn it to “nC” (flashing) then press Enter to confirm the change (solid) and press Enter again to return to
“Arc” in the Con menu. Press Next until “End” is displayed then press Enter to return to normal operation.
4.5.8
Fan Relay Setting – “FrS”
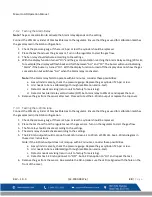
To select the Fan Relay setting, in normal mode, press the Next button twice to get to “Con” or the Configuration
menu. Then press the Enter button to enter the Con menu. The seventh selection is the “FrS” or Fan Relay setting.
Press Next six times to get to “FrS” then press Enter. If the fan relay is “dIS” (disabled) press Next to change it to 3, 4,
5, 6, 7, 8, 9, 10, 11, 12, 13, 14, 15, 16, 17, 18, 19 or 20% LEL (flashing) then press Enter to confirm the change (solid)
and press Enter again to return to “FrS” in the Con menu. Press Next until “End” is displayed then press Enter to
return to normal operation.
4.5.9
Fan Relay Delay Setting – “FrD”
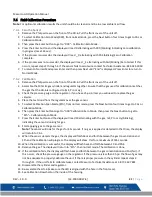
To select the Fan Relay Delay setting, in normal mode, press the Next button twice to get to “Con” or the
Configuration menu. Then press the Enter button to enter the Con menu. The eighth selection is the “FrD” or Fan
Relay Delay. Press Next seven times to get to “FrD” then press Enter. If the delay is “0” (disabled) press Next to
change it to 1, 3, 5, or 10 minutes (flashing) then press Enter to confirm the change (solid) and press Enter again to
return to “FrD” in the Con menu. Press Next until “End” is displayed then press Enter to return to normal operation.
4.5.10
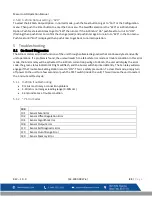
Fan Relay Minimum Runtime Setting – “Frr”
To select the Fan Minimum Runtime setting, in normal mode, press the Next button twice to get to “Con” or the
Configuration menu. Then press the Enter button to enter the Con menu. The ninth selection is the “Frr” or Fan
Minimum Run Time. Press Next eight times to get to “Frr” then press Enter. If the runtime is “0” (disabled) press
Next to change it to 3, 5, 10 or 15 minutes (flashing) then press Enter to confirm the change (solid) and press Enter
again to return to “Frr” in the Con menu. Press Next until “End” is displayed then press Enter to return to normal
operation.
4.5.11
Fan Relay Latching Setting – “FrL”
To select the Fan Relay Latching Option, in normal mode, push the Next button twice to get to “Con” or the
Configuration menu. Then push the Enter button to enter the Con menu. The tenth selection is the “FrL” or Fan
Relay Latching Option. Push Next nine times to get to “FrL” then Enter. If latching is “OFF” push Next to turn it to
“On” (flashing) then push Enter to confirm the change (solid) and push Enter again to return to “FrL” in the Con
menu. Push Next until “End” is displayed then push Enter to get back to normal operation.
4.5.12
Trouble Fan Setting – “tFS”
To select the Trouble Fan Setting Option, in normal mode, push the Next button to get to “Con” or the Configuration
menu. Then push the Enter button to enter the Con menu. The eleventh selection is the “tFS” or Trouble Fan Setting
Option. Push Next ten times to get to “tFS” then Enter. If Trouble Fan Setting is “OFF” push Next to turn it to “On”
(flashing) then push Enter to confirm the change (solid) and push Enter again to return to “tFS” in the Con menu.
Push Next until “End” is displayed then push Enter to get back to normal operation.
Summary of Contents for GD-12
Page 2: ......
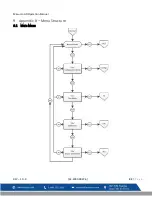
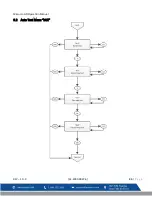
Page 35: ...Macurco GD Operation Manual REV 1 0 0 34 2900 0027 6 34 P a g e 9 2 Auto Test Menu bUZ ...
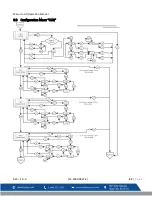
Page 36: ...Macurco GD Operation Manual REV 1 0 0 34 2900 0027 6 35 P a g e 9 3 Configuration Menu CON ...
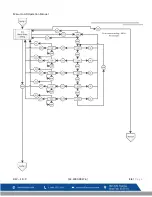
Page 37: ...Macurco GD Operation Manual REV 1 0 0 34 2900 0027 6 36 P a g e ...
Page 38: ...Macurco GD Operation Manual REV 1 0 0 34 2900 0027 6 37 P a g e ...
Page 39: ...Macurco GD Operation Manual REV 1 0 0 34 2900 0027 6 38 P a g e ...
Page 40: ...Macurco GD Operation Manual REV 1 0 0 34 2900 0027 6 39 P a g e ...
Page 41: ...Macurco GD Operation Manual REV 1 0 0 34 2900 0027 6 40 P a g e ...
Page 42: ...Macurco GD Operation Manual REV 1 0 0 34 2900 0027 6 41 P a g e 9 4 Select Test Menu tst ...
Page 43: ...Macurco GD Operation Manual REV 1 0 0 34 2900 0027 6 42 P a g e 9 5 CAL Menu ...
Page 44: ...Macurco GD Operation Manual REV 1 0 0 34 2900 0027 6 43 P a g e 9 6 Sensor Reset Menu Sen ...
Page 45: ......
Page 47: ......
Page 49: ......
Page 94: ...Macurco GD Operation Manual REV 1 0 0 34 2900 0027 6 46 L a p a g e ...
Page 95: ...Macurco GD Operation Manual REV 1 0 0 34 2900 0027 6 47 L a p a g e ...
Page 96: ...Macurco GD Operation Manual REV 1 0 0 34 2900 0027 6 48 L a p a g e ...
Page 97: ...Macurco GD Operation Manual REV 1 0 0 34 2900 0027 6 49 L a p a g e ...
Page 98: ...Macurco GD Operation Manual REV 1 0 0 34 2900 0027 6 50 L a p a g e ...
Page 100: ...Macurco GD Operation Manual REV 1 0 0 34 2900 0027 6 52 L a p a g e 9 5 CAL Menu ...
Page 102: ......
Page 104: ......
Page 106: ......
Page 150: ...Macurco GD Operation Manual REV 1 0 0 34 2900 0027 6 45 p á g i n a ...
Page 151: ...Macurco GD Operation Manual REV 1 0 0 34 2900 0027 6 46 p á g i n a ...
Page 152: ...Macurco GD Operation Manual REV 1 0 0 34 2900 0027 6 47 p á g i n a ...
Page 153: ...Macurco GD Operation Manual REV 1 0 0 34 2900 0027 6 48 p á g i n a ...
Page 154: ...Macurco GD Operation Manual REV 1 0 0 34 2900 0027 6 49 p á g i n a ...
Page 156: ...Macurco GD Operation Manual REV 1 0 0 34 2900 0027 6 51 p á g i n a 9 5 Menú CAL ...
Page 158: ......
Page 159: ......

