background image

- 13 - 

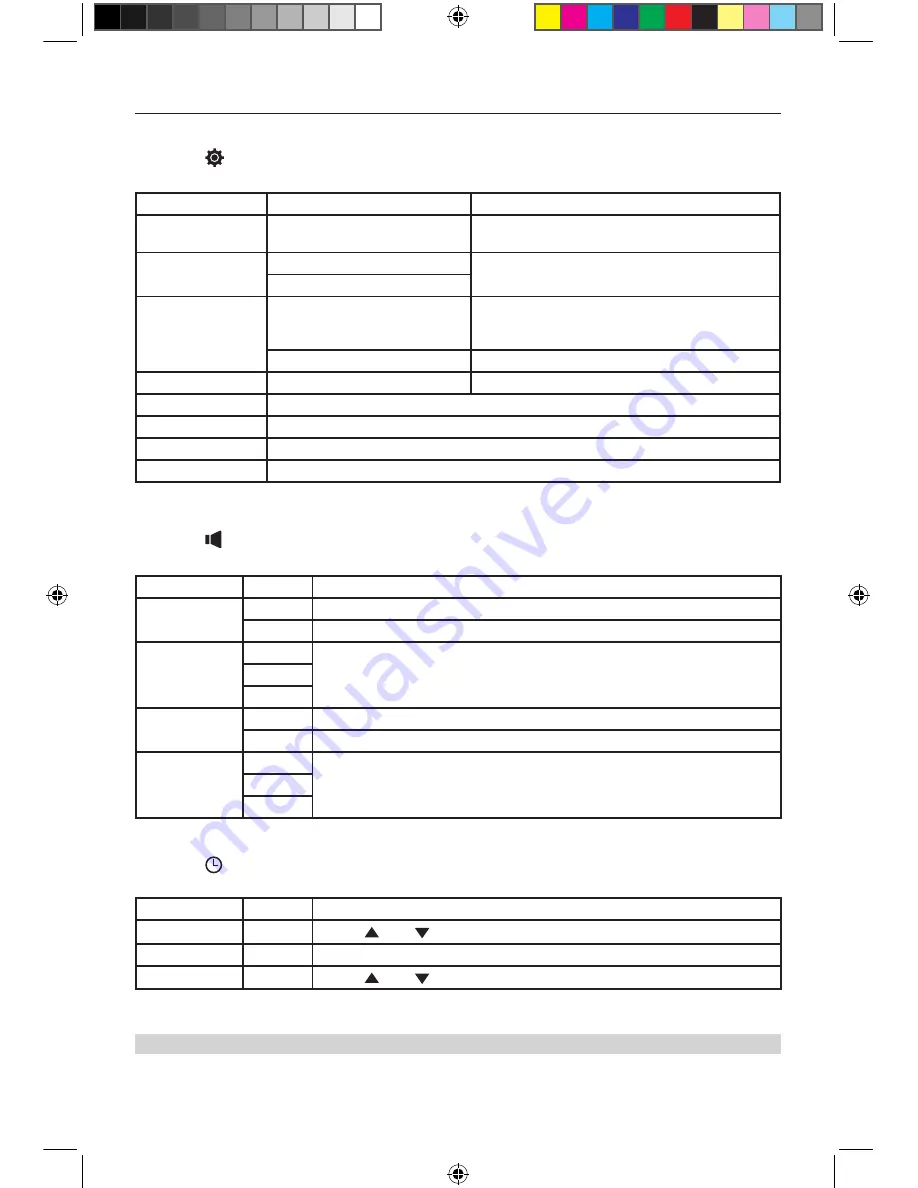
General Settings

1.  Touch [ 

 ], if necessary.

2.  Touch to highlight a setting to display/select an option.

General Settings

Options

Description

Radio Region

USA/Asia/Japan/Europe/Europe 

LW/Oirt

Select one that matches your location.

Radio Range

Distance

Select Local to receive only stations with extremely 

strong signal.

Local

Beep

On

Turn-ON the beep sound. Each time you press a 

button,

the unit beeps.

Off

Turn-OFF the beep sound.

Calibration

Start

Calibrate the touch screen.

Shortcut

Set the shortcut.

SWC

Enter to SWC interface

Load Factory

Restore to default settings.

UI Color

Change the color of the UI.

Settings

Audio Settings

1.  Touch [   ].
2.  Touch an option repeatedly to select.

Audio Settings

Options

Description

Subwoofer

On

Turn On the subwoofer.

Off

Turn Off the subwoofer

Subwoofer Filter

80Hz

Select a crossover frequency to set a cut-off frequency for the subwoofer’s LPF 

(low-pass filter).

120Hz
160Hz

Loudness

On

Turn On the loudness

Off

Turn Off the loudness

L o u d n e s s 

Center

400Hz

Select loudness center frequency.

800Hz
2.4KHz

Time Settings

1.  Touch [   ].
2.  Touch an option repeatedly to select.

Time Settings

Options

Description

Date

Y/M/D

Touch

 [   ] 

or

 [   ] 

to set year, month and day.

Clock Format

Touch [ 24Hr ] or [ 12Hr ] to switch clock mode.

Time

H/M

Touch

 [   ] 

or

 [   ] 

to set hour and minutes.

Note:
When date/time is set, touch [ 

Save

 ] to confirm or [ 

Cancel

 ] to exit.

M-DL4000 User manual_ENG.indd   13

08/06/2017   15:41:12

Summary of Contents for M-DL4000

Page 1: ...USER MANUAL M DL4000 M DL4000 User manual_ENG indd 1 08 06 2017 15 41 06...

Page 2: ...Function 7 Playback Mode 8 Touch Screen Controls 8 Controlling Playback 8 Connect a USB device 8 Remove a USB device 8 Play Pause 8 Previous Next 8 Audio playback from USB 8 9 Video playback from USB...

Page 3: ...MUTE OK Never install this unit where the operation condition for safe driving is impaired Never use the video display function in the front when driving to prevent the violation of laws regulations...

Page 4: ...e the unit in this situation Eject the disc and wipe off the moisture on the disc If the unit still doesn t work after a few hours please contact the service center 6 Do not impact the LCD monitor whi...

Page 5: ...from the actual unit 3 4 5 1 2 3 4 5 6 7 8 9 10 11 12 13 14 15 16 17 18 19 1 Power Mute On Off 2 Fast forward Station up 3 4 Previous Seek down 5 Play Pause 6 Stop 7 Fast backward Station down 8 Pres...

Page 6: ...ode status appears on LCD Press and hold the button to turn OFF the unit Volume Adjustment To increase or decrease the volume level press the or button on the front panel The volume range is from 0 to...

Page 7: ...mode Touch the icon in the user interface and the EQ setup interface will display on the screen 2 Adjust subwoofer volume Touch or drag to adjust subwoofer volume from 8 to 8 3 Adjust fader balance va...

Page 8: ...tep Method 2 1 Touch the numeric keypad icon Numeric keyboard is displayed touch number to input frequency 2 Touch to delete the input number step by step 3 Touch OK to enter Radio Mode 1 Current radi...

Page 9: ...Note During auto switching radio frequency some interference may be heard Turning off AF function can settle this problem TA Function The TA Traffic Announcement function lets the unit receive traffi...

Page 10: ...ice is inserted play starts automatically For movie if a menu appears press to start play 2 To pause touch To resume play touch 3 Skip to previous next track chapter press key Previous Next Touch key...

Page 11: ...rce via the main menu The device changes to the desired source and the playback starts If the playback does not start with the video playback touch the icon to change to the folder file list Touch the...

Page 12: ...k touch the icon to change to the folder file list Touch the icon to display all the folders and files of the data carrier Or Touch the icon to display all the images of the data carrier If you select...

Page 13: ...uce the operational range Keep this unit away from any other electronic device that may cause interference Disconnect Bluetooth Device To disconnect one device touch After pressed the unit will displa...

Page 14: ...o load on initial setup Bluetooth Music Function Bluetooth provides an Advanced Audio Distribution Profile A2DP profile for streaming music from a mobile phone sometimes referred to as a MP3 player Th...

Page 15: ...e UI Settings Audio Settings 1 Touch 2 Touch an option repeatedly to select Audio Settings Options Description Subwoofer On Turn On the subwoofer Off Turn Off the subwoofer Subwoofer Filter 80Hz Selec...

Page 16: ...iving Adjust Enter Touch or to adjust brightness contrast and saturation Version Info Enter Display the current version information Adjust Volume Settings You can set different volumes for different s...

Page 17: ...eering wheel control functions can be programmed via the built in SWC interface Not all functions may be supported for each vehicle 1 Before programming you need to clear reset the SWC interface by pr...

Page 18: ...e connected to the unit using an audio video adapter cable that is available separately 2 Video will only play when the vehicle parking brake is engaged The parking brake must be connected for this fe...

Page 19: ...e out 0 1 Frequency Response 3dB 20Hz 20KHz Maximum Output Power 4 50W Load Impedance 4 AUX IN Distortion 0 5 Frequency Response 3dB 20Hz 20KHz Audio Input Level 0 5Vrms Audio Audio Output Impedance 1...

Page 20: ...is an album that does not contain MP3 files and is not be shown in the display Unsupported file formats are skipped For example Word documents doc or Mp3 files with extension dlf are ignored and not p...

Page 21: ...connection between ACC and BATT Check wiring and correct TFT monitor Warning information is shown at all times Parking break wiring is not correct Check wiring and correct Flashing image or interfere...

Page 22: ...EVERSE VIDEO OUT SWC 1 SWC 2 BRAKE MIC SUB Output 1 SUB Output 2 VIDEO Input LINE Output RL LINE Output RR LINE Output FL LINE Output FR AV Input Left AV Input Rght ACC Ignition Illumination GND Groun...

Page 23: ...M DL4000 User manual_ENG indd 21 08 06 2017 15 41 13...

Page 24: ...declares that the type of radio equipment Multimedia Navigation Receiver model M DL4000 brand Macrom complies with the 2014 53 EU Directive The full text of the EU Declaration of conformity is availa...

Reviews: