Box Office User Guide
Quick Installation Guide
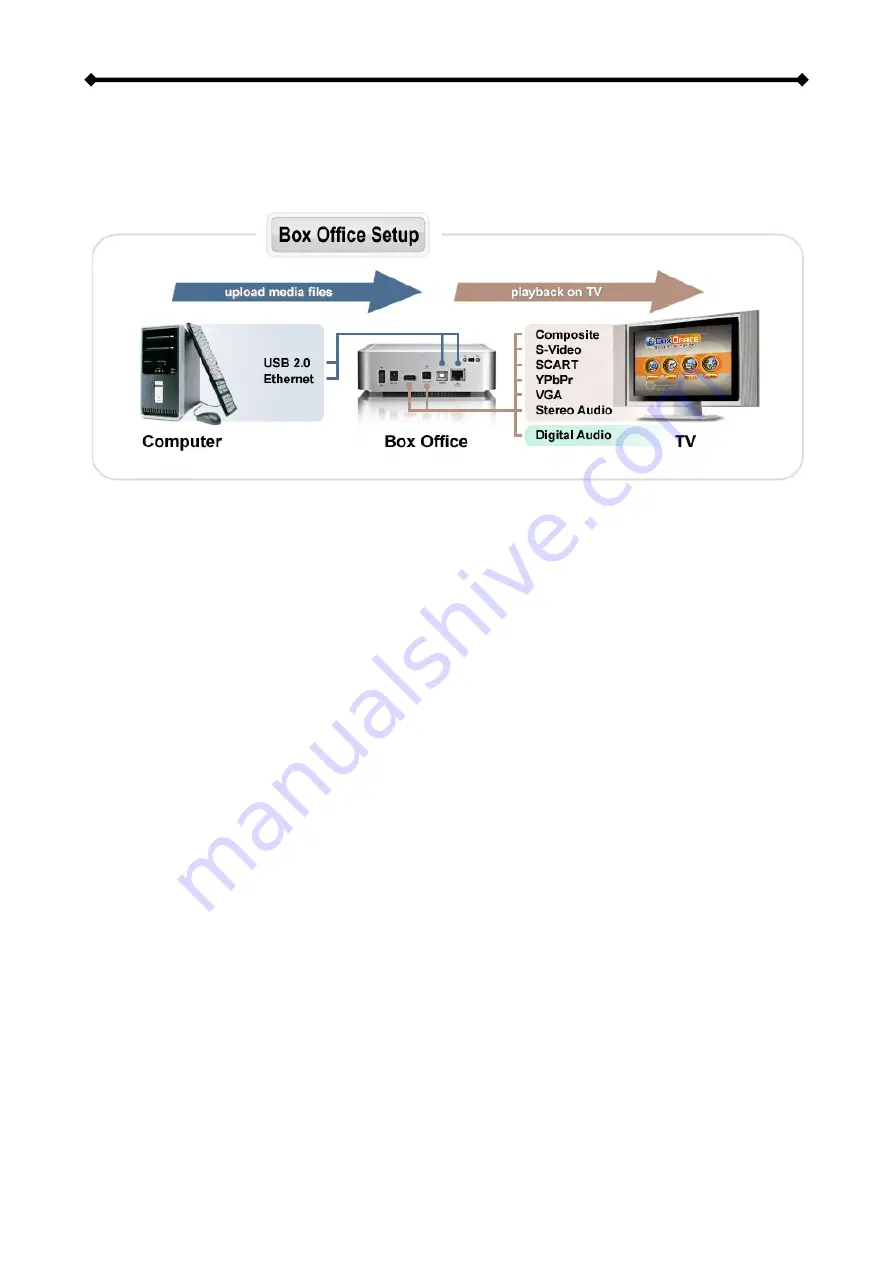
Following is a quick installation guide to get you up and running. In a few steps, we will
show you how to set up the hard drive, fill it with some media files and hook it up to your
TV system for immediate playback.
1. Open the enclosure, install and connect your hard drive but be careful not to
damage any pins or components! Jumper settings of your hard drive should be set
to Master. Mount the hard drive with the supplied screws and finish the assembly.
2. Set the switch on the Box Office to PC, connect the USB cable to your computer,
connect the power supply to the wall socket and turn on the power.
3. Create a single primary partition and format the drive using the FAT32, NTFS or
HFS+ file system, depending on your Operating System and personal preferences.
4. Create four (4) empty folders in the root directory, named exactly as follows:
Firmware, Movies, Music and Pictures.
5. Copy your media files to the hard drive. Store videos inside the Movies folder,
music clips inside the Music folder and images inside the Pictures folder.
6. Remove the device from your computer and disconnect the USB cable.
7. Connect the AV cable to your TV, set the switch on the Box Office to TV and turn on
the power.
8. Use the remote control to access your files and start playback.
Note: If you do not see anything on your TV screen, make sure you have selected the
correct TV channel but if you still only see a black screen, press the “TV out” button on
your Box Office remote control to toggle between the different TV formats until you see the
main screen. Once you have found the right video output, go to Settings, select the proper
output and press the HOME key on your remote control to save the new settings.
Page 5 / Chapter 1 - Introduction


