background image

   Box Office                                                                                                      User Guide 

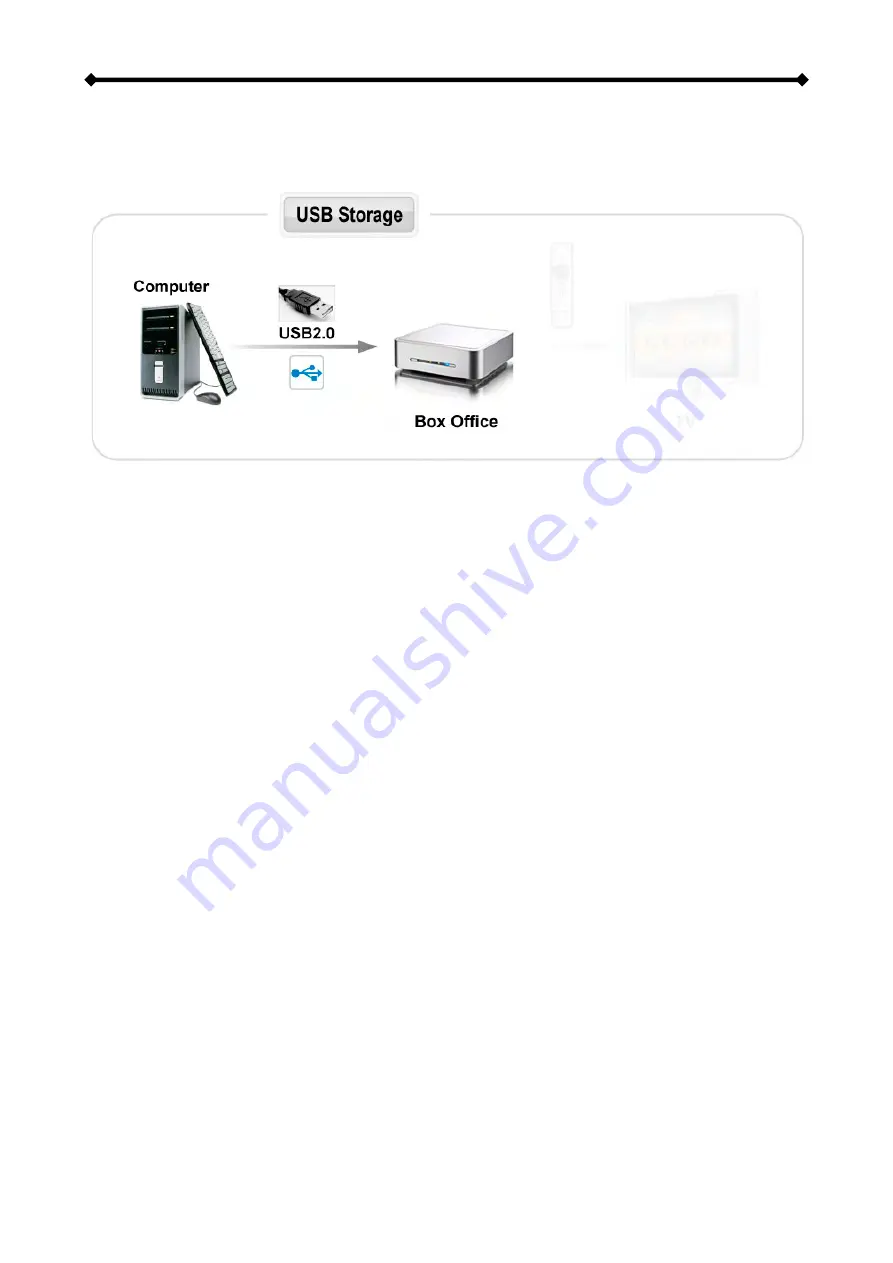
USB Connection 

The Box Office operates as a standard USB 2.0 mass storage device when connected to a 
computer via USB. Use the included cable to connect your device to the computer system. 


Always connect the USB cable to your computer first and 

set the switch to PC

, before 

you turn on the device. Your system will automatically recognise the Box Office as external 
hard disk in which you then can copy any file(s) you want (music, movies, pictures, and/or 
data).  
 

It is strongly recommended to empty the “Recycle Bin” after your file(s) deletions to 
free the HDD space.


The Box Office supports the following file formats: FAT32 (Windows & Mac) NTFS 
(Windows), HFS+ (Mac). If your computer system does not have a USB 2.0 interface, but 
only USB 1.1, you will receive a warning. You can still use the device with USB 1.1, but 
with a slower performance level.  
 

Note: You will always need the external power adapter when connected to the computer. If 
the switch on the Box Office is set to TV, the device will not be recognised by the computer. 


NONE of the prerequisite folders should ever be deleted or renamed, because your 
Box Office uses these exact names as a reference to locate the respective files. 

Inside these folders you can have any sub-directories that are convenient for you. 
 

Firmware 

- This is the folder in which you can copy the latest Box Office firmware files 

when there is a new upgrade available. 

Movies

 - Store all your video clips and movies inside this folder. 

Music

 - Store all your music files inside this folder.  

Pictures

 - Store all your images and photos inside this folder. 


Note: Media files stored in different locations will not be recognised by the media player 
when it is connected to the TV. 

 
To backup your files or to transfer data between different computers and platforms, you 
may create as many new folders in the root directory as you like. These will not affect the 
Box Office media player and also won’t be seen on the TV screen. 

Page 12  /  Chapter 2 - System Setup 

Summary of Contents for Box Office BOX-LNU2UXS

Page 1: ...r Guide Date May 23 2007 v1 0 Firmware v2 0 16 60 Model BOX LNU2UXS The diagrams and images contained in this manual may not fully represent the product that you are using and are there for illustration purposes only ...

Page 2: ...tallation on a Mac 14 The Device ID 14 Registering a new device on a PC 14 Registering a new device on a Mac 15 CHAPTER 3 UPLOADING FILES 16 USB Connection 16 Ethernet Connection 16 CHAPTER 4 TV PLAYBACK 17 THE REMOTE CONTROL 17 UNIQUE CONTROL KEYS 20 MENU FUNCTIONS 21 Main Menu 21 Movies 21 Music 22 Settings 24 Background Images 26 CHAPTER 5 NDAS NETWORK DRIVE 27 MOUNTING AND USING YOUR NDAS DISK...

Page 3: ...es Composite RCA S Video and SPDIF digital audio cable Manual utility CD Note Package contents may vary depending on vendor product version System Requirements Computer with internet browser network access and USB connection for setup Switch or Router with one free Ethernet port for the Box Office One 3 5 IDE hard drive to be installed into the Box Office media player Supported Operating Systems P...

Page 4: ...audio supports compressed Dolby Digital 5 1 and DTS pass through Picture Formats JPG baseline and progressive up to 8 mega pixel The Box Office is not designed or intended to and may not be used to violate any copyrights or other IP Intellectual Property rights Each user of the Box Office may only use it in connection with materials legally owned by or licensed to the user and only extend such own...

Page 5: ...gnal 2 LAN LED yellow ON Blinking LINK LAN connected 3 System LED green ON Standby media player Blinking IR command received 4 Power LED blue ON Power ON Blinking Data Access Rear View X Y Z 1 ON OFF switch 5 USB 2 0 High Speed connection 2 Power receptacle 6 Ethernet port RJ 45 100Base TX Auto 3 Analogue audio video output 7 TV PC switch for player storage mode 4 Digital audio output Page 3 Chapt...

Page 6: ...an be used as standard mass storage class device Transfer files between different computers and platforms expand your storage capacity or use it to backup your data in case of data loss Network Attached Storage Easily transfer media files from any computer on the local network to the Box Office through the Ethernet connection The network connection offers convenient data management for the media f...

Page 7: ... and personal preferences 4 Create four 4 empty folders in the root directory named exactly as follows Firmware Movies Music and Pictures 5 Copy your media files to the hard drive Store videos inside the Movies folder music clips inside the Music folder and images inside the Pictures folder 6 Remove the device from your computer and disconnect the USB cable 7 Connect the AV cable to your TV set th...

Page 8: ... the case Please skip this step 1 Lift the top cover off the body 2 Remove the aluminium shielding 3 Loosen the screws for the base 4 Lift the aluminium base out of the enclosure 5 Install the hard drive upside down in the aluminium base so that the mounting holes line up 6 Place the shielding on top of the drive Page 6 Chapter 2 System Setup ...

Page 9: ...crews from the side to mount the hard drive to the base 10 Align the top cover with the body and push lightly into place 8 Place the assembled drive back into the enclosure and connect the cables Note Set the jumper of the hard drive to master or factory default Page 7 Chapter 2 System Setup ...

Page 10: ...ive using the NTFS file system If you are using the FAT32 file system to format the drive on Win2000 WinXP or Vista the biggest single partition you can create will be 32GB To create larger partitions you need to use a 3rd party application The file size for a single file on FAT32 is limited to 4GB Formatting on Mac OS X Mac OS 10 2 or above Use the Disk Utility Select Disk Utility in the utilitie...

Page 11: ...ing is user editable but should not contain more than 16 letters Create this file if required otherwise leave the folder empty Movies This folder will contain your video files Music This folder will contain your music files Pictures This folder will contain your image files AutoBoot Optional folder for video files AVI MPG to be played automatically at boot up Only create this folder when you are a...

Page 12: ...osite video and S Video For the audio the standard is stereo left right analogue audio If your TV does not have this connection or you prefer a different type please purchase some of the additional cables Optional cables AV cable with analogue YPbPr video progressive or interlaced scalable up to 1280x720p or 1920x1080i AV cable with full SCART RGB support VGA AV cable for VGA interfaces with a res...

Page 13: ...le connected to the multi connector port A V on the Box Office Note With this simple setup you can get the highest video quality but the audio quality remains the same as the stereo analogue quality provided by the TV set s built in speakers Digital Audio Setup This configuration provides the best mix of video and audio quality In this setup you can connect any of the available AV cables except th...

Page 14: ...rnal power adapter when connected to the computer If the switch on the Box Office is set to TV the device will not be recognised by the computer NONE of the prerequisite folders should ever be deleted or renamed because your Box Office uses these exact names as a reference to locate the respective files Inside these folders you can have any sub directories that are convenient for you Firmware This...

Page 15: ...hardware The adjacent dialogue box wil appear displaying the external Plug Play devices In the current example you can see the Box Office as a USB Mass Storage Device In and then press Stop C operating system will automatically stop device and inform you for its safe removal If you are using the Box Office e g you are working on a Word document or a picture located in its disk the operating system...

Page 16: ... The device ID can be found on a sticker on the outside or the inside of your enclosure The device ID and Write Key do not contain the letter O Always use the number 0 Without the Write Key the NDAS disk can only be accessed with Read Only permit Registering a new device on a PC Click on the NDAS Device Management icon on the taskbar Select Register a New Device Depending on your setup under Optio...

Page 17: ...our Applications folder under Utilities and open it Under Management select Register a New Device Enter a name for your NDAS disk or use the default name Add your NDAS device ID and if you also want to be able to write to the disk enter the Write Key last 5 digits Page 15 Chapter 2 System Setup ...

Page 18: ...n on the device 4 Erase old files and upload new ones to the media player 5 Eject the drive remove the USB cable and turn it off 6 Set the switch to TV 7 Connect it to your TV and turn it back on 8 Done Ethernet Connection 1 Connect the Ethernet cable to your Box Office and a router on the local network 2 Set the switch to PC 3 Turn on the device 4 Mount the network drive on your computer using th...

Page 19: ...t format DVD TITLE PLAY ALL Files SEARCH for Time or Title Chapter NAVIGATION BUTTONS REPEAT chapter or title A1 not used FAST FORWARD NEXT TRACK PAUSE STEP SLOW forward function PREVIOUS TRACK SHUFFLE play all files randomly ANGLE view DVD with different angle INFO displays details during playback PLAY REVERSE PLAY STOP PLAYBACK RETURN to the previous menu SUBTITLE toggle subtitle language AUDIO ...

Page 20: ...ed for Time Search INFO Displays file information e g size format etc Displays file information e g size format etc SEARCH SEARCH for Time or Title Chapter applicable ONLY for ISO files Search for Time MOVIES Go to top folder Jump to Movies folder MUSIC Jump to Music folder Go to top folder PICTURES Jump to Pictures folder Jump to Pictures folder SETTINGS Jump to Settings Jump to Settings SLOW SLO...

Page 21: ... size format etc N A SEARCH N A N A MOVIES Jump to Movies folder N A MUSIC Jump to Music folder N A PICTURES Go to top folder N A SETTINGS Jump to Settings Leave Settings and go to Home SLOW N A N A ANGLE N A N A THUMBNAILS Image preview ON OFF N A TV OUT VIDEO OUTPUT toggle video out format You can switch between the individual video outputs pressing this button The video output selected at any t...

Page 22: ...en it is pressed a dual set of white template lines will appear for you to position using the c d keys Press the button again when done positioning Use the same button to also adjust the font size for the external subtitles After pressing this button use the efkeys to increase or decrease the size Press the button again when done resizing Pressing this key turns the image preview of your photos ON...

Page 23: ...e directory list of the video clips that are stored in your Movies folder on the device s hard disk Each directory is named under left right brackets For example in the directory XviD we have stored various XviD video clips You can make any directory you want with your desired name and store any movie you want in it use your computer to create and change directories Please note that every director...

Page 24: ...INFO button during playback for further details of your present song or see the progress bar on the left side Music Playlist Inside a folder you can select certain individual songs you like and create a playlist 1 Use the up down keys to highlight the song 2 Press the right arrow key to add or remove the file from the playlist 3 Add as many songs in the same folder as you like 4 When finished pres...

Page 25: ...turn on the image preview on the left corner of your screen depending on the file size the preview will slow down the file access During playback you can use the ZOOM PAN and ROTATE function Picture Playlist Inside a folder you can select certain individual images you like and create a playlist 1 Use the up down keys to highlight the image 2 Press the right arrow key to add or remove the file from...

Page 26: ... control to save the language setting Once activated all the menu selections and wording will switch to the selected language Audio Settings These settings configure the provided audio output format Analog for the dual Stereo audio Digital for the optical SPDIF digital audio supports compressed Dolby Digital 5 1 and DTS pass through Use the navigation buttons to select your audio setting and press...

Page 27: ... before enabling the NTSC SCART option you should have already connected the SCART cable In case of any setting errors e g the simple Composite AV cable is connected and you setup NTSC Component with no display on the TV screen press the TV out key on the remote control repeatedly until you see the correct display You can then choose the right video output via Settings and save it by pressing the ...

Page 28: ...R SUPPLY FAILURE DURING FIRMWARE UPDATE THE PROCEDURE FAILS YOU MAY NOT BE ABLE TO OPERATE YOUR DEVICE IN THIS CASE YOUR DEVICE MUST BE REPLACED WITH A FUNCTIONAL UNIT BY YOUR VENDOR To return to factory default settings press successively INFO 0 1 2 RETURN Background Images The background images seen on your TV can be customised To do so connect your Box Office to the computer and create a new fo...

Page 29: ...n the NDAS Device Management icon on the taskbar Select your new NDAS device which should now be listed Mount the drive using either Read Only or Read Write The drive is now available under My Computer Mounting the NDAS disk on a Mac Open the NDAS Utility and select your new NDAS device Under Configuration mount the drive using either the Read Only or Read Write mode The drive will now appear on y...

Page 30: ... from Read Write mode to Read Only as an example first Unmount the device then mount it again using the new mode Tip For best performance use only network switches and routers but no hubs When you write to the disk limit the access for as few users as possible to speed up the transfer rate Note If a Mac is connected using the Read Write mode other computers can only connect using the Read Only mod...

Page 31: ... present status and function of a certain device place the cursor on your NDAS disk You will be able to see the current state such as Disconnected Connected Mounted RW Mounted RO or Deactivated Mounted RW stands for Read Write mode Mounted RO stands for Read Only mode Note If you want to use suspend or hibernation mode with a connected NDAS device enable it first under Options and Advanced Tip To ...

Page 32: ... with your device Yellow Bound Non Primary Used for bound NDAS devices except the primary device Note To uninstall the entire Device Management tool first eject and remove all NDAS devices then use the Add or Remove Programs utility in your Control Panel to remove the NDAS Software NDAS Utility on a Mac Locate the NDAS Utility found inside your Applications folder under Utilities and open it All r...

Page 33: ...e is an existing Write Key it can be removed by clicking this button The device can then only be mounted using the Read Only mode Note To uninstall the NDAS Utility first eject all devices and remove them then insert the driver CD open the corresponding folder for your OS and start the NDAS Uninstaller Tip To remove the Write Key select the NDAS device itself as shown in the screenshot Tip Without...

Page 34: ...to run the NDAS software from a command line interface Open the command line and type following cd C Program Files NDAS System folder may vary depending on driver being used Type ndascmd exe which will load the command line interface for the NDAS software The Syntax for the interface should be as follows ndascmd command parameters The supported commands are as follows register name device id witho...

Page 35: ...contents through the Internet ISO is a common DVD image format for DOS Windows Mac OSX Linux and other operating systems The Box Office media player can play the ISO file exactly the same as if it was running from the original DVD The produced files are huge in size but this is not a limitation for the Box Office as it supports any of the FAT32 NTFS or HFS file systems Note The largest single file...

Page 36: ...r Qpel If you want to use external text subtitles we recommend saving them as srt SubRIP format text files Please pay attention that in order for the Box Office to display the subtitles both movie avi and movie srt should be placed in the same directory In order for the Box Office to display the subtitles the subtitle file should also be an Unicode file To do so open the sub smi or srt file with t...

Page 37: ...nal font Supported Interfaces RJ 45 100Base TX Auto MDI MDI X USB 2 0 High Speed AV multi connector supporting four 4 cables Composite RCA left audio RCA right audio RCA S Video Mini DIN RGB Colour Component Video 3 RCA left audio RCA right audio RCA SCART Europe with RGB support VGA at 1024x768 USB 2 0 and Ethernet 100Base TX for data transfer to and from computer Output Ports Transmitter Fiber O...

Page 38: ...ernet cable 9 Utility CD Manual Note Package content may vary depending on vendor version The diagrams may also not fully represent the product that you are using and are there for illustration purposes only Optional Cables and Accessories 10 YPbPr AV cable YPbPr color Component video 3 RCA left audio RCA right audio RCA 11 VGA AV cable 15 pin female VGA left audio RCA right audio RCA 12 SCART AV ...

Page 39: ...laces Locations with direct sunlight next to radiators other sources of heat or in vehicles that are parked directly in the sun with the windows and doors closed Locations with very high temperature more than 35 C or humidity more than 90 Very dusty or sandy locations Locations subject to vibration shock or with a sloping base Electricity and power plug Careful attention must be paid to the follow...

Page 40: ...input to display on the TV set and that the switch on the Box Office is set to TV If this does not solve the problem use the TV out on your remote control of your Box Office and toggle through the different video output formats until an image appears on the TV set Toggling TV out does not save the video settings To do so select the Video Settings from the Settings menu choose the correct output an...

Page 41: ...hrough the FAQ on the previous page and make sure you are using the latest firmware About this Manual This manual was written using the model BOX LNU2UXS and the firmware version v2 0 16 60 Images and descriptions might slightly vary between this manual and the actual product you have Copyright 2007 by Macpower Tytech Technology Co Ltd all Rights Reserved The information contained in this manual i...

Reviews: