background image

Connecting to WiFi

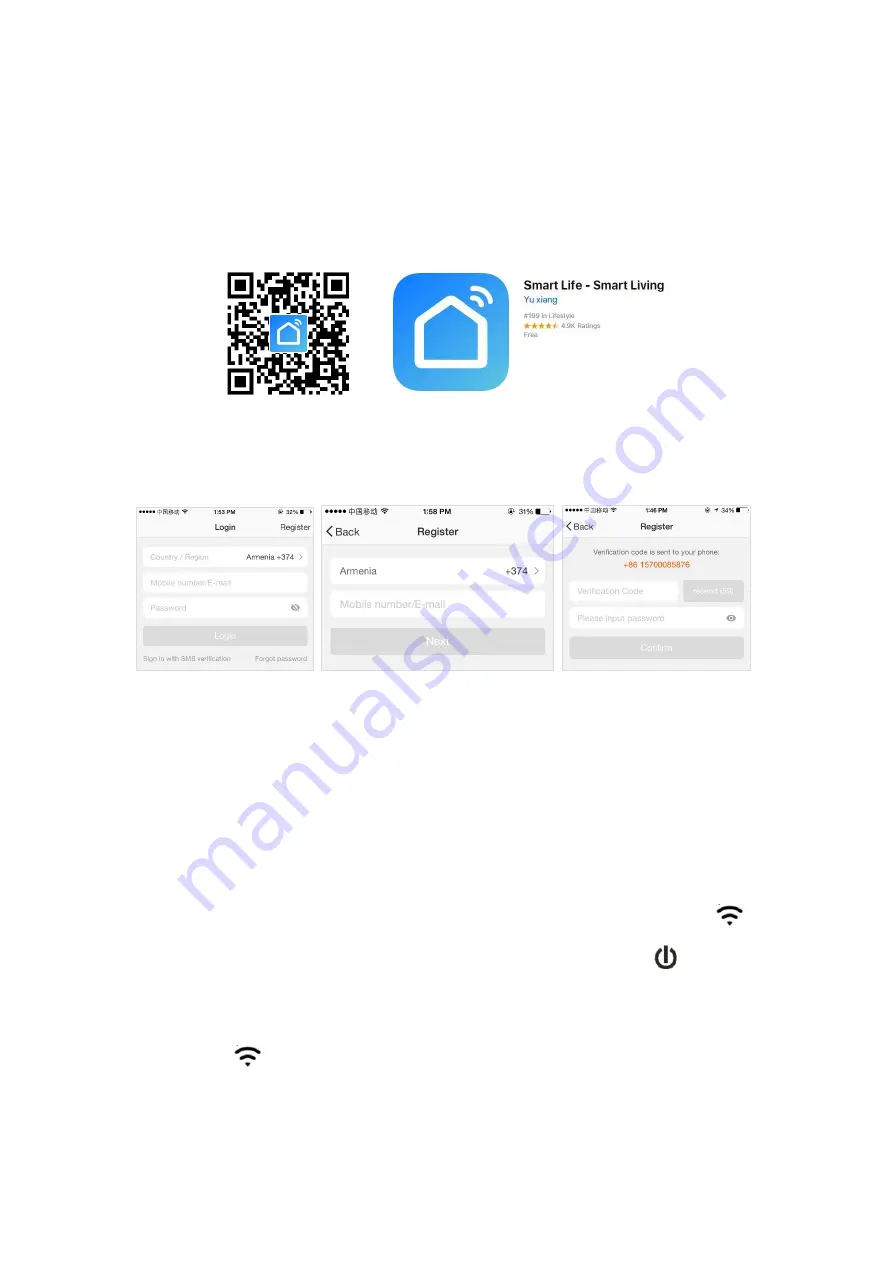
1. To connect your heater to the WiFi, the first step is to download the Smart Life 

app onto your smart phone or tablet. You can find the app by scanning the QR 
code below or searching “Smart Life” in the Google Play or Apple app store.

2. Download and install the app. Unless you already have a Smart Life account, you 

will need to create an account by tapping Register.

The  device  will  automatically  determine  your  country,  although  you  can 
change this if necessary. Enter your phone number or email address. If you 
enter a phone  number,  a  verification  number  will  be  sent  to  your  phone: 
enter this number to verify, then create a password. If you enter your email 
address, you’ll just need to create a password.

3. To add your heater to the app, first put the heater in WiFi connection mode. The 

heater is in WiFi connection mode when the WiFi icon is flashing. If  the wifi

icon is not flashing, go to standby mode and hold down the  


button for three

seconds.

4. Once the        icon is flashing, go to the app and press Add a Device. Select the

device type (Small Appliances > Heater) and confirm that the indicator   is 
flashing. You will then be prompted to enter your WiFi password. This allows 
the app to find your heater using your WiFi.

Summary of Contents for MCE502

Page 1: ...EN I Electric Glass Panel Heater with WiFi Control Instruction Manual MCE502 Please read the manual carefully prior to use ...

Page 2: ...t is in a good condition and intact Do not plug in or use the heater if the casing wire or plug are damaged The heating element may be damaged if the heater is dropped or hit Check that the element is not damaged prior to each use Do not use the heater if the element is broken Disconnect the plug from the socket when moving or cleaning the heater When disconnecting first turn off the switch then u...

Page 3: ...given supervision or instruction concerning use of the appliance in a safe way and understand the hazards involved Children shall not play with the appliance Cleaning and user maintenance shall not be made by children without supervision CAUTION some parts of this product can become very hot and cause burns Particular attention must be given where children and vulnerable people are present Install...

Page 4: ... brackets 6 expansion screws and 6 screws out from the box and fix 2 brackets onto the wall according to the distances between holes of the bracket as depicted in the picture below 2 Fix 2 brackets onto the bottom of productst as depicted in the picture below ...

Page 5: ...wall to avoid damage Remember that the screws on the wall shall be fixed and firm to ensure the safety installation of the electric heater on the wall Please note the safe distance mentioned below During installation the heater must be maintained sufficiently safe distance from combustible materials and gas and away from water During wall hanging installation keep the installation height from the ...

Page 6: ...ol Pad Display Screen WiFi Connection Keyboard Lock Comfort Mode Eco Mode Current Temperature Timer Working Status Anti Frost Mode Displays temperature or timer settings heating if icon displayed not heating if not displayed ...

Page 7: ...show that the timer has been set The heater will heat until the time has elapsed To schedule your heater to switch on later press the TIME button while on standby mode U Delay range is 1 24hours The digits will flash while setting and then the screen will return to heating mode The timer icon on the screen will show that the timer has been set The heater will switch on when the delay has elapsed T...

Page 8: ...address If you enter a phone number a verification number will be sent to your phone enter this number to verify then create a password If you enter your email address you ll just need to create a password 3 To add your heater to the app first put the heater in WiFi connection mode The heater is in WiFi connection mode when the WiFi icon is flashing If the wifi icon is not flashing go to standby m...

Page 9: ...has two connection modes one where the icon flashes slowly once per second and one where the icon flashes fast three times per second Most devices will connect on the fast flashing mode 6 The heater will beep and display a solid icon when the device is connected The app will confirm that the heater has been added You can now name the device share it with family members or proceed to scheduling you...

Page 10: ...t wall rocker switch Turned Off device is in standby mode Turned On device is in heating mode When the heater is online tap the device name to go to the control interface Note when the heater is offline you will not be able to control it with the app Controlling the Heater Set Temperature Temperature Adjust Programming ON OFF Current Temperature Select Mode ...

Page 11: ...ant it to repeat Select Only Once if you just want to set a timer for now If you want the event to repeat select which days you want it to occur Finally choose whether you want the heater to switch on or off Make sure you confirm your settings at every stage and press save to keep the event Each event will appear in your schedule You can activate and de activate events using the toggle You can als...

Page 12: ...n the app which you can trigger by tapping the image offering a quick and easy means of co ordinating your heating For example you could create a Heat Boost scenario that at one tap switches all your panel heaters on at high power mode at 30 C To create new scenarios press the button while on the Scenario screen You can add as many heaters as you want to a scenario You can control whether they swi...

Page 13: ...ol the heater or scenario by voice You can find quick guides to connecting the app to both Google Home and Alexa in the FAQ section Press then Example commands OK Google turn on Glass Heater Alexa switch off Glass Heater OK Google switch Glass Heater to 25 degrees Alexa set Glass Heater to 9 degrees OK Google turn on Comfort where Glass Heater is what you ve named the heater in the SmartLife app w...

Page 14: ...Type of heat output room temperature control select one At minimum heat output elmin N A KW single stage heat output and no room temperature control No In standby mode elSB 0 00089 KW Two or more manual stages no room temperature control No with mechanic thermostat room temperature control No with electronic room temperature control No electronic room temperature control plus day timer Yes electro...

Page 15: ...ance Hints on disposal According to the European waste regulation 2012 19 EU this symbol on the product or on its packaging indicates that this product may not be treated as household waste Instead it should be taken to the appropriate collection point for the recycling of electrical and electronic equipment By ensuring this product is disposed of correctly you will help prevent potential negative...

Reviews: