13
Channel Faders and Input Meters
The channel fader adjusts the
level of each channel going to
the selected output, including the
LR Main Mix, Auxes, Reverb and
Delay. We will discuss the ins and
outs of the selected output later.
Adjustments are made by touching
and dragging channels up and down.
You may have noticed that a touched
fader increases in size and its border
becomes highlighted, giving you
clear indication that a fader is being
adjusted. This is called “Grow &
Glow” and gives you confidence that
the fader is under your control.
Next to each channel fader lies an
input meter. These display the input
signal level to the channel before all
channel processing. Changes made
to the EQ, mute and fader do not
affect these meters. As mentioned
earlier, this meter should remain
green with the occasional bump into
the yellow zone.
Turn down the Gain knob if the
input meter remains consistently
yellow. If the input is too high
[overloading], a clip indicator at the
top of the meter will illuminate red. If
clipping occurs, reduce the gain.
Finally, the thin illuminated strip
underneath the fader cap indicates
which output type is currently
selected; the color varies and is
dependent on the selected output
[LR, Auxes or FX]. This topic will be
discussed further on page 16 of the
Master Fader section.
Channel Strips: Solo
Solo offers the opportunity to
audition channel(s) before they
are added to the mix. Whenever a
channel’s Solo button is engaged,
only the soloed channel(s) may be
heard in the headphones.
These Solo buttons are PFL
which stands for Pre-Fader Listen.
Therefore, the level of the channel
fader does not affect the level heard
in the headphones.
Solo is also post-EQ, so if a
soloed channel’s EQ is engaged, the
EQ settings will be heard. But, solo
is unaffected by the position of the
Mute button.
If no channels are soloed,
you will hear the LR signal
through the headphones.
The Solo button illuminates
yellow when engaged.
Channel Strips
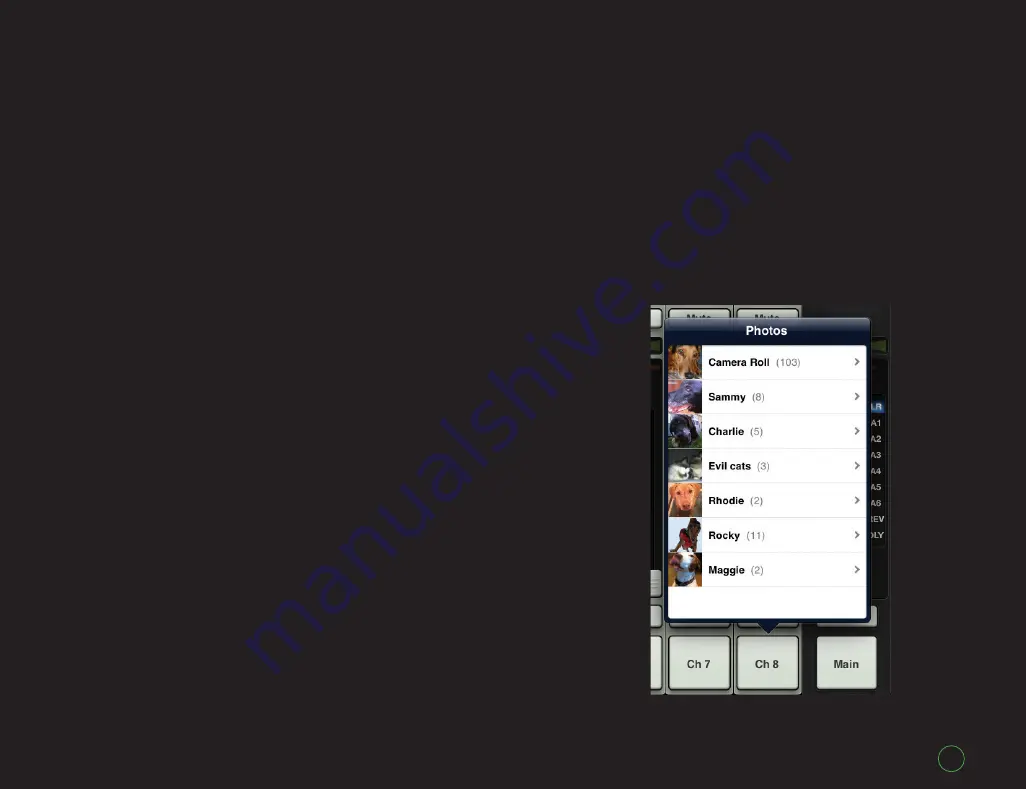
Channel Strips: Name and Image
Each channel strip name and
image is user-editable. Simply tap
the button at the bottom of the
channel and a popover allows editing
a name or selecting an image. Utilize
the keyboard to personalize the
name or choose a new image from
the popover [Figure J].
Figure J – Names and Images