background image

English

8

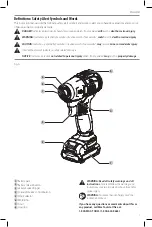
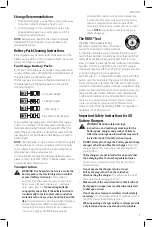
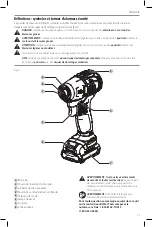
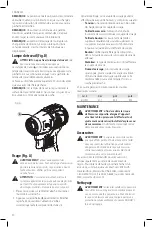
Worklights (Fig. D)


CAUTION: Do not stare into worklights.

 Serious 

eye injury could result.

The worklights 

 6 

 are located around the anvil. The 

worklights are activated when the trigger is depressed. If 
the trigger switch remains depressed, the worklights will 
remain on.
The beam will automatically turn off 20 seconds after the 
trigger switch is released.

nOTE: 

The worklights are for lighting the immediate work 

surface and are not intended to be used as a flashlight.

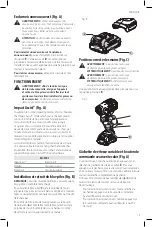
Fig. B

1

2

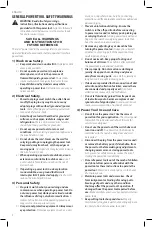
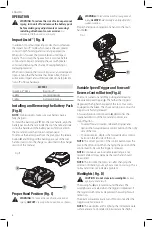
Installing and Removing the Battery Pack 

(Fig. B)

nOTE:

 For best results, make sure your battery pack is 

fully charged.
To install the battery pack 

 1 

 into the tool handle, align the 

battery pack with the rails inside the tool’s handle and slide 
it into the handle until the battery pack is firmly seated in 
the tool and ensure that it does not disengage.
To remove the battery pack from the tool, press the release 
button 

 2 

 and firmly pull the battery pack out of the tool 

handle. Insert it into the charger as described in the charger 
section of this manual

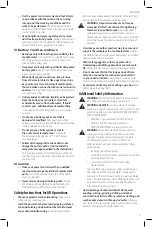
Impact Assist

 (Fig. A)

In addition to normal impacting modes, this tool features 
the Impact Assist™ mode which grants the user greater 
control in both fastening and loosening applications. 
When set in forward, the tool will fasten until impact 
begins. The tool will then pause for 0.5 seconds before 
continuing to impact, providing the user with greater 
control and reducing the chance of overtightening or 
damaging material.
When set in reverse, the tool will impact at a normal speed. 
Upon sensing that the fastener has broken free, the tool 
will cease to impact and will reduce speed to help prevent 
“run-off” of loose hardware.

MCF901

Impact Assist™ Mode

Impact Assist™

Lo Mode

Low Speed Impacting

Hi Mode

High Speed Impacting


WARNING:

 To reduce the risk of serious personal 

injury, 

ALWAYS

 hold securely in anticipation of a 

sudden reaction.

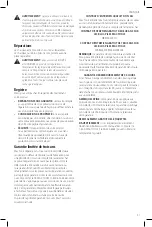
Proper hand position requires one hand on the main 
handle 

 9 

.

Fig. C

9

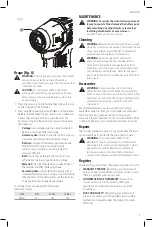
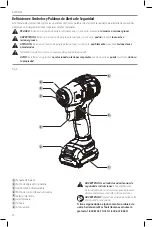
Variable Speed Trigger and Forward/

Reverse Control Button (Fig. A)

The tool is turned on and off by pulling and releasing 
the variable speed trigger 

 3 

. The farther the trigger is 

depressed, the higher the speed of the tool. Your tool is 
equipped with a brake. The chuck will stop as soon as the 
trigger switch is fully released.
A forward/reverse control button 

 4 

 determines the 

rotational direction of the tool and also serves as a 
lock-off button.
•  To select forward rotation, release the trigger and 

depress the forward/reverse control button on the right 
side of the tool.

•  To select reverse, depress the forward/reverse control 

button on the left side of the tool.

nOTE:

 The center position of the control button locks the 

tool in the off position. When changing the position of the 
control button, be sure the trigger is released.

nOTE:

 Continuous use in variable speed range is not 

recommended. It may damage the switch and should 
be avoided.

nOTE:

 The first time the tool is run after changing the 

direction of rotation, you may hear a click on start up. This is 
normal and does not indicate a problem.

OPERATION


WARNING: To reduce the risk of serious personal 
injury, turn unit off and remove the battery pack 
before making any adjustments or removing/
installing attachments or accessories.

 An 

accidental start-up can cause injury.

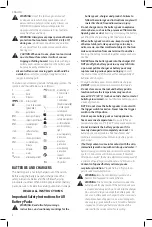
Proper Hand Position (Fig. C)


WARNING:

 To reduce the risk of serious personal 

injury, 

ALWAYS

 use proper hand position as shown. 

Summary of Contents for MCF901

Page 1: ...Llave de Impacto de 6 35 mm 1 4 12 V M X Instruction Manual Guide D utilisation Manual de instrucciones If you have questions or comments contact us Pour toute question ou tout commentaire nous conta...

Page 2: ...English original instructions 1 Fran ais traduction de la notice d instructions originale 11 Espa ol traducido de las instrucciones originales 22...

Page 3: ...ay result in minor or moderate injury Used without word Indicates a safety related message NOTICE Indicates a practice not related to personal injury which if not avoided may result in property damage...

Page 4: ...ard hat or hearing protection used for appropriate conditions will reduce personal injuries c Prevent unintentional starting Ensure the switch is in the off position before connecting to power source...

Page 5: ...oil and grease Slippery handles and grasping surfaces do not allow for safe handling and control of the tool in unexpected situations 5 Battery Tool Use and Care a Recharge only with the charger spec...

Page 6: ...erting or removing the battery pack from the charger may ignite the dust or fumes When battery pack is not in use keep it away from other metal objects like paper clips coins keys nails screws or othe...

Page 7: ...cycle Inc Storage Recommendations 1 The best storage place is one that is cool and dry away from direct sunlight and excess heat or cold 2 For long storage it is recommended to store a fully charged b...

Page 8: ...oo cold it automatically starts a Hot Cold Pack Delay for outdoor use Use of a cord suitable for outdoor use reduces the risk of electric shock An extension cord must have adequate wire size AWG or Am...

Page 9: ...24 C DO NOT charge when the battery pack is below 40 F 4 5 C or above 104 F 40 C This is important and will prevent serious damage to the battery pack 2 The charger and battery pack may become warm to...

Page 10: ...o impact and will reduce speed to help prevent run off of loose hardware MCF901 Impact Assist Mode Impact Assist Lo Mode Low Speed Impacting Hi Mode High Speed Impacting WARNING Toreducetheriskofserio...

Page 11: ...he non metallic parts of the tool These chemicals may weaken the plastic materials used in these parts Use a cloth dampened only with water and mild soap Never let any liquid get inside the tool never...

Page 12: ...after purchase 2 YEARS FREE SERVICE ON MAC TOOLS BATTERY PACKS MBR124 MBR127 3 YEARS FREE SERVICE ON MAC TOOLS BATTERY PACKS MBR203 MBR204 and MBR205 NOTE Battery warranty voided if the battery pack...

Page 13: ...terme Indique un message propre la s curit AVIS indique une pratique ne posant aucun risque de dommages corporels mais qui par contre si rien n est fait pour l viter pourrait poser des risques de dom...

Page 14: ...n outil lectrique dans un endroit humide brancher l outil dans une prise ou sur un circuit d alimentation dot s d un disjoncteur de fuite la terre GFCI L utilisation de ce type de disjoncteur r duit l...

Page 15: ...accessoires les forets etc conform ment aux pr sentes directives en tenant compte des conditions de travail et du travail effectuer L utilisation d un outil lectrique pour toute op ration autre que c...

Page 16: ...on retrouve Le plomb dans les peintures base de plomb La silice cristallis e dans les briques et le ciment ou autres produits de ma onnerie et L arsenic et le chrome dans le bois ayant subi un traitem...

Page 17: ...l lectrolyte de la pile est compos d un m lange de carbonates organiques liquides et de sels de lithium Le contenu des cellules d une pile ouverte peut causer une irritation respiratoire En cas d inha...

Page 18: ...tiliser une rallonge qu en cas de n cessit absolue L utilisation d une rallonge inad quate comporte des risques d incendie de chocs lectriques ou d lectrocution Pour utiliser un chargeur l ext rieur l...

Page 19: ...nnect au bloc d alimentation des mat riaux trangers pourraient court circuiter le chargeur Les corps trangers conducteurs tels que mais pas limit poussi res de rectification d bris m talliques laine d...

Page 20: ...dans un local o la temp rature ambiante est lev e comme dans un hangar m tallique ou une remorque non isol e 3 Si le bloc piles ne se recharge pas correctement a V rifier le bon fonctionnement de la...

Page 21: ...vitesse variable et bouton de commande avancer reculer Fig A L outil est mise en marche ou teinte en appuyant et en rel chant la g chette de vitesse variable 3 Plus vous appuyez sur la g chette plus...

Page 22: ...marrer Rel chez la g chette pour arr ter l utilisation V rifiez syst matiquement le couple l aide d une cl Fig D 6 Lampe de travail Fig D ATTENCION ne pas fixer la lampe de travail Cela peut causer u...

Page 23: ...h ant par un centre de r paration en usine Mac Tools ou un centre de r paration agr Mac Tools Toujours utiliser des pi ces de rechange identiques CONTRAT D ENTRETIEN GRATUIT D UN AN Mac Tools entretie...

Page 24: ...Utilizado sin palabras indica un mensaje de seguridad relacionado AVISO Se refiere a una pr ctica no relacionada a lesiones corporales que de no evitarse puede resultar en da os a la propiedad ADVERTE...

Page 25: ...ble adecuado para uso en exteriores a fin de reducir el riesgo de descarga el ctrica f Si el uso de una herramienta el ctrica en un lugar h medo es imposible de evitar utilice un suministro protegido...

Page 26: ...iferentes de aqu llas para las que fue dise ada podr a originar una situaci n peligrosa h Mantenga las manijas y superficies de sujeci n secas limpias y libres de aceite y grasa Las manijas y superfic...

Page 27: ...tir sueltas joyas o el cabello largo Instrucci n Adicional de Seguridad ADVERTENCIA Nunca modifique la herramienta el ctrica ni tampoco ninguna de sus piezas Podr a producir lesiones corporales o da o...

Page 28: ...La exposici n a fuego o temperatura mayor a 130 C 265 F puede causar una explosi n No incinere la unidad de bater a aunque est completamente da ada o descargada La unidad de bater a puede explotar si...

Page 29: ...ayuda a proteger el medio ambiente y a conservar recursos naturales Tambi n puede comunicarse con el centro de reciclaje de su localidad para mayor informaci n sobre d nde llevar sus bater as gastadas...

Page 30: ...nte el ctrica est ndar residencial de 120 V No intente usarlo con ning n otro voltaje Esto no aplica al cargador vehicular ADVERTENCIA Peligro de descarga el ctrica No permita que ning n l quido se in...

Page 31: ...izo met lico o un remolque sin aislamiento t rmico 3 Si la unidad de bater a no se carga correctamente a Verifique el funcionamiento de la toma enchufando una l mpara u otro aparato b Revise que la to...

Page 32: ...bater a antes de realizar cualquier ajuste o retirar instalar conexiones o accesorios Una activaci n de arranque accidental puede causar lesiones sujetador se liber la herramienta detendr el impacto y...

Page 33: ...Luz de Trabajo Fig D ATENCI N No mire directamente la luz de trabajo Podr a resultar en lesiones oculares serias Las luces de trabajo 6 est n ubicadas alrededor del yunque Las luces de trabajo se acti...

Page 34: ...enetre l quido dentro de la herramienta ni sumerja ninguna de las piezas en un l quido MANTENIMIENTO ADVERTENCIA Para reducir el riesgo de lesiones personales apague la unidad y retire el paquete de b...

Page 35: ...Garant a Limitada por Tres A os Mac Tools reparar sin cargo cualquier falla que surja de defectos en el material o la fabricaci n del producto por tres a os a contar de la fecha de compra Esta garant...

Page 36: ...13 DCB115 Maximum initial battery voltage measured without a workload is 12 volts Nominal voltage is 10 8 La tension initiale maximum du bloc piles mesur e vide est de 12 volts La tension nominale est...

Reviews: