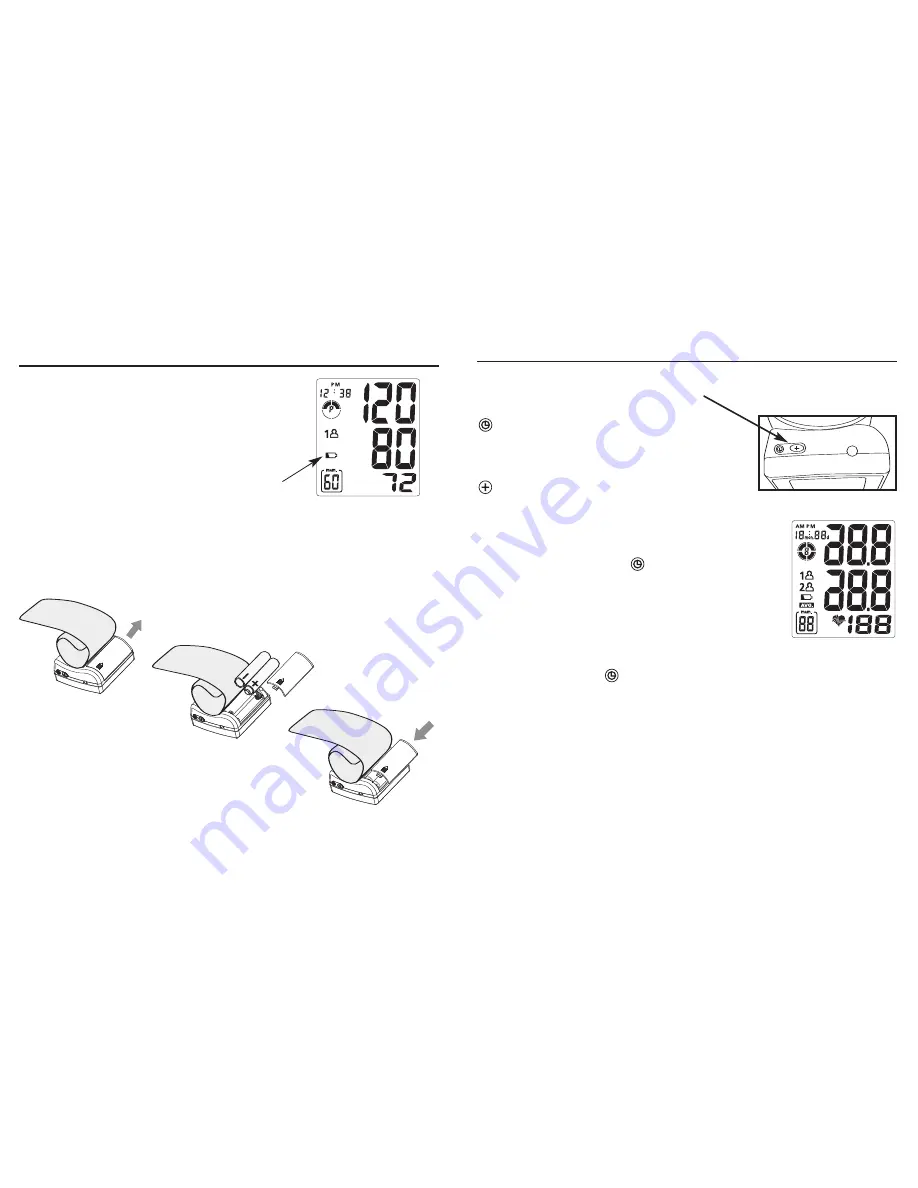
To change the batteries:
1. Open the battery cover,
Fig. 2
.
2. Making sure the battery polarity is correct,
install two AAA alkaline batteries,
Fig. 3
.
3. Close the battery cover,
Fig. 4
.
NOTE:
It is recommended to remove the batteries if the unit will not be
used for an extended period of time.
10
Replace the batteries when the Low Battery
symbol appears on the display,
Fig. 1
, or when the
display remains blank when the POWER
Button is pressed.
Fig. 1
Fig. 2
Fig. 3
Fig. 4
Battery Installation/Replacement
The two buttons positioned on top of the monitor are for setting
the date and time,
Fig. A
.
Time Set button
– Sets the entry and/or
moves to the next
mode.
Time Adjust button
– Increases to the
desired value.
NOTE:
• The appropriate mode must be flashing to
make a change. Use the Time Set button
to move within modes (Month/Date/Hour/Minute);
otherwise, the mode will automatically
change to the next mode after approximately
10 flashes.
To enter into time/date mode:
1. Press and hold the Time Set button for
approximately 3-5 seconds until the date/time
appears. Release the button.
Fig. A
Fig. 1
Setting the Date/Time
11
Summary of Contents for 04-237-001
Page 27: ...48 Registro de Presión ...


