background image

Recomendaciones de conservación

Se  recomienda  guardar  los  alimentos  en  recipientes  con  tapa, 
empacados o utilizando materiales que permitan mantenerlos sellados, 
tales como papel aluminio, papel plastificado o portaviandas.
No  coloque  alimentos  calientes  en  el  enfriador  o  el  congelador, 
deberá esperar a que logren la temperatura ambiente.
Procure abrir las puertas solamente el tiempo necesario para colocar o 
retirar alimentos o bebidas. De esta forma usted estará reduciendo el 
consumo de energía y mejorando el rendimiento de su refrigerador.
si está abriendo y cerrando constantemente la puerta del enfriador 
para  introducir  o  retirar  alimentos,  y  desea  abrir  nuevamente  la 
puerta, ésta puede presentar algo de dificultad. Ésta es una condición 
normal, debida al vacío que se forma en el interior del refrigerador por 
el intercambio de aire a diferentes temperaturas. Puede esperar de 
10 a 15 segundos y las puertas abrirán con facilidad nuevamente.
Guarde siempre la cebolla dentro de una bolsa de plástico o recipiente 
hermético para evitar que su olor contamine.
No guarde ajo dentro del refrigerador, el frío y la oscuridad promueven 
la germinación.
Al  almacenar  los  alimentos  en  el  congelador,  prepare  pequeñas 
porciones,  esto  facilitará  un  congelamiento  más  rápido  y  una 
utilización integral de cada porción.
Si desea congelar rápidamente alimentos o fabricar cubos de hielo, 
se recomienda colocarlos sobre la parrilla del congelador.
Observe siempre la fecha de caducidad de los productos congelados 
indicada por el fabricante.
Una  vez  descongelado  un  alimento  no  podrá  ser  congelado 
nuevamente.
Los liquidos aumentan su volumen cuando son congelados.
Por eso tome la precaución de no llenar hasta el borde con sustancias 
liquidas los recipientes.
No  colocar  en  el  congelador  recipientes  cerrados  de  vidrio, 
conteniendo  líquidos.  La  rotura  de  recipientes  de  vidrio  puede 
provocar daños graves en el congelador.

Limpieza del refrigerador

Siempre desconecte la clavija del enchufe de su refrigerador, antes de 
efectuar cualquier tipo de limpieza o verificación técnica.

1.-  Nunca

  utilice  productos  tóxicos  (amoniaco,  etc.)  o  abrasivos 

(pastas, etc.) ni fibras que dañen el producto. 
Utilice una esponja suave o trapo humedecido en agua con un jabón 
neutro. Enjuague y seque bien con un trapo limpio y seco.
También puede utilizarse para limpiar el interior, una solución de una 
cucharada de bicarbonato de sodio en dos litros de agua tibia.
No utilice fibras ni objetos afilados o puntiagudos que puedan rayar 
el refrigerador, las parrillas o los anaqueles interiores.

2.- Para

 limpiar el condensador (en los modelos que lo tengan) utilice 

un cepillo, trapo o esponja para eliminar el polvo acumulado. Procure 
hacerlo por lo menos cada seis meses. 

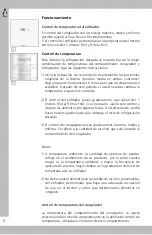
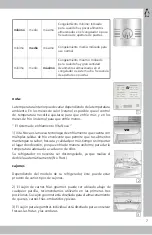
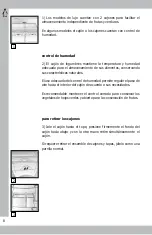
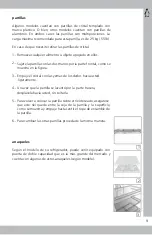
14

1

2  

Summary of Contents for MA021WIM

Page 1: ...RMV21WIM MA021WIM RMV21WIEM RMV21YIM MA021YIM RMV41WIM MA041WIM RMV51YIM MA051YIM RMV51ZLM RMV61WIM MA061WIM RMV61WIEM RMV71YIM MA071YIM RMV71ZLM RMV81WIM MA081WIM RMV91YIM No de parte 355B2090P001 REV 0 lea este instructivo antes de instalar su refrigerador ...

Page 2: ......

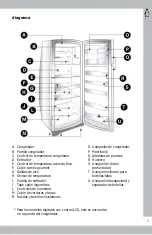
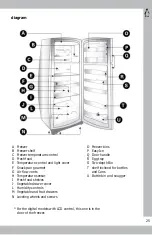
Page 3: ...egumbres Controles de humedad Cajón de verduras y frutas Ruedas y tornillos niveladores A B C D E F G H I J L M N Anaqueles de congelador Practihielo Jaladeras de puertas Huevera Anaquel de doble profundidad Anaquel inclinado para botellas latas Anaquel ultracapacidad y separador de botellas O P Q R S T U Para los modelos digitales con control LCD este se encuentra en la puerta del congelador 1 di...

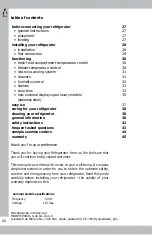
Page 4: ...brero No 1325 Nte Apdo postal 262 C P 76120 Querétaro Qro características eléctricas nominales Frecuencia 60 Hz Voltaje 115 V 2 diagrama 1 antes de conectar su refrigerador 3 indicaciones generales 3 colocación 3 nivelación 3 cómo instalarlo 4 instalación 4 primera conexión 5 funcionamiento 6 control de temperatura del enfriador 6 control de temperatura del congelador 6 sistema de enfriamiento vit...

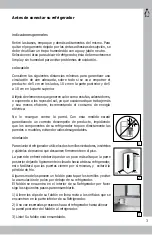
Page 5: ...á garantizando un correcto desempeño de producto impidiendo que los componentes de su refrigerador toquen directamente las paredes o muebles evitando ruidos desagradables nivelación Para nivelar el refrigerador utilice los dos tornillos niveladores insértelos y ajústelos de manera que descansen firmemente en el piso La parte de enfrente deberá quedar un poco más alta que la parte posterior dejando...

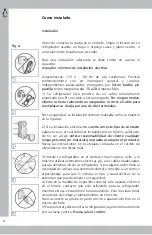
Page 6: ...dquiera uno el cual debe ser instalado por un técnico calificado de no ser así es entera responsabilidad de cliente cualquier riesgo personal y o material que pueda ocasionar el producto Revise las instrucciones en la etiqueta colocada en el cordón de alimentación con letras rojas 3 Instale su refrigerador en el contacto más cercano evite a lo máximo utilizar extensiones eléctricas y o unir cables...

Page 7: ...anas al congelador Su refrigerador cuenta con un dispositivo que evita la condensación El calentamiento de algunas zonas externas de su refrigerador es normal Esto ocurre para evitar la condensación de gotas de agua en el exterior de su refrigerador No obstante en condiciones de alta temperatura y alta humedad en el ambiente pudiera llegar a formarse una ligera condensación Seque con un trapo suav...

Page 8: ...río al 9 más frío Si es necesario ajuste este control y observe los alimentos por algunas horas Si usted requiere podrá hacer nuevos ajustes hasta que obtenga el nivel de refrigeración deseado El control del congelador posee graduaciones máxima media y mínima Se refiere a la cantidad de aire frío que será lanzado al compartimiento del congelador A temperatura ambiente la cantidad de apertura de pu...

Page 9: ...shielo automáticamente No Frost cajones Dependiendo del modelo de su refrigerador éste puede estar provisto de varios tipos de cajones 2 El cajón de carnes frías gourmet puede ser ubicado abajo de cualquier parrilla recomendamos utilizarlo en las primeras tres posiciones Su cajón gourmet está diseñado para el almacenamiento de quesos carnes frías embutidos y pizzas 3 El cajón para legumbres indivi...

Page 10: ...aracterísticas naturales El uso adecuado del control de humedad permite regular el paso de aire hacia el interior del cajón de acuerdo a sus necesidades Es recomendable mantener el control cerrado para conservar los vegetales de hojas verdes y abierto para la conservación de frutas para retirar los cajones 3 Jale el cajón hasta el tope presione firmemente el fondo del cajón hacia abajo y con la ot...

Page 11: ...de del mercado y cuenta con algunos de estos anaqueles según modelo 1 2 9 Remueva cualquier alimento u objeto apoyado en ellos Sujete la parrilla con las dos manos por la parte frontal como se muestra en la figura Empuje el cristal con las yemas de los dedos hacia usted ligeramente Una vez que la parrilla se levantó por la parte trasera desplácela hacia usted sin soltarla Para volver a colocar la ...

Page 12: ...cidad Anaquel con gran capacidad y versatilidad en la puerta Usted puede almacenar recipientes grandes y botellas de 4 lt Galón 3 anaquel inclinado para botellas y latas Anaquel que proporciona el espacio justo para almacenamiento de latas en la parte frontal y en la parte posterior de este anaquel usted podrá almacenar botellas altas Adicionalmente está ergonómicamente diseñado para que los produ...

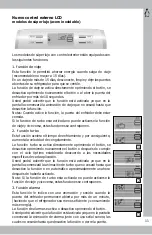
Page 13: ...lera el tiempo de enfriamiento y por consiguiente aumenta la velocidad de congelamiento La función turbo se activa directamente oprimiendo el botón se desactiva oprimiendo nuevamente el botón o después de cumplir con el ciclo óptimo establecido deacuerdo a las necesidades específicas de cada aplicación Usted podrá advertir que la función está activada ya que en la pantalla comenzará la animación d...

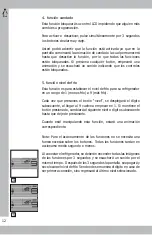
Page 14: ...n rango de 1 menos frío a 9 más frío Cada vez que presiones el botón nivel se desplegará el dígito subsecuente al llegar al 9 vuelve a empezar en 1 Si mantiene el botón presionado cambiará al siguiente nivel o dígito subsecuente hasta que deje de presionarlo Cuando esté manipulando esta función estará una animación correspondiente Nota Para el accionamiento de las funciones no se necesita una fuer...

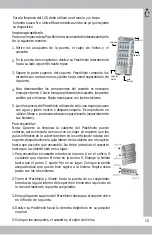
Page 15: ... más sencillo llenarlo verticalmente también puede hacerlo Las hieleras cuentan con un control de nivel de agua si usted lo excede el agua se derramará Con las perillas de frente a usted gire el cassette en sentido de las manecillas del reloj Las hieleras quedarán en posición horizontal Finalmente coloque de nuevo el cassette dentro del practihielo Desplácelo sobre sus rieles asegurando que llegue...

Page 16: ...y una utilización integral de cada porción Si desea congelar rápidamente alimentos o fabricar cubos de hielo se recomienda colocarlos sobre la parrilla del congelador Observe siempre la fecha de caducidad de los productos congelados indicada por el fabricante Una vez descongelado un alimento no podrá ser congelado nuevamente Los liquidos aumentan su volumen cuando son congelados Por eso tome la pr...

Page 17: ...aqueles el cassette y el cajón de hielos Retire los anaqueles de la puerta el cajón de hielos y el cassette En la puerta del congelador deslice su Practihielo lateralmente hacia su lado izquierdo hasta topar Separe la parte superior del soporte Practihielo tomando los laterales con ambas manos y jálela hacia usted separándolo de la puerta Para desensamblar los componentes del cassette es necesario...

Page 18: ...lazar su refrigerador de lugar meta los tornillos niveladores hasta el fondo fallas en el suministro de energía eléctrica La mayoría de las interrupciones en el suministro de energía eléctrica son corregidas en pocas horas La temperatura interior no se afecta hasta antes de 4 horas Si la falla eléctrica persiste por más de 6 horas le sugerimos que introduzca bolsas de hielo en ambos compartimiento...

Page 19: ...re cuando el producto está haciendo el deshielo ruido del sistema de ventilación Ruido característico de ventilador que muestra que el sistema Vita Nova está en perfecto funcionamiento ruido de burbujeo de agua Ruido característico de burbujeo de agua en el sistema de deshielo que impide la entrada de calor a la unidad cambio de foco Algunos modelos poseen iluminación en el enfriador y el congelad...

Page 20: ...l enfriador quite la cubierta foco tomándola de la parte más lejana presione hacia usted y saque hacia adelante y abajo sacando la lengüeta de la cubierta Sustituya el foco Para colocar la cubierta siga estas instrucciones a la inversa Precaución No toque las paredes interiores del congelador con las manos mojadas Evite que los niños se cuelguen de las puertas y o jueguen cerca del refrigerador cu...

Page 21: ...Preguntas frecuentes y guía de funcionamiento 19 ...

Page 22: ...sco 0133 36 69 3125 La Paz Revolución 2125 entre Allende y B Juárez Centro 23000 La Paz B C Sur 01612 12 5 99 78 León Prolongación Juárez 2830 B Plaza de Toros 37450 León Guanajuato 01477 7 70 00 03 06 y 07 Matamoros Porfirio Muñoz Ledo 22 Magisterial Cebetis 87390 Matamoros Tamaulipas 01868 817 6673 Fax 817 6959 Mérida Calle 22 323 X 13 y 13a Ampliación Cd Industrial 97288 Mérida Yucatán 01999 94...

Page 23: ...ondiciones distintas de las normales Si no ha sido operado de acuerdo con el instructivo de uso proporcionado en idioma español Si el producto ha sido alterado o reparado por personas y o talleres de servicio no autorizados 7 Limitaciones de la garantía Esta garantía no será válida Si no presenta la póliza de garantía debidamente sellada factura nota o algún otro documento que acredite la fecha de...

Page 24: ...22 ...

Page 25: ...rte 355B2090P001 REV 0 read this guide before installing your refrigerator Models RMV21WIM MA021WIM RMV21WIEM RMV21YIM MA021YIM RMV41WIM MA041WIM RMV51YIM MA051YIM RMV51ZLM RMV61WIM MA061WIM RMV61WIEM RMV71YIM MA071YIM RMV71ZLM RMV81WIM MA081WIM RMV91YIM 23 ...

Page 26: ...24 ...

Page 27: ...esh food shelves Vegetable drawer cover Humidity controls Vegetable and fruit drawers Leveling wheels and screws A B C D E F G H I J L M N Freezer bins Easy Ice Door handle Egg tray Two depth Bin shelf inclined for bottles and Cans Bottle bin and snugger O P Q R S T U For the digital models with LCD control this one is in the door of the freezer diagram ...

Page 28: ... de Febrero No 1325 Nte Apdo postal 262 C P 76120 Querétaro Qro nominal electric specifications Frequency 60 Hz Voltage 115 V 26 before connecting your refrigerator 27 general instructions 27 placement 27 leveling 27 installing your refrigerator 28 installation 28 first connection 29 functioning 30 fresh food compartment temperature control 30 freezer temperature control 30 vita nova cooling syste...

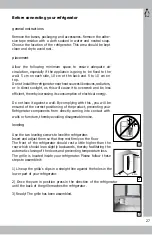
Page 29: ...against a wall By complying with this you will be ensured of the correct positioning of the product preventing your Refrigerator components from directly coming into contact with walls or furniture thereby avoiding disagreeable noise leveling Use the two leveling screws to level the refrigerator Insert and adjust them so that they rest firmly on the floor The front of the refrigerator should rest ...

Page 30: ...ped with this kind of AC outlet obtain one and have it installed by a qualified electrician Any personal accidents and or material damage caused by the product resulting from failure to do this will be the full responsability of the client Read the instructions printed in red ink on the label attached to the power cable 3 Connect your refrigerator to the closest AC outlet Avoid using extension cor...

Page 31: ...events condensation of the drops of water on the exterior of your refrigerator However in conditions where there is high atmospheric temperature and humidity a light film of condensation could form Dry this with a soft cloth first connection If you live in an area where are power surges exercise the following precautions Once your refrigerator is in place wait 4 to 6 hours before connecting it so ...

Page 32: ...a few hours If you need to you can make further adjustments until you obtain the desired level of refrigeration The freezer control has maximum medium and minimum settings This refers to the amount of cold air that will be sent into the freezer compartment At room temperature the amount the doors are opened will have an effect on your product s performance therefore the higher the room temperature...

Page 33: ...rigerator as it defrosts automatically No Frost drawers Your refrigerator come equipped with various types of drawers depending on the model 2 Depending on the model your refrigerator may be fitted with our gourmet snack pan This snack pan may be placed under any shelf we recommend it should be used in the first three positions Your gourmet snack pan is designed for storing cheese cold cuts saussa...

Page 34: ...eir natural characteristics The correct usage of the humidity control ensures the adequate flow of air into the interior of the drawer It is recommended to use the humidity control closed to preserve green vegetables and open to preserve fruit to remove the drawers 3 Pull the drawer out as far as it will go press the rear of the drawer down firmly and simultaneously pull it out with the other hand...

Page 35: ...ingertips gently pull the shelf towards you 4 Once the rear section of the shelf is lifted pull it towards you taking care to grasp it firmly 5 To replace the shelf on the desired support make sure that the support is between the shelf edge and the surface as shown in the picture and push until you feel the catch of the shelf joint 6 To change the position of other shelves proceed in the same mann...

Page 36: ...if overloaded 2 Bottle bin A bin with a large storage capacity and great versatility on the inside of the door Suitable for storing large recipients and 4 liter bottles Gallon 3 shelf inclined for bottles and Cans A bin which provides adequate space for the storage of cans on the front part the rear part is for storing tall bottles Additionally it is designed ergonometrically so that products can ...

Page 37: ...vice versa these functions are opposed 2 turbo function This function accelerates the cooling process and so it increases the freezing speed The turbo function activates directly pressing the button it deactivates by pressing the button again or after accomplishing the optimal cycle You will notice when the function is activated since the turbo animation will be in motion until you deactivate the ...

Page 38: ...tor from 1 less cold to 9 coldest Each time you press the level button the next subsequent number will appear when it reaches 9 it wil start all over from 1 If you keep pushed the level button the subsequent numbers will continue appearing untill you left the button At the same time an animation will show up in the screen Note For the activation of the functions you don t need to press hard the bu...

Page 39: ... will go And wait for the ice to be made Be sure to dry all excess of water from the bottom of the cassette before putting it in freezer Turn or twist each knob in the clockwise direction until the ice cubes fall into the drawer below The drawer can only store the ice from the three molds Make sure the ice drawer is empty before unmolding the next bath of ice Clean the surface under the drawer at ...

Page 40: ...acilitates quicker and more effective freezing We recommend placing food that you would like to freeze rapidly or ice cubes on the freezer shelf Always take note of the manufacture s expiring date on frozen products Once food has been defrosted it cannot be frozen Liquids increase in volume when frozen For this reason do not fill recipients up to the brim with liquids Do not store closed glass rec...

Page 41: ... to the left as far as possible Remove the upper part of the Easy Ice from its mount holding the sides in both hands and pulling it towards you away from the door To disassemble the cassette s components you must push the pin C outwards to free it from the cassette The knobs will come off on their own Repeat these steps with the three ice molds Wash the parts of the Easy Ice using just a soft spon...

Page 42: ...ansport it place it only on its left side when viewing your refrigerator from the front Before changing your refrigerator s location screw the leveling screws in as far as they will go problems with electrical supply The majority of power cuts are corrected in hours The interior temperature of your refrigerator will not be affected for 4 hours If the electrical failure persists for more than 6 hou...

Page 43: ...frigeration system It is similar to the noise heard when filling a gas cylinder defrosting This sounds like running water This occurs when the refrigerator is going through the defrosting process bubbling water This occurs in the defrosting cycle and stops heat from entering the unit Light Bulb Change Some models are fitted with light in the refrigerator and the freezer others only have light in t...

Page 44: ...tment remove the bulb cover from the far side push towards you and take out to the front and downwards Replace the bulb And follow these instructions in the reverse order safety instructions Do not touch the interior walls of the Freezer with wet hands Do not allow children to hag from the doors and or play near the Refrigerator when the door is open as they could get injured or trapped inside Whe...

Page 45: ...watts and one minimum current of 10 amperes Connect other appliance to this outlet to verify it and change the socket if necessary Connect the plug Call an authorized Service Center See installation instructions See installation instructions See installation instructions If environmental humidity is above 75 RH this is normal Check there are not objects obstructing the door closing Adjust the leve...

Page 46: ... 00 03 06 y 07 Matamoros Porfirio Muñoz Ledo 22 Magisterial Cebetis 87390 Matamoros Tamaulipas 01868 817 6673 Fax 817 6959 Mérida Calle 22 323 X 13 y 13a Ampliación Cd Industrial 97288 Mérida Yucatán 01999 946 0275 0916 3090 3428 y 3429 México D F Prol Ings Militares 156 San Lorenzo Tlaltenango 11210 México D F 0155 52 27 1000 Monterrey Carretera Miguel Alemán Km 5 Vista sol 67130 Cd Guadalupe NL ...

Page 47: ...anty will not be valid in the following cases If the duly signed warranty an invoice sales receipt or any other document that proves the date of purchase of the product is not presented If the warranty has expired and is not within the warranty perio authorized by the manufacturer If the product has been used for commercial purposes professional services or any other use that is not wholly domesti...

Page 48: ...46 ...

Page 49: ...47 Notas ...

Page 50: ...48 Notas ...

Page 51: ...49 ...

Page 52: ......

Reviews: