background image

5.0 The First Print! 

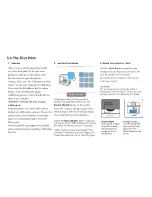
1. Calibrate

Often a successful first print layer leads 
to a successful print! To be sure your 
printer is ready for its first print, select 
the Gear Icon to open the printer 
settings. Then go to the Calibration section 
where you can select Advanced Calibration. 
Now select the Recalibrate Bed Location 
button. This will begin the Quick 
Calibration process, which should take no 
more than 5 minutes.  

*DO NOT TOUCH The Pro During 

Calibration*

Keep the printer on a level/stable surface 
during any calibration sequence. There is the 
option in the M3D Software to manually 
adjust the calibration height of your Pro. 
Please visit
www.PrintM3D.com/support for detailed 
videos and documents regarding calibrating 
The Pro.

2. Load the First Model

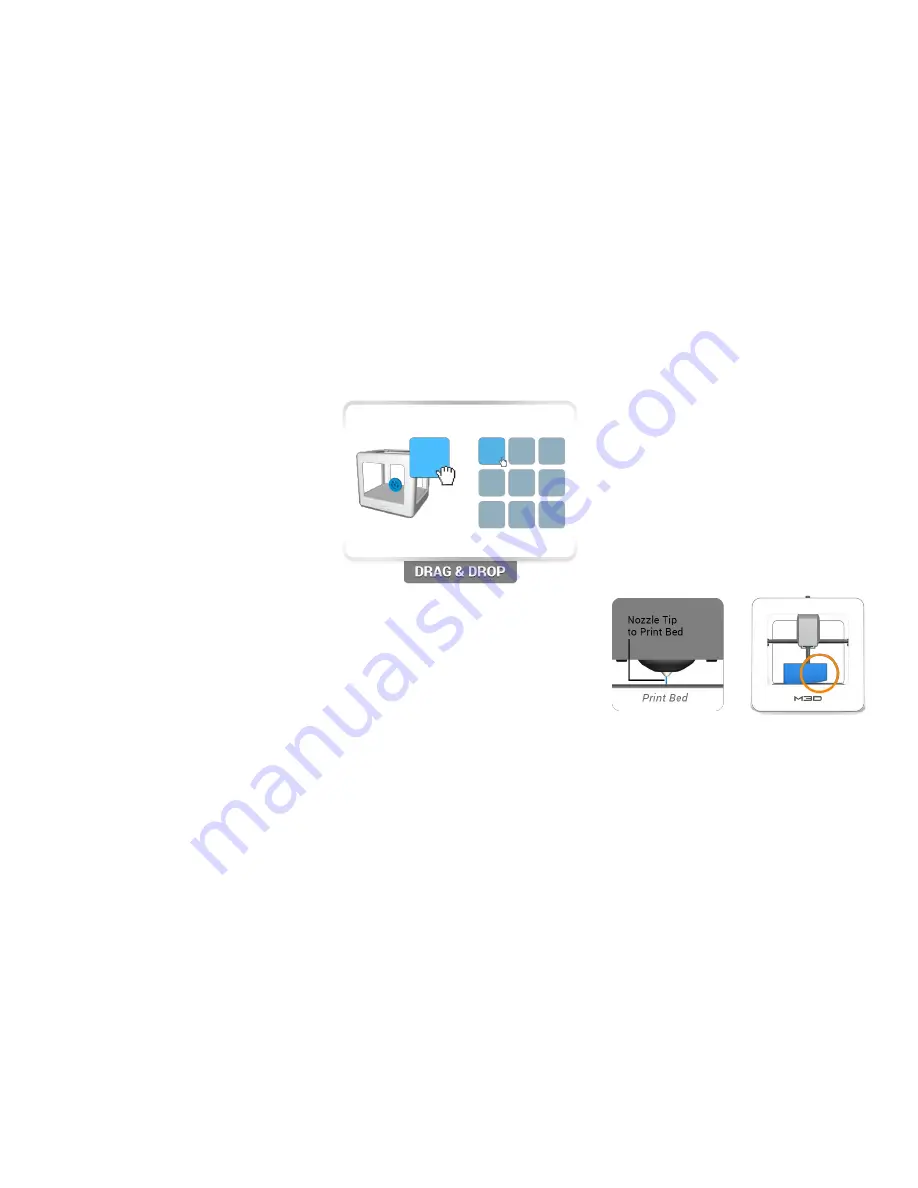
Loading a model into the printer is 

simple; just drag the model from the  

Recent Models         


library to the printer. 

Your first model is already loaded in the 
M3D Software. We recommend printing 
this model first as a test calibration. 

Select the     

Open Model                                                                   


button in the top 

left corner of the M3D Software to browse 

for other 3D Models on your computer. 
Other models can be downloaded from 

sites like Thingiverse.com and Yeggi.com. 

These files must be .STL or .OBJ file types. 

3. Watch Your First Pro Print!

Click the       

Green Button

 to open the print 

settings menu and begin your first print. For 
your first model, we have already 
pre-loaded the best settings, so all you have 
to do is press print! 

*Look Out!*

We encourage you to get into the habit of 

watching the first few layers of your print and 

paying attention to the following two things:

Nozzle Height 
Only a piece of paper 
should fit between 
the print bed and 
nozzle tip. If not, 
Recalibrate! 

Peeling/Warping


You should typically 
stop your print and 
adjust the User 
Offset Values in that 
corner. 

Summary of Contents for PRO

Page 1: ...The M3D PRO 3D Printer User Manual...

Page 2: ...ontent features and news www PrintM3D com Downloads Find new software 3D models and in depth documentation www PrintM3D com Support View our expansive customer support network technical articles and F...

Page 3: ...ro is completely free of the box remove the foam from the bottom of the printer Next flip the printer over and remove the foam from the top of the printer Lastly remove any additional tape and packagi...

Page 4: ...rol Panel this will prevent Windows Automatic Updates from restarting your computer resulting in a print failure while The Pro is in operation 3 0 Connect and Power The Pro Figure Rear view of The Pro...

Page 5: ...you are loading filament apply constant force on the filament to push it forward into the extruder gear A good way to test if the filament is caught is to lightly pull back and forth on the filament...

Page 6: ...le just drag the model from the Recent Models library to the printer Your first model is already loaded in the M3D Software We recommend printing this model first as a test calibration Select the Open...

Page 7: ...t is the heated bed for A heated bed is a feature for 3D printing and has many benefits that will help improve the quality of your prints A heated bed helps with removing a printed model from the prin...

Page 8: ...s PRECAUTION None of components of The M3D Pro 3D Printer or parts printed from it should be used for medical applications such as but not limited to implantation drug delivery or ingestion PRECAUTION...

Page 9: ...user agreement and the limited warranty may have been provided as a physical copy where required by law with the initial customer purchase A digital copy of this agreement and the end user agreement...

Page 10: ...www printM3D com M3D 3D Ink and Print Anything are registered trademarks of M3D LLC in Fulton MD...

Reviews: