background image

NASH 

MC/MM PHONO PREAMPLIFIER 

REVISION P

R

A – JUNE 2018 


Copyright © 2018, M2Tech Srl 

27

M2Tech 

www.m2tech.biz 


10. Setting MM input resistance and capacitance 

 
The 

NASH

 is provided with a dedicated MM input. Correct input resistance and capacitance 

are overly important to obtain the best performance by an MM cartridge, as well as by a 
high output MC cartridge or other technology cartridges with output level 1mV to 5mV. 
Most MM cartridges need a load resistance of 47 kOhms, which is the standard input 
resistance of most MM phono preamplifiers. On the other hand, many medium and high 
output MC cartridges work better with a lower value, around 15 kOhms. The 

NASH

 offers 

both values, which can be selected by the rear panel DIP-switches (Fig.2, 10). 
 
MM cartridges are also very sensitive to the capacitive load: many of them work better 
when the phono preamplifier’s input impedance is slightly capacitive. As the 

NASH

 MM input 

has a very small capacitance, user can add more capacitance by the rear panel DIP-
switches. Capacitance base values are 100pF, 220pF and 470pF. By setting more than 
one value, user can also set 320pF, 570pF, 690pF and 790pF. 
 
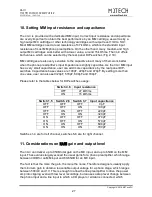
Please refer to the tables below for DIP-switches usage: 
 

Switch 4,8 

Input resistance 

OFF 

47 kOhms 

ON 

15 kOhms 


Switch 1,5 

Switch 2,6  Switch 3,7  Input capacitance 

OFF 

OFF 

OFF 

0pF 

OFF 

OFF 

ON 

100pF 

OFF 

ON 

OFF 

220pF 

OFF 

ON 

ON 

320pF 

ON 

OFF 

OFF 

470pF 

ON 

OFF 

ON 

570pF 

ON 

ON 

OFF 

690pF 

ON 

ON 

ON 

790pF 

 
Switches 1-4 are for left channel, switches 5-8 are for right channel. 
 

11. Considerations on 

NASH

 gain and output level 

 
The 

NASH

 can deliver up to 95dB total gain on the MC input, and up to 65dB on the MM 

input. These values largely exceed the usual gains for a phono preamplifier, which range 
between 40dB for an MM input and 60-65dB for an MC input. 
 
The fact is that the more the gain, the more the noise. Therefore designers usually apply 
the minimum gain to obtain a reasonable output voltage for a phono stage, which ranges 
between 500mV and 1V. This is enough to allow the line preamplifier to drive the power 
amp into clipping even with low level recordings, but causes a step level change between 
the phono input and a line input to which a CD player or similar is connected, which 

Summary of Contents for NASH

Page 1: ...M2TECH NASH MC MM PHONO PREAMPLIFIER USER MANUAL REV PrA 6 2018 ...

Page 2: ...NASH MC MM PHONO PREAMPLIFIER REVISION PRA JUNE 2018 Copyright 2018 M2Tech Srl 2 M2Tech www m2tech biz ...

Page 3: ...r equipment in the system must be done when all equipment are off Failing to comply with this advice may lead to damage to the NASH The label above printed on the product case indicates that the product when no more usable can t be treated as generic garbage but must be disposed of at a collection point for recycling of electrical and electronic equipment in compliance with the WEEE regulation Was...

Page 4: ...rol and set up to the trigger input NASH is designed for low noise operation to deliver the same output level as any modern digital source We re sure that your expectations will be fulfilled by purchasing NASH your hi fi system will exhibit an incredible increase of its sonic performance so you can now prepare for a whole new listening experience Nadia Marino CEO Please note here your NASH serial ...

Page 5: ...the MM input is used 19 7 2 5 MM FILTER 16Hz setting the high pass filter for the MM input 20 7 2 6 AUTO OFF Setting the Automatic Switch off 20 7 2 7 STANDBY LED Setting the Front Panel LED behaviour 21 7 2 8 POWER MODE Setting the NASH behaviour when power is applied 21 7 2 9 REMOTE ON OFF Setting the NASH to Accept Ignore the IR Remote ON OFF command 22 7 2 10 BLUETOOTH Enabling Disabling the B...

Page 6: ...NASH MC MM PHONO PREAMPLIFIER REVISION PRA JUNE 2018 Copyright 2018 M2Tech Srl 6 M2Tech www m2tech biz ...

Page 7: ...tact your retail dealer Remove the NASH from the cardboard tray enclosure and place it onto a stable base far from heat sources Avoid full sunlight on the unit Allow for ample room around the unit for venting and for easy connection between NASH s Bluetooth module and your smartphone tablet The NASH is a high efficiency low power design therefore very low power is lost in heat Anyway an adequate a...

Page 8: ...NASH MC MM PHONO PREAMPLIFIER REVISION PRA JUNE 2018 Copyright 2018 M2Tech Srl 8 M2Tech www m2tech biz ...

Page 9: ...e this LED blinks to indicate to the user that the device can be switched on by the included remote control This LED is steadily lit during the firmware update procedure 3 IR receiver Aim the remote control to this point to send commands to the NASH 4 Display Multifunction OLED display During normal operation it indicates the selected source the gain of MM stage and the status of high pass filter ...

Page 10: ...NASH MC MM PHONO PREAMPLIFIER REVISION PRA JUNE 2018 Copyright 2018 M2Tech Srl 10 M2Tech www m2tech biz ...

Page 11: ...ions Resistance can be selected 10 Ohms to 1000 Ohms 8 MC input Connect a low output cartridge typically less than 1mV Female RCA 9 MM input Connect a medium or high output cartridge typically 1 5mV Female RCA 10 MM input resistance and capacitance selection DIP switches When using the MM input set these switches according to the app or following your cartridge s manual indications See chapter 10 ...

Page 12: ... 2018 M2Tech Srl 12 M2Tech www m2tech biz 16 Trigger input Connect the trigger output of another device to automatically power the NASH on and OFF 5VDC to 15VDC accepted 3 5mm jack 17 Bluetooth module antenna Keep clear from metal shields for optimal communication ...

Page 13: ...r key DAC AMP or PLAYER blinks instead the NASH will not receive the command In this case press the PHONO key to select the right commands codes for the NASH Below is a brief description of the relevant keys for the NASH Standby key This allows for putting the NASH in standby mode prolonged push and for awakening it DIM Display dimming PHONO Instructs the remote to send commands using the phono sy...

Page 14: ...NASH MC MM PHONO PREAMPLIFIER REVISION PRA JUNE 2018 Copyright 2018 M2Tech Srl 14 M2Tech www m2tech biz ...

Page 15: ...frequency response an MC cartridge can be directly connected to the MM input Connect the NASH output Fig 2 12 to your preamplifier or integrated amplifier input If the trigger feature is to be used connect a mono cable with 3 5mm jack to the NASH trigger input Fig 2 16 WARNING Be sure to apply a voltage in the allowed range Connect the stock wall adaptor to the NASH power input Fig 2 15 and to a w...

Page 16: ...NASH MC MM PHONO PREAMPLIFIER REVISION PRA JUNE 2018 Copyright 2018 M2Tech Srl 16 M2Tech www m2tech biz ...

Page 17: ...sired source is displayed Then press the encoder again to confirm the new source will be selected Should the user change his her mind and keep the current source it is sufficient to push the button to the left of the front panel item 1 Fig 1 or avoid doing anything else After a few seconds the NASH will automatically return in its idle status without changing the source setting Sources can also be...

Page 18: ...FF mode the display is always off except when a command is executed In ALWAYS ON mode the display is always on To set the backlight mode it is necessary to access the first menu item or to use the DIM key on the remote control This feature is applied in real time to give user the possibility to immediately see the results a short message indicating the present setting appears on the display when t...

Page 19: ...e may enable or disable the high pass filter accessing this menu item Like the MC gain setting this setting only relates to the MC input and doesn t affect the same setting for the MM input 7 2 4 MM GAIN Setting the gain of the MM stage when the MM input is used This setting allows for choosing the gain of the MM stages when the MM input is used The MM gaoin can be set to one of three value 55dB 6...

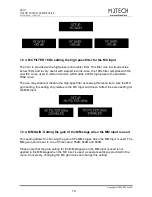
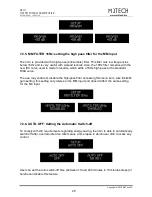
Page 20: ... a 16Hz high pass to the standard RIAA curve The use may enable or disable the high pass filter accessing this menu item Like the MM gain setting this setting only relates to the MM input and doesn t affect the same setting for the MC input 7 2 6 AUTO OFF Setting the Automatic Switch off To comply with UE requirements regarding energy saving the NASH is able to automatically switch off after a cer...

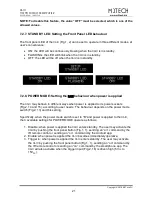
Page 21: ...power sockets Fig 2 14 and 15 according to user needs The behaviour depends on the power mode switch Fig 2 13 and this setting Specifically when the power mode switch is set to B and power is applied to the NASH the 3 available settings for POWER MODE operate as follows 1 Disable when power is applied the NASH enters standby The user may activate the NASH by pushing the front panel button Fig 1 1 ...

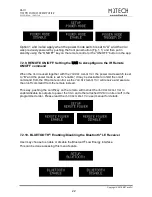
Page 22: ... is set to B and the power mode is set to enable it may be desirable to inhibit the on off command from the IR remote control as the VAN DER GRAAF MKII will receive and execute the on off command from the remote instead This way pushing the on off key on the remote will instruct the VAN DER GRAAF MKII to enable disable its outputs to power the NASH and other attached M2Tech units on off in the pro...

Page 23: ... devices in your smartphone Please note that in the real world the 4 letter ABCD are replaced by a unique value for your NASH 7 2 12 FIRMWARE REVISION Accessing Firmware Revision Information All NASH features are handled by a microcontroller It may be useful to check the version of the firmware executed by the microcontroller using this menu feature 7 2 13 DEFAULT Restoring Factory Settings User m...

Page 24: ...NASH MC MM PHONO PREAMPLIFIER REVISION PRA JUNE 2018 Copyright 2018 M2Tech Srl 24 M2Tech www m2tech biz ...

Page 25: ...panel button Fig 1 1 or by sending an ON OFF command by the IR remote control or by the smartphone app The setting with the power switch mode in B and the power mode set to enable is very useful when using the Van Der Graaf MkII or any other external power supply with on off switch to power the NASH 9 Setting MC input resistance and gain The NASH is provided with an internal MC preamplifier which ...

Page 26: ...NASH MC MM PHONO PREAMPLIFIER REVISION PRA JUNE 2018 Copyright 2018 M2Tech Srl 26 M2Tech www m2tech biz ...

Page 27: ...es Capacitance base values are 100pF 220pF and 470pF By setting more than one value user can also set 320pF 570pF 690pF and 790pF Please refer to the tables below for DIP switches usage Switch 4 8 Input resistance OFF 47 kOhms ON 15 kOhms Switch 1 5 Switch 2 6 Switch 3 7 Input capacitance OFF OFF OFF 0pF OFF OFF ON 100pF OFF ON OFF 220pF OFF ON ON 320pF ON OFF OFF 470pF ON OFF ON 570pF ON ON OFF 6...

Page 28: ...ore the passive RIAA equalizer and in the second MM amplifier with slight changes to adapt it to the specific functions To ensure the best noise performance low noise regulator were used throughout with the MC preamplifier powered by a proprietary discrete components ultra low noise dual regulator Thanks to these low noise amplifiers the NASH can deliver at least 2 5V at its output with every cart...

Page 29: ...tance 0 100 220 320 470 570 690 790 pF MC input resistance 10 Ohms to 1000 Ohms Output level 2 5Vrms MM 5mVrms in 55dB gain SNR 90dBA MM 5mVrms in 55dB gain 80dBA MC 0 48Vrms 75dB gain THD N 0 005 2 8Vrms out Frequency response RIAA 0 5dB 20Hz 20kHz Supply voltage 15VDC Power consumption 5W Input 5 5 2 1mm barrel jack with positive on internal External supply voltage 15V 15V 5V Size 200x50x200mm w...

Reviews: