Light Bulb Replacement
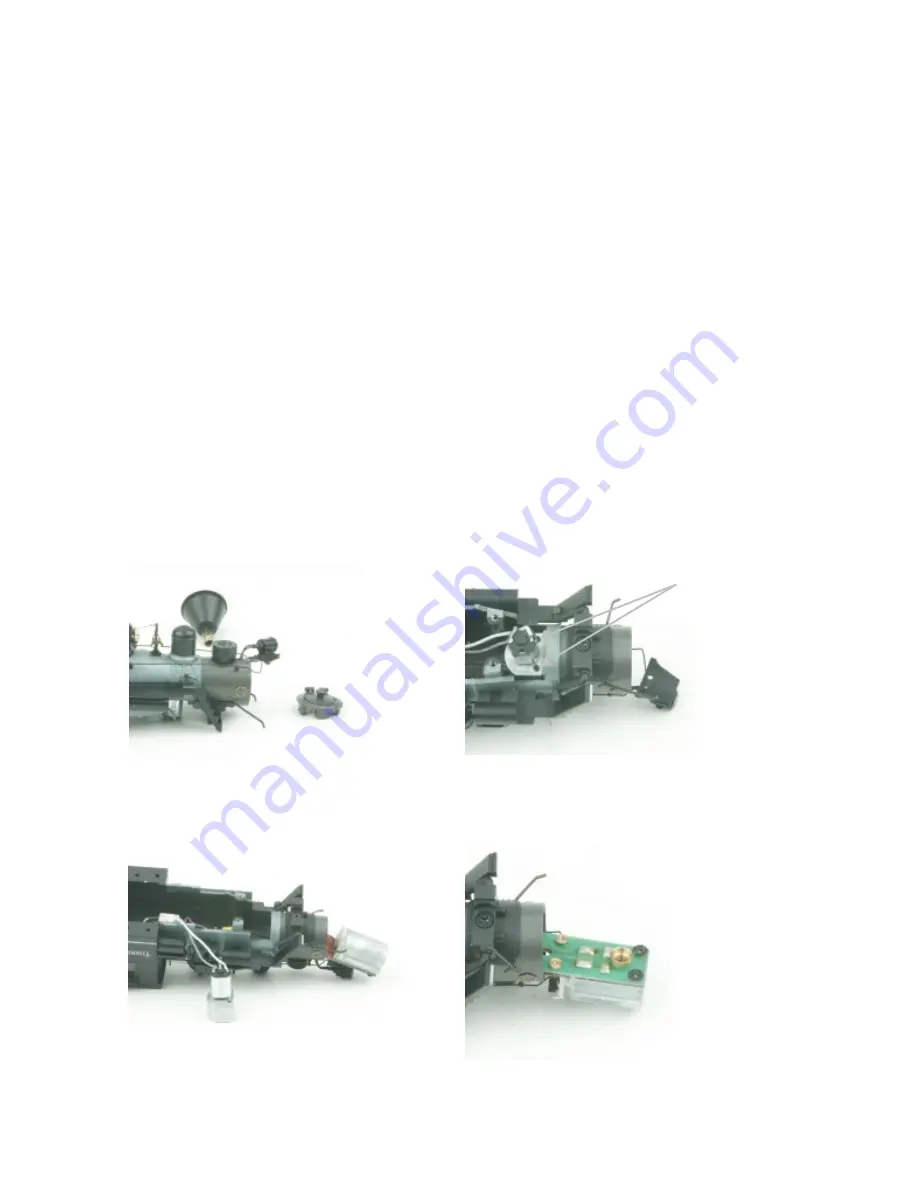
To replace the light bulb in the locomotive, follow these instructions and see the
diagrams below:
1. Remove the boiler from the chassis as shown in fig. 6 on page 10.
2. Unscrew and remove the smokestack by twisting it counterclockwise.
3. Remove the 2 screws holding the headlight frame in place.
4.Remove the smokebox front.
5. Undo the connectors in the boiler for the headlight and the smoke unit heating
elements.
6.Remove the 2 mounting screws for the smoke unit fan housing and separate the fan
housing from the smoke unit.
7.Pull the smoke unit forward through the front of the smokebox.
8.Pull the light bulb out of the grommet in the back of the headlight shell.
9.Insert the new bulb into the back of the headlight shell.
10.Reverse the disassembly process while being careful not to pinch the wires during
the re-assembly.
11.Make sure the boiler braces are in correct position before reinserting the smoke unit.
Figure 10: Replacing the Headlight
Figure 11: Replacing the Headlight
Premier Climax Steam Locomotive
13


