background image


25 

3. Do not leave open flame under the hood. When removing pots from the burners set 
the flame to its minimum level. 
4.  Any  food  cooked  in  fat  shall  be  constantly  monitored,  since 
overheated fat can ignite very easily. 
5. The textile grease filter should be replaced, and the aluminium 
filter  should  be  cleaned  at  least  every  2  months  in  connection 
with the existing fire danger (saturated fat is very flammable). 
6. Pull the plug of the power cord from a wall socket before any 
filter cleaning  or repair operation. 
7. If any other non-electric devices are used in the same room as 
the hood (e.g. liquid fuel ovens, flow-through or volumetric water 
heaters),  it  is  necessary  to  provide  appropriate  ventilation  (air 
supply).  Safe  operation  is  possible  when  during  simultaneous 
operation of the hood and combustion devices dependent on air 
supply  the  negative  pressure  of  not  more  than  0.004  milibar  is 
maintained at the location of these devices inside the room (this 
point  does  not  apply  when  the  hood  is  used  as  an  odour 
absorber). 
8. When connecting to 230V power supply network use an electric socket in working 
order.   
 

V. Installation 

To install the hood perform the following operations: 
1. mount the hood body 

A

2. connect the hood to power supply network. 
 

2.


Installation of the hood body 

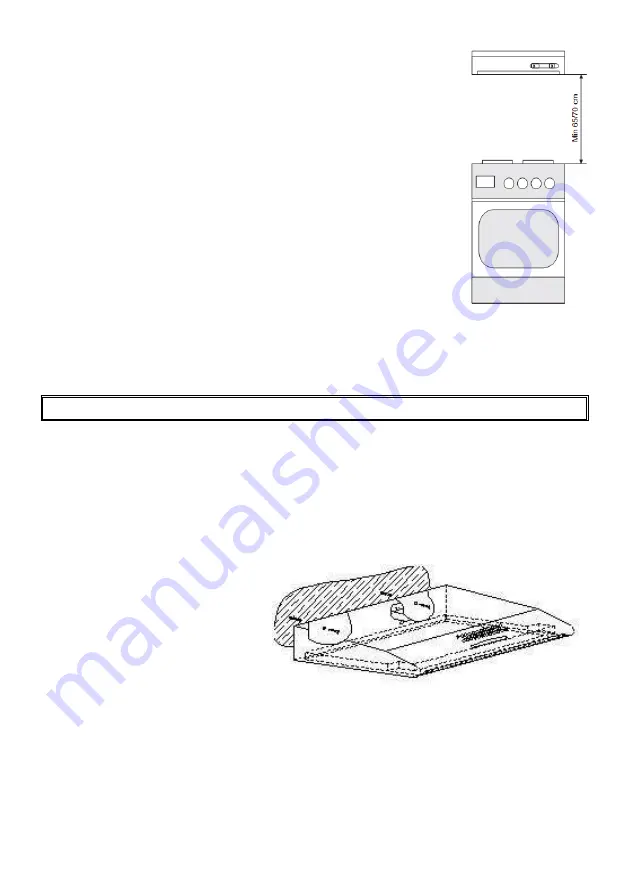
a) trace a vertical line on the wall to indicate the center of the cooker plate, dismantle 
the grease filter, hold the hood body „A” to the wall with its indicated center point on 
the vertical line, with the 
distance between the holes and 
the cooker plate at least 710 mm 
(Fig. 2). Note: make sure that the 
hood body „A” is level. 


b)  mark  the  locations  of 

fixing holes on the wall 
 

c) drill the holes as marked on the wall, using drills of diameter corresponding 

to the attached expansion plugs, drive the plugs in and then screw the hood body „A” 
to the wall (Fig. 3).  


3.


Connecting to the power network and operation check 

Summary of Contents for MOK620WT

Page 1: ...bauhaube MOK620WT MOK620IX MOK600WT ACHTUNG Der Hersteller bernimmt keine Verantwortung f r die Schaden die auf Nichtbeachten der Montage und Gebrauchsanweisungen dieser Betriebsanleitung zur ckzuf hr...

Page 2: ...ig Die Abzugshaube ist ein Elektroger t in Feuerschutzausf hrung Klasse II mit integrierten Anschlusskabel und Stecker Au erdem ist das Ger t mit eigener Beleuchtung und einem Abzugsl fter mit 3 einst...

Page 3: ...dbar werden 6 Vor jeglicher Reinigung Filteraustausch oder Reparatur das Ger t von der Stromversorgung trennen den Stecker aus der Steckdose herausziehen 7 Sollten in dem Raum neben dem Dunstabzug auc...

Page 4: ...s A b auf der Wand den Abstand zwischen den Bohrungen markieren c L cher bohren Bohrer mit Durchmesser entsprechend f r die beigelegten D bel verwenden Spreizd bel schlagen und das Geh use mit Schraub...

Page 5: ...r gem den Vorschriften des Herstellers gereinigt werden Bei intensiver Benutzung ber 4 Stunden pro Tag reinigen Sie die Filter oder wechseln Sie diese fter aus Lassen Sie die Flamme Ihres Gasherdes ni...

Page 6: ...ohleaktivfilter a Wirkungsweise Kohleaktivfilter C Abb 6 nehmen Ger che bis zur Filters ttigung auf Sie k nnen noch gereinigt weder wiederverwertet werden und sollen mindestens alle 2 Monate bei inten...

Page 7: ...7 FR Les hottes de cuisine MOK620WT MOK620IX MOK600WT...

Page 8: ...stensiles du foyer r gler la flamme au minimum 4 Les plats cuisin s l huile doivent tre sous constante surveillance car l huile chaude est tr s inflammable 5 Le filtre graisses de la hotte doit tre ch...

Page 9: ...rective Europ enne 2002 96 EC concernant les appareils lectriques usag s WEEE CARACTERISTIQUES Les hottes de cuisine MOK620WT MOK620IX MOK600WT servent l vacuation des manations de cuisine Cela exige...

Page 10: ...fonctionnement Extracteur ou absorbeur Couleur Blanc MONTAGE Pour installer la hotte effectuer comme suit 1 Fixer le bo tier de la hotte la hauteur appropri e fig 2 2 Raccorder la hotte au conduit de...

Page 11: ...lis e comme absorbeur ne pas boucher les trous de conduit d air se trouvant en partie sup rieure de la hotte si la hotte doit tre utilis e comme extracteur et si l orifice du conduit d vacuation doit...

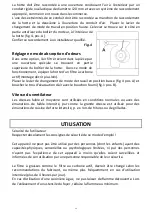
Page 12: ...sse fig 4 pos A et boucher le trou d vacuation d air avec le bouchon fourni fig 1 pos B Vitesse du ventilateur Les vitesses faible et moyenne sont utilis es en conditions normales ou avec des manation...

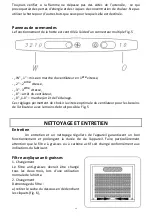
Page 13: ...e Ces r glages permettent de choisir la vitesse optimale du ventilateur pour les besoins de l utilisateur avec le moins de bruit possible Fig 5 NETTOYAGE ET ENTRETIEN Entretien Un entretien et un nett...

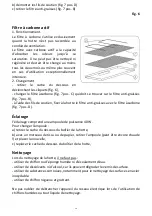
Page 14: ...aide des fils de soutien fixer la hotte le filtre anti graisses avec le filtre carbone fig 7 pos D clairage l clairage comprend une ampoule de puissance 40 W Pour changer l ampoule a retirer le cache...

Page 15: ...15 NL De afzuigkappen MOK620WT MOK620IX MOK600WT...

Page 16: ...er de afzuigkap geen open vlam branden Draai de vlam naar het minimum als u een pan van de brander afhaalt 4 Houd continu toezicht als u gerechten bereidt met vetten Oververhit vet kan makkelijk in br...

Page 17: ...zijn Houd de folie buiten bereik van kinderen om risico s te voorkomen Dit apparaat bezit het keurmerk in overeenstemming met de Europese richtlijn 2002 96 EG over afgedankte elektrische en elektronis...

Page 18: ...Diepte cm 47 Hoogte cm 14 Uitstroomopening mm 120 Capaciteit m3 h max 335 Opgenomen vermogen 135 Geluidsniveau dBA 51 Nettogewicht kg 6 Werkingsmogelijkheden Afzuigen of absorberen Kleur Wit MONTAGE...

Page 19: ...ordt gebruikt b boor de benodigde gaten in de onderkant van het kastje en bevestig de behuizing van de afzuigkap met behulp van eerder gekochte schroeven Attentie als u de afzuigkap gebruikt om geuren...

Page 20: ...ordt de lucht gefilterd en weer teruggeblazen in de ruimte door de speciale openingen die zich in het bovenste gedeelte van de behuizing van de afzuigkap bevinden Bij deze instelling moet u een actiev...

Page 21: ...en dan waarvoor hij bestemd is Bedieningspaneel De werking van de afzuigkap wordt gecontroleerd met behulp van een gecombineerde schakelaar Afb 5 W 1 inschakelen van de eerste snelheid van de motor va...

Page 22: ...afb 7 pos c dat zich op het anti vetfilter bevindt afb 7 pos B bevestig het anti vetfilter en het actieve koolfilter aan de afzuigkap met behulp van het draad afb 7 pos D REINIGING EN ONDERHOUD Verlic...

Page 23: ...23 GB Cooker hood MOK620WT MOK620IX MOK600WT...

Page 24: ...anent supply cord and plug It has its own lighting and an exhaust fan which can be set to one of three rotational speeds II Technical data Power supply voltage AC 230V 50 Hz Fan motor 1 Lighting 40 W...

Page 25: ...ative pressure of not more than 0 004 milibar is maintained at the location of these devices inside the room this point does not apply when the hood is used as an odour absorber 8 When connecting to 2...

Page 26: ...Operation and maintenance 1 Operational safety All safety instructions included in chapter IV must be observed Textile grease filters and carbon filters should be replaced and aluminium filter should...

Page 27: ...odours until they are saturated They cannot be washed or regenerated and should be replaced at least every 2 months or more frequently in case of very intensive use b replacement remove masking cover...

Reviews: