


11
ProKeys 88sx User Guide
English
Before You Connect your ProKeys 88sx...
Important:
Do not connect the USB to a computer until instructed to do so in the installation instructions that follow.
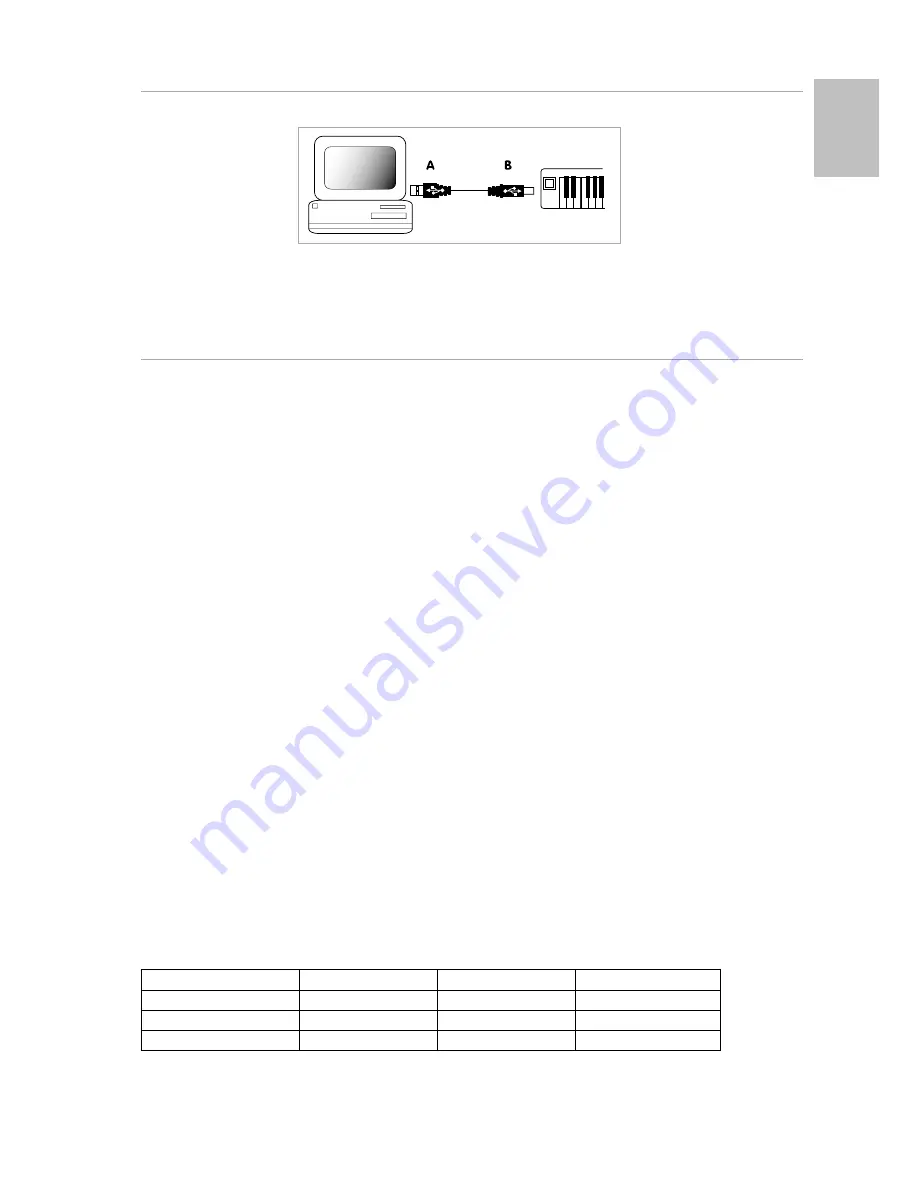
Your computer must have a USB port. The wide flat end of the included USB cable (A) connects to the USB port at the back or on the side of your
computer. Plug the square end of the cable (B) into the back of the keyboard.
The ProKeys 88sx cannot use the USB cable to provide the keyboard with its power. You must power your ProKeys 88sx using the included power
supply. If you wish to use an alternative power supply, make sure to choose one that meets the required specifications given on page 6.
2.3 Driver Installation Procedure
2.3.1 Basic Installation
Because it is a class-compliant device, installing the ProKeys 88sx on your Windows XP or Mac OS X computer is simple and straightforward:
<
Use the supplied USB cable to connect the ProKeys 88sx to a USB port on your computer, connect and plug-in the power supply, and
you’ll be ready to go! You can do this while the computer is on or off, and no driver installation is necessary.
2.3.2 Installing the Windows Multi-Client Driver
While class-compliancy offers easy setup and connection of the ProKeys 88sx, the Windows class driver allows only one MIDI application, or
program, to use the ProKeys 88sx at any given time. For many users, this is perfectly acceptable, as they will only be using the ProKeys 88sx to
communicate with their host MIDI/audio application.
However, if you use multiple applications at once, including applications “ReWired” together (such as Ableton Live
TM
as a host and Propellerhead
Reason
TM
as a slave), you’ll need to install the Windows ProKeys 88sx MIDI driver so that both the host and the ReWired application can be
simultaneously controlled from the ProKeys 88sx.
PLEASE NOTE:
DO NOT connect your ProKeys 88sx to your computer until the appropriate driver files have been copied to your computer.
1.
Insert the Stage Piano Series CD-ROM into your computer’s CD-ROM drive.
2.
The computer will automatically display the interactive menu. If your computer fails to launch the menu, manually start the menu by
clicking on Start > My Computer > Stage Piano Series > autorun.exe.
3.
Follow the onscreen directions to choose your product. Once you select your product, click “Install” to begin copying files.
4.
Follow the driver installer’s on-screen instructions.
5.
At various points in this installation process, you may be notified that the driver being installed is not “digitally signed.” Click “Continue
Anyway” to proceed with the installation.
6.
Click “Finish” once the installer is complete.
7.
Connect your ProKeys 88sx to an available USB port and switch it on.
8.
Windows will identify the new MIDI device and will display a “Found New Hardware Wizard.” If you have Service Pack 2 installed on your
computer, you will be asked if you’d like to search the Internet for a driver. Please select “No, not this time” and press “Next.”
9.
Choose “Install software automatically (recommended)” and click “Next.”
10. Once the wizard is completed, click “Finish.” You will see a message pop up that says “Your new hardware is installed and ready to
use.”
2.3.3 Using the ProKeys 88sx with Your Software
When installed, the ProKeys 88sx will appear in the computer as a simple MIDI device with one input port and two output ports. You should select
the ProKeys 88sx input port as the MIDI input device in your audio application. The application will then be able to read any of the data transmitted
by you from the ProKeys 88sx.
To trigger the internal sounds of your ProKeys 88sx using MIDI data from your sequencer, you should select the first ProKeys 88sx MIDI output that
you see in your sequencer’s MIDI output devices.
To stream data directly to the external MIDI Out port of your ProKeys 88sx, you should select the second ProKeys 88sx MIDI output that you see in
your sequencer’s MIDI output devices.
The port names are defined in the table below. Note that the MIDI ports will appear with different names depending on whether you are using Mac
or PC, and whether you’ve installed the Windows multi-client driver or not:
Input Port
Output to Internal Sounds Output to MIDI OUT port
Mac OS X
USB ProKeys 88sx
USB ProKeys 88sx port 1
USB ProKeys 88sx port 2
Windows Class Driver
USB Audio Device
USB Audio Device (1)
USB Audio Device (2)
Windows Multi-Client Driver
USB ProKeys 88sx In
USB ProKeys 88sx Out (1)
USB ProKeys 88sx Out (2)
Part 2: The ProKeys 88sx as a MIDI Controller
Summary of Contents for ProKeys 88sx
Page 1: ...ProKeys 88sx User Guide...


