background image

MicroTrack 24/96  

<

  User Guide

13


9.  While a file is recording, you can:


<  

make adjustments to the record levels if necessary using the [LEVELS] buttons.


<  

pause the recording by pushing in on the [NAV] wheel once. To resume recording, push in on the [NAV] wheel again.


<  

stop the recording by pressing the [REC] button again.


<  

delete the file being recorded by pressing the [DEL] button.


10. Once the recording is stopped, the MicroTrack 24/96 will finish writing the file to memory.

Playback

Now that a file has been recorded, you can play it back to check the recording. 

1.  Connect the outputs of the MicroTrack 24/96 so you can hear the playback. You can use any combination of the following:
2.  Plug a pair of headphones into the 1/8” jack on the MicroTrack 24/96.
3.  Connect the RCA outputs to an amplifier or mixer.
4.  Press the [MENU] button to enter the Settings menu. The first option, Files, will be selected.
5.   Press in on the [NAV] wheel to enter the Files menu. This menu will show all the audio files currently stored on the media. If you’ve only 

recorded the one file so far, it will already be selected for playback.

6.  Press in on the [NAV] wheel to begin playback of the current file.

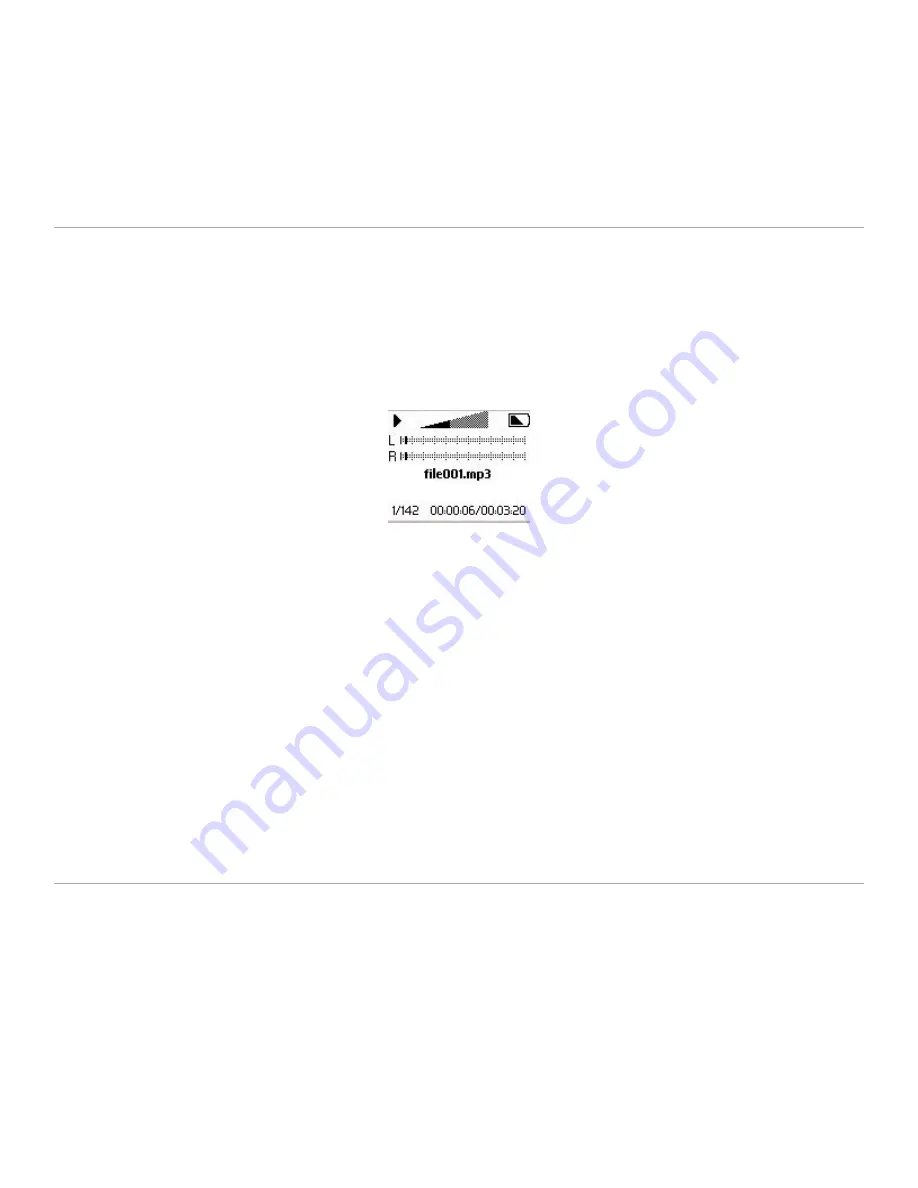
The triangle in the upper-left corner of the screen shows that the MicroTrack 24/96 is playing a file. The file being played is “file001.

mp3.” The numbers in the lower-left corner show that this is file 1 of 142 files on the media. The lower-right corner shows the current 

play time and the current file length.

7.  While an audio file is playing, you can:


<  

adjust the volume using the [VOLUME] button.


<  

pause playback by pressing in on the [NAV] wheel. Press in again to resume playback.


<  

 play at half-speed by pressing in and holding the [NAV] wheel for over two seconds. Press in and hold the [NAV] wheel again to 
resume playback at original speed.


<  

fast-forward through the file by pressing and holding up on the [NAV] wheel.


<  

rewind the file by pressing and holding down on the [NAV] wheel.


<  

skip ahead to the next file by pressing up on the [NAV] wheel.


<   

return to the beginning of the file by pressing down on the [NAV] wheel. If you are within the first three seconds of a file, pressing 
down will skip back to the previous file.


<  

delete the file by pressing the [DEL] button.


<  

immediately begin recording a new file by pressing the [REC] Button.


<  

loop playback of the file using the procedure explained below.

Loop Playback

The MicroTrack 24/96 will allow you to loop a section of an audio file. This can be useful when practicing parts or studying dictation. The method 
for looping a file requires setting a start and end point, and is accomplished as follows:

1.   To engage Loop Playback, press and hold the [MENU] button for over 2 seconds while the file is playing.  A Loop Playback icon will be 

displayed on the LCD.

2.  Press the [MENU] button once when you reach the start point of the loop.
3.  Press the [MENU] button a second time when you reach the end point of your loop. The section will begin to loop immediately.
4.   Pressing the [MENU] button a third time will clear the start and end points, and exit Loop Playback mode.  The Loop Playback icon will be 

removed from the LCD.

While using the Loop Playback mode, you will not be able to skip to other files using the up and down action of the [NAV] wheel. You will only be 
able to fast-forward or rewind the current file by holding the [NAV] wheel in your desired direction.

4  -  Operating Instructions

Summary of Contents for MICROTRACK 24

Page 1: ...Professional 2 Channel Mobile Digital Recorder...

Page 2: ...s and Indicators 5 Front 5 Top 6 Bottom 6 Left 7 Right 8 Settings Menu 8 4 Operating Instructions 12 Recording 12 Playback 13 Loop Playback 13 5 Using the MicroTrack 24 96 with a Computer 14 Charging...

Page 3: ...r supply CompactFlash card Printed Quick Start Guide CD ROM containing this User Manual and Audacity editing software Product Features Records stereo WAV and MP3 les 16 or 24 bit recording and playbac...

Page 4: ...ery the unit will eventually turn off You will then have to recharge the battery before the MicroTrack 24 96 can be turned on again If you recharge the battery before the unit becomes inoperable the c...

Page 5: ...put signal exceeds the headroom of the MicroTrack 24 96 4 Input Levels Adjust These control the individual record levels of the MicroTrack 24 96 s left and right inputs 5 Signal Indicators Will light...

Page 6: ...k Connect a pair of headphones with an 1 8 plug for monitoring the MicroTrack 24 96 Bottom 12 RCA Outputs Line level outputs from the MicroTrack 24 96 13 S PDIF Input Allows a S PDIF format digital si...

Page 7: ...RS and 1 8 inputs Use the L position for line level devices The M position should be used when recording from microphones The H position uses a higher gain stage on the 1 4 TRS inputs which can help w...

Page 8: ...the current selection or enter a sub menu The MENU button is used to exit a sub menu When rst entering the Settings menu you will be presented with the following options each explained in detail in t...

Page 9: ...he highest quality recordings Be aware that the les created in this format can be quite large MP3 Selects MP3 as the recording format This format compresses the audio data to yield smaller le sizes Un...

Page 10: ...t the proper time and date on the device Connect to PC Menu This menu option is used to connect your MicroTrack 24 96 to your computer when the USB cable is already attached 1 Selecting this menu opti...

Page 11: ...ck 24 96 to turn off after the speci ed time of non use Please note The MicroTrack 24 96 will ignore this setting while in Record Paused Record or Playback modes to ensure that recording and playback...

Page 12: ...he Menu key and NAV wheel to select Settings Recording Sample Rate Select the appropriate sample rate and press the NAV wheel in again to make your selection 5 Select the BIT RATE of the MicroTrack 24...

Page 13: ...n the NAV wheel Press in again to resume playback play at half speed by pressing in and holding the NAV wheel for over two seconds Press in and hold the NAV wheel again to resume playback at original...

Page 14: ...icroTrack 24 96 simply drag the les back into the MicroTrack 24 96 window You can also create and delete le folders rename les and move them to new locations when connected to the computer These featu...

Page 15: ...press its DEL key to exit host mode and return to normal operation Swapping CompactFlash Media If you wish to change out the CompactFlash card or MicroDrive while the MicroTrack 24 96 is connected to...

Page 16: ...872 0444 Sales fax 514 396 7102 Internet Home Page http www m audio ca M AUDIO France Floor 6 Gresham House 53 Clarendon Road Watford WD17 1LA United Kingdom M AUDIO Japan 460 0002 2 18 10 Assistance...

Page 17: ...7 51 4 15 50 53 3 17 28 43 3 2 33 55 2 15 54 48 1 20 44 21 8192 8 6 50 28 6 5 7 51 4 23 18 17 4 3 25 14 3 13 13 3 2 11 39 8 Media WAV Recording Time in Seconds Capacity 16 16 16 16 24 24 24 24 MB 441...

Page 18: ...4 6144 6 5 7 51 4 15 50 53 3 17 28 43 3 2 33 55 2 15 54 48 1 20 44 21 8192 8 6 50 28 6 5 7 51 4 23 18 17 4 3 25 14 3 13 13 3 2 11 39 8 Media WAV Recording Time in Seconds Capacity 16 16 16 16 24 24 24...

Page 19: ...5 2 15 54 48 1 20 44 21 8192 8 6 50 28 6 5 7 51 4 23 18 17 4 3 25 14 3 13 13 3 2 11 39 8 Media WAV Recording Time in Seconds Capacity 16 16 16 16 24 24 24 24 bit width MB 44100 48000 88200 96000 44100...

Reviews: