background image

21

As a rule, lower latency is preferable when recording, while maximum stability is desired when mixing. Try to select the lowest buffer setting your 
system will allow for recording, and a higher buffer setting for mixing.

ASIO Options

Checking  this  box  will  disable  your  DAW  application’s  ASIO  drivers  from  using  the  Monitor  Mixer  and  Router,  allowing  you  to  use  your  DAW 
application’s internal routing.

Input Channel Phase

Checking  either  of  these  boxes  will  reverse  the  phase  of  the  associated  input  channel.  This  is  useful  for  checking  phasing  on  stereo  input 
sources.

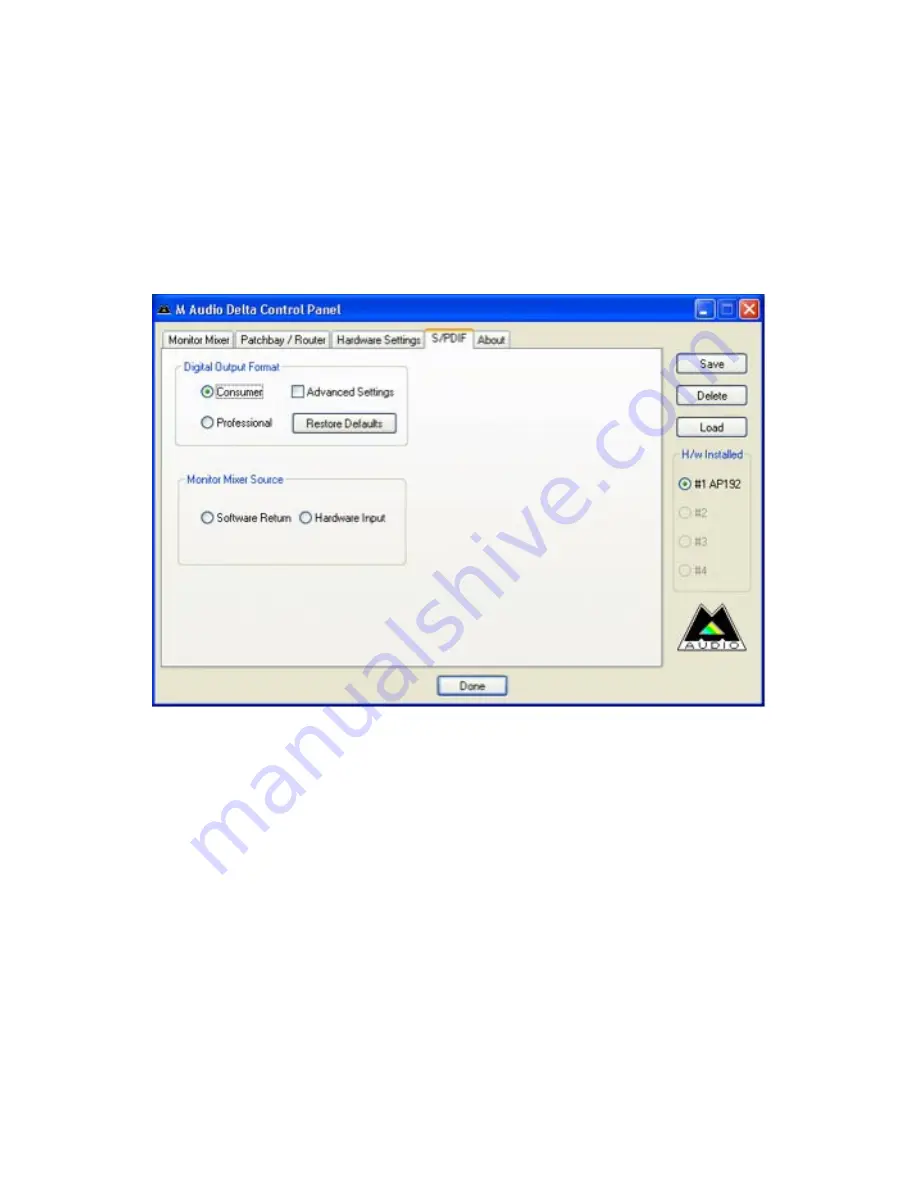
S/PDIF Page

This page allows you to select various options for the digital input and output signals.

Digital Output Format

Selects between S/PDIF (Consumer) and AES/EBU (Professional) digital output streams. The default is S/PDIF. The default setting,”Consumer,” is a 
true S/PDIF format and is recognized by all consumer devices.The alternate “Professional” setting is an AES/EBU type data stream, but electrically 
S/PDIF. This is a work-around that is recognized by some but not all AES/EBU devices.

Checking the Advanced Settings box will bring up additional dialog boxes for enabling emphasis, copy protection and additional options.

Monitor Mixer Source

When recording via the S/PDIF input, this selects the audio source sent to the monitor mixer. Options are Software Return (the output of your DAW) 
or Hardware Input (direct input monitoring).

Summary of Contents for AUDIOPHILE 192

Page 1: ...High De nition 4 in 4 out Audio Card with Digital I O and MIDI user guide...

Page 2: ...2 17 Using the Control Panel 18 Monitor Mixer Page 18 WavOut 1 2 18 WavOut S PDIF 18 H W in S PDIF 19 H W in 1 2 19 Patchbay Router Page 19 Available sources are 19 Hardware Settings Page 20 Master Cl...

Page 3: ......

Page 4: ...hile 192 also offers a highly exible software mixer giving you zero latency input monitoring As part of the Delta series of M Audio interfaces the Audiophile 192 can be used together with other Delta...

Page 5: ...ocess step by step Refer to the section below for Windows or Mac speci c instructions on running the installer software Once the software has been installed open your computer and physically insert th...

Page 6: ...your computer system and disconnect the power cords Touch a metal plate on your computer system chassis to ground yourself and discharge any static electricity This is not dangerous if the system is...

Page 7: ...hassis screw or retaining bracket Replace the computer chassis cover and reconnect the power cords Connect the Audio cables to the Audiophile 192 PCI See the External Connections section for more info...

Page 8: ...er software has not passed Windows Logo testing Select Continue Anyway and proceed with the installation NOTE In Windows 2000 this message will refer instead to the drivers not passing Windows Logo te...

Page 9: ...prompted to reboot your computer When your computer restarts you will see the M Audio mixer icon in your system tray Note that in some cases you may not be prompted to restart In order to make certai...

Page 10: ...Audio Audiophile 192 Installer An M Audio volume icon will appear on your desktop If necessary double click on the M Audio volume icon to open then click on the M Audio installer to launch it You wil...

Page 11: ...important information on changes that may have occurred since the writing of this manual so be certain to read through it You will then be presented with the License Agreement Click Continue and then...

Page 12: ...11 Select a destination disk for the installation and then click Continue On the Easy Install box click Install...

Page 13: ...will then see the Installation Completed box and be prompted to click Restart and reboot your computer After the computer has rebooted you may shut down the computer completely disconnect your power...

Page 14: ...An M Audio volume icon will appear on your desktop If necessary double click on the M Audio volume icon to open it Click on the installer icon and you will be greeted with the Welcome dialog of the in...

Page 15: ...14 You will then be presented with the License Agreement Click Continue then click Agree if you agree with the License Agreement Select a destination disk for the installation and then click Continue...

Page 16: ...15 In the Easy Install box click Install You will need to type in your Administrator Password for the next step...

Page 17: ...diophile 192 into an available PCI slot Hardware Installation Turn OFF the power to your computer system and disconnect the power cords Touch a metal plate on your computer system chassis to ground yo...

Page 18: ...jack located on the PCI card bracket Any incoming signal is assigned via the software mixing panel and your DAW application Connect your S PDIF digital sources to this input Main Outputs 1 and 2 Thes...

Page 19: ...e Mac control panel is functionally equivalent Any differences in actual function are detailed in the following sections Monitor Mixer Page The Monitor Mixer page has fader controls for the input sour...

Page 20: ...card number under H W Installed to display that card s settings The default setting for the S PDIF Output is the S PDIF SW Return WavOut S PDIF in Windows SW Out S PDIF on Mac This is usually the sign...

Page 21: ...sample rate checking the Rate Locked box will retain the selected sample rate regardless of the incoming sample rate The Reset Rate When Idle box will prevent the sample rate from changing even if the...

Page 22: ...ou to select various options for the digital input and output signals Digital Output Format Selects between S PDIF Consumer and AES EBU Professional digital output streams The default is S PDIF The de...

Page 23: ...al Support email support m audio de Fax 0 7941 98 70070 Internet Home Page http www m audio de M AUDIO U K Unit 5 Saracen Industrial Estate Mark Road Hemel Hempstead Herts HP2 7BJ England Sales Inform...

Page 24: ...Hz to 20kHz 48kHz 0 1dB 20Hz to 40kHz 96kHz 0 5dB 20Hz to 80kHz 192kHz Crosstalk 105dB 1kHz channel to channel Impedance 300 balanced 150 unbalanced Warranty Terms Registration Warranty Terms M Audio...

Page 25: ...www m audio com AP192_UG_EN1...

Reviews: