background image

SEDONA CARE & USE/INSTALLATION


|

17

TROUBLESHOOTING YOUR GRILL... 

continued

If the burner will light with a match, then the igniter may 
not be functioning correctly. Contact Lynx Customer Care. 

If the burner will not match light, and you know you are 
getting gas, wait for any gas to dissipate and remove the 
burner and check it for blockages. (See INDEX: “Clean the 
Burner” for further details.)

SMELL OF GAS WHILE COOKING

IF YOU SMELL GAS WHILE THE GRILL IS OPERATING, 
IMMEDIATELY TURN OFF ALL BURNERS AND SHUT OFF 
THE MAIN FUEL SUPPLY. 
• Perform a leak test (See INDEX: “Leak Test” for further 

details.)

• Check for blockages (See INDEX: “Clean the Burner” for 

further details.)

YELLOW FLAMES

Under normal conditions the flames should be blue with 
slight yellow tips. (See page 30). A yellow flame on the 
main burners indicates a lack of air. But, if the air around 
the grill is dusty or if heavy grease is present, some orange 
tips on the burner flame are normal.

Adjust the Air Shutter

To adjust for insufficient air, adjust the air shutter. (See     
INDEX: “Air Shutter Adjustment” for further details.)

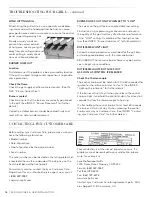
LOW OR INSUFFICIENT HEAT

NO PART OF THE GRILL SHOULD EVER BE LINED WITH 
ALUMINUM FOIL. Doing so will interfere with airflow and 
can cause a low heat condition.

Ensure that you’ve preheated the grill with all main burners 
on for at least 10 – 15 minutes with the hood closed. 

Proper leveling during installation is critical. A grill that is 
out of level will cause erratic burner combustion and inef-
ficient, uneven heating. A carpenter’s spirit level should be 
used to level the grill both front-to-back and side-to-side.

If the low heat problem persists:

• Check the gas supply line sizing requirements.
• Check the gas supply line for kinks or damage. 
• Replace any damaged supply lines. 
• Check the regulator
  Make sure that the regulator & hose assembly is the one  
  designed for and supplied with your grill and that it is 

correctly set up for the type of fuel you are using.
(See INDEX: “Regulator Conversion” for further details.) 

The hose and regulator provided by the manufacturer must 
be used if your grill is set-up for an LP Gas Cylinder.

Check that there is no physical pressure being applied to 
the regulator attached to the back of the grill. The regula-
tor contains a flexible diaphragm and should not be al-
lowed to touch the grill body or its surroundings. 
• Check for Obstructions

Ensure that the burners and drip tray are clean and free 
from obstructions. 

LP (Propane) units: 

• Is the cylinder almost empty? 

Almost-empty cylinders may not have sufficient pressure 
to run the burners at high heat. 

• Have the line pressure checked by a qualified technician 

(See INDEX: “Gas Requirements” for further details.)

• Flow Limiting Device

Improper lighting procedures may have activated the LP 
cylinders flow control device, reducing the heat output. 

  To reset the flow control:


– Shut off all burner controls and close the LP cylinder.


– Wait 30 seconds and, very slowly, reopen the cylinder valve. 


– Wait a few seconds and relite a burner. 

• Bulk LP Cylinder Users

Bulk LP cylinder lines must be properly regulated.

Ensure that you are using a 4/11 appliance regulator sup-
plied by the manufacturer and converted to LP gas. Also 
ensure that you do not have more than one regulator in line.

Natural Gas units:

• Supply Line

Ensure that the supply line is at least 3/4” inside diameter 
or 1” outside diameter. 

• Check line pressure

Natural gas inlet pressure should be at least 5” W.C. and 
manifold pressure not less that 4” W.C. under full load 
(with all burners on.) 

• Check burners for blockages
• Check flame characteristics. (See INDEX: “Flame, Correct 

Size” )

• Clean or adjust air shutter (See INDEX: “Air Shutter 

Adjustment.”

Summary of Contents for L400PS

Page 1: ...SEDONA CARE USE INSTALLATION MAKE THE MOST OF YOUR...

Page 2: ...rystalline which is used in one of the components of the IR burner as an agent known to the state of California to cause cancer IF YOU SMELL GAS 1 Shut off all gas supply lines to the grill 2 Extingui...

Page 3: ...rs boats or any other moving installation 6 Always have an ABC Fire Extinguisher accessible never attempt to extinguish a grease fire with water or other liquids 7 Storing your grill Store your grill...

Page 4: ...DELINES 20 Before You Start 22 If shipment arrives damaged 22 Built In Installations 22 Clearance to Combustibles 23 Cut Out Dimensions 24 Unpacking and Assembly 25 Gas Connections 25 Natural Gas 26 L...

Page 5: ...10 Never use charcoal or any other solid fuel in the grill 11 Cooking excessively fatty meats and oils will cause flare ups Internal fires or damage caused by them or by the grill being left unattende...

Page 6: ...grill is overheating using an oven mitt open the front hood Then adjust the burner control knob to a lower setting Install your grill with a wind break behind it Orient the grill so prevailing winds a...

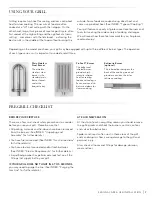
Page 7: ...ing area and provides consistent heat for rotisserie cooking USING YOUR GRILL PRE GRILL CHECKLIST BEFORE YOUR FIRST USE There are a few must check safety precautions to consider before you use your gr...

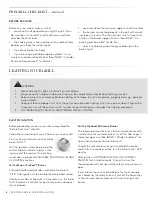
Page 8: ...he control knob in and rotate the knob to LITE After ignition set the knob to the desired heat setting If the burners do not light with in 5 seconds turn the knob to OFF and wait 5 minutes for gas to...

Page 9: ...efore attempting to light it again ProSear Burner To match light this burner use the lighting rod to insert a lit match through the cooking grate Push and turn the corresponding burner control knob to...

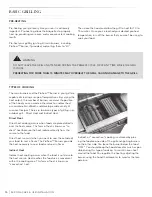
Page 10: ...heat cooking occurs when foods are placed directly over the heat source This form of heat is known as ra diant heat because the heat radiates directly from the source to the food Direct heat is a mus...

Page 11: ...ed Avoid placing food over a ProSearTM burner before it is fully pre heated because food particles and grease drip ping onto a cold ProSearTM burner may clog the ports and damage the burner For the sa...

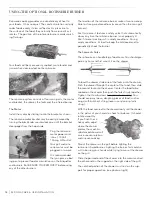
Page 12: ...atically closes any time the rotisserie burner is not properly lit like if it were to extinguish in windy conditions During windy conditions it s best to keep the lid closed and to periodically check...

Page 13: ...glow evenly across its surface in about 5 minutes NOTE The hood thermometer is only an indication of the radiant heat inside the grill When cooking on a rotisserie use a meat thermometer to check the...

Page 14: ...swimming pools or the salt from sea air may cause surface rust to appear and even create some pitting if left on the product Here are a few tips to avoid this Regularly wipe down the exterior surface...

Page 15: ...Remove Burners 1 Remove the grill racks and briquette trays 2 Remove the hex head bolt securing the burner 3 Lift the burner up at the rear until the legs exit the frame 4 Then pull to the rear of the...

Page 16: ...e oils found in human skin Touch ing the bulbs may shorten their life Pull the bulb straight out from the socket without twisting Hold the bulb using a paper towel or other cloth and gen tly press it...

Page 17: ...ace any damaged supply lines Check the regulator Make sure that the regulator hose assembly is the one designed for and supplied with your grill and that it is correctly set up for the type of fuel yo...

Page 18: ...diagnose problems with the rotisserie burner BE CAREFUL The rotisserie burner flame may be hard to see in bright sunny conditions ROTISSERIE LIGHTS BUT GOES OUT AS SOON AS CONTROL IS RELEASED Check t...

Page 19: ...ions or liabilities related to the sale or use of its grill products 4 Warranty shall not apply and Lynx is not responsible for damage resulting from misuse abuse alteration of or tampering with the a...

Page 20: ...ural Gas 26 LP Gas 27 Gas Line Purging 28 Gas Conversion Kits 28 Electrical Connections 29 Connection to AC 29 Battery Installation 29 Final Checks 30 Leak Testing 30 Wiring Schematics 32 L400 L500 No...

Page 21: ...ws where the shut off is located If you smell gas check for gas leaks immediately Check only with a soap and water solution Never check for gas leaks with an open flame See INDEX Leak Testing for furt...

Page 22: ...is critical A grill that is out of level will cause erratic burner combustion and inef ficient uneven heating A carpenter s spirit level should be used to level the grill both front to back and side...

Page 23: ...of 6 of clearance is needed on the left side of the grill above the counter top for the motor and skewer If the grill is to be placed in a combustible enclosure an approved insulating jacket is necess...

Page 24: ...at floor level are in a side wall there shall be at least two openings The bottom of the openings shall be 1 in 25 4 mm or less from the floor level and the upper edge no more than 5 in 127 mm above...

Page 25: ...emove the white accessory box and packing the grill racks and remove any loose items from the firebox Carefully cut the zip ties securing the warming rack and rotisserie spit if equipped Make sure you...

Page 26: ...f all the gas fired equipment that will be connected to that line In no case should pipe less than inside diameter or 1 outside diameter ever be used to connect this product Calculate the total BTU ou...

Page 27: ...egulated gas line to the grill LP cylinder with type 1 valve connection DO NOT CHANGE THE REGULATOR HOSE ASSEMBLY OR USE ANY OTHER ASSEMBLY THAN THE ONE SUPPLIED WITH YOUR GRILL DO NOT ATTEMPT TO USE...

Page 28: ...X Leak Test for further details GAS LINE PURGING You should purge the gas line of air before attempting to light the grill Make sure all grill controls are in the OFF position Slowly turn on the main...

Page 29: ...arrow on the cover 3 The battery compartment will disengage and protrude so that you may pull and remove the battery and compartment 4 Insert and or replace a new 9V battery into the battery compartm...

Page 30: ...ting the burners Light the burner and allow it to preheat on high for 3 minutes Turn the burner to LO Pull off the control knob While holding the valve shaft with pliers as shown insert a small flat s...

Page 31: ...ve it tighten the air shutter set screw and reinstall the burner briquette trays and grill racks NOTE The ProSear does not have an air shutter The appearance of the ProSear burner should be visually c...

Page 32: ...32 SEDONA CARE USE INSTALLATION WIRING SCHEMATICS L400 L500 NON ROTISSERIE GRILL...

Page 33: ...SEDONA CARE USE INSTALLATION 33 WIRING SCHEMATICS L400 L500 ROTISSERIE GRILL...

Page 34: ...34 SEDONA CARE USE INSTALLATION WIRING SCHEMATICS L600 L700 NON ROTISSERIE GRILL...

Page 35: ...SEDONA CARE USE INSTALLATION 35 WIRING SCHEMATICS L600 L700 ROTISSERIE GRILL...

Page 36: ...36 SEDONA CARE USE INSTALLATION SEDONA GRILL EXPLODED PARTS VIEW...

Page 37: ...SEDONA CARE USE INSTALLATION 37 SEDONA GRILL PARTS LIST...

Page 38: ...000 Btu Hr 58 500 Btu Hr L600PS 2 23 000 Btu Hr N A 1 23 000 Btu Hr 69 000 Btu Hr L600PSR 2 23 000 Btu Hr 1 14 000 Btu Hr 1 23 000 Btu Hr 83 000 Btu Hr L700PS 2 23 000 Btu Hr N A 1 23 000 Btu Hr 69 00...

Page 39: ...ne Purging 28 Gas Requirements 26 Gas Supply Line Runs 38 Gas Type Conversion 28 Grilling in Windy Conditions 6 I Important Safety Precautions 5 Indirect Heating 10 L Leak Test Procedure 30 Lighting M...

Page 40: ...40 SEDONA CARE USE INSTALLATION Lynx Professional Grills 7300 Flores Street Downey CA 90242 Lynx Customer Care 888 289 5969 Fax 562 299 6978 www lynxgrills com PN 34170 Rev D 02 15...

Reviews: