SP21-CEC
Rev. B 102019
12
Luxier
Cleaning The Thermostatic Valve
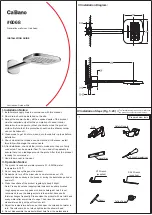
Parts Diagram
Before You Begin
•
Read and understand this instruction completely before service the shower panel.
•
Make sure the water supply is shut off to the unit. If necessary, shut off the water to the entire
house.
•
Turn on one of the faucets in the house to relieve the water pressure in the plumbing system.
•
Make sure the service site is clean and free of dust and debris.
Fig. C
Fig. D
Fig. E
Thermostatic Valve Cleaning / Replacement Instructions
1.
Remove Cap #1 from the Temperature Control Knob #3.
2.
Use a small hex wrench, loosen the Setscrew #2 by 2-3 turns. (NOTE: Do not remove the
setscrew completely.)
3.
Remove Temperature Control Knob #3.
4.
Remove Temperature Limiter #5 by pulling it off the Thermostatic Valve #7.
5. Use a small needle nose pliers remove the brass Valve Retaining Plate #6. See Figure A for
reference.
6.
Use a pair of pliers to pull out the Thermostatic Valve #7 for cleaning. (Figure B)
7.
Use commercially available hard water scale remover to clean the valve. Dilute the solution as
instructed on the cleaner. Soak the valve for about 5 minutes in the solution and clean it with a soft
brush. (Figure C)
8.
Thoroughly rinse the Thermostatic Valve under running warm water. Wash off any cleaning
solution and debris off the Thermostatic Valve. (Figure D)
9. After the cleaning process, follow the above steps in reverse order to assemble the shower panel.
(NOTE: When inserting the thermostatic valve, make sure the marking on the tip of the valve is
pointing up at 12 o’clock position as seen in Figure E)
10. Turn on water supply to the unit and test the system for leak.
1. Cap
2. Setscrew
3. Temperature Control Knob
3-1. Safety Pin
4. Chrome Trim w/ Temperature Scale
5. Temperature Limit Stop
6. Valve Retaining Plate
7. Thermostatic Valve
8. Setscrew
9. Brass Housing
100.
4
1
2
3-1
3
4
5
6
7
9
8
Fig. A
Fig. B


