16
17
LUVION
Premium Babyproducts
bAby UNIT PAIRING
The system comes with a baby unit that has already
been paired with the parent unit. These units will
communicate with each other once they are switched
on.
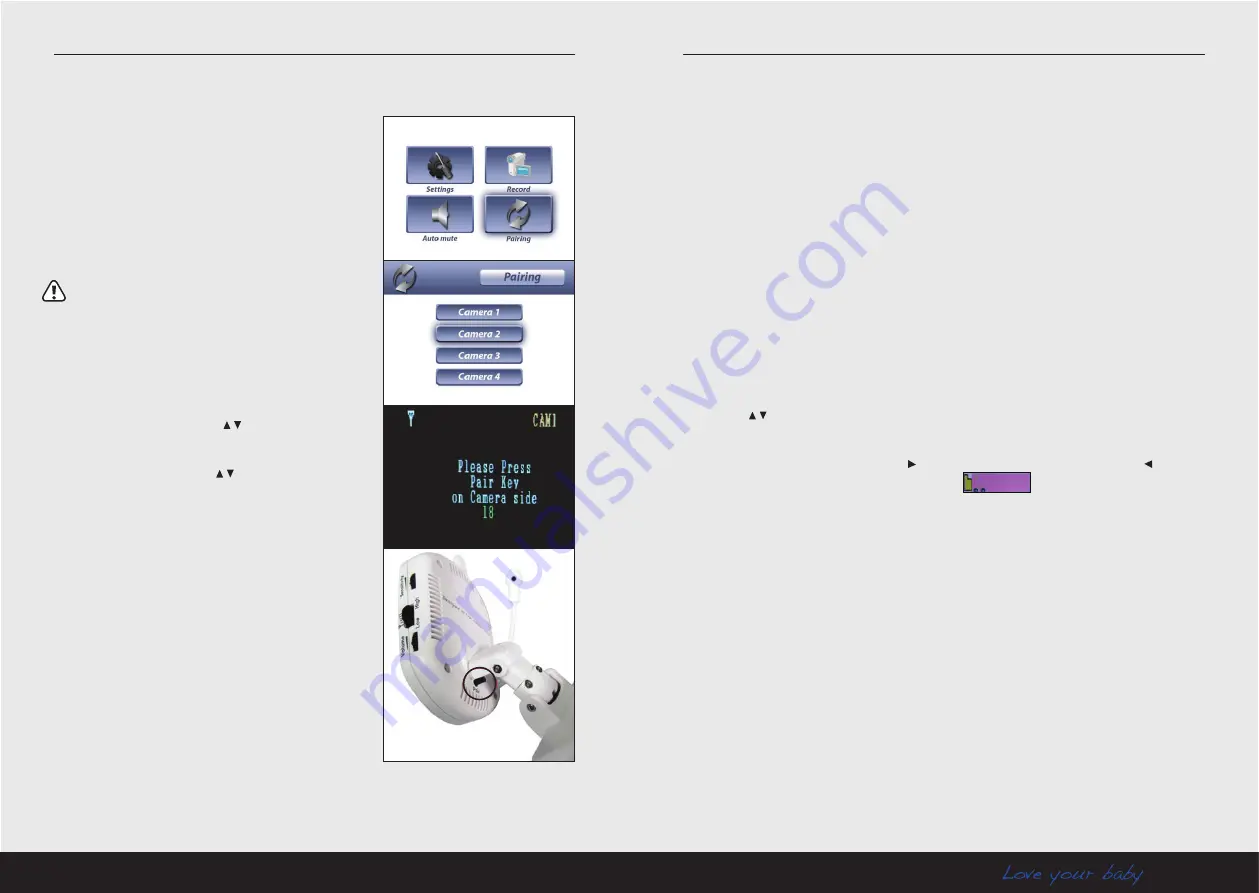
The pairing function gives each baby unit a seperate
channel on the parent unit (with a maximum of 4 baby
units) this is necessary for configuring additional baby
units.
Note:
It is highly recommended to pair the baby units to the
parent unit before permanently mounting them.
1. Switch the baby unit on.
2. Switch the parent unit on.
3. Press the MENU button on the parent unit. Navigate
to the Pairing menu using the
buttons. Press the Ok
button to enter the Pairing menu.
4. Select a channel using the
buttons. Press Ok to
accept the channel.
5. A message will be displayed on the parent unit screen.
The parent unit will count down from 30 to 0. You have
to press the Pair button on the baby unit within this time
to successfully pair it to the parent unit.
If the Pair button on the back of the baby unit is not
pressed within this time, the units will not be paired.
6. Press the pair button. It is located at the back of the
baby unit.
When the baby and parent unit have been paired, the
video from the baby unit will be directly displayed on
the screen of the parent unit.
The system is designed for Micro SD card recording. You can manually record videos or you
can schedule it. Before you can start recording video, you need to insert a Micro SD card into
the Micro SD slot in the parent unit. The system supports SD cards with a maximum capacity
of 16GB.
Manual video recording
Press the Auto record button on the parent unit to start the video recording. Press the button
once more to end the recording.
Scheduled video recording
Go to Menu-Record-Schedule Record, to set the start and end time of the recording. Select
ON to initiate the the scheduled recording. In this mode the parent unit will record each day
during the scheduled time.
Play videos
Follow these steps to play the recorded videos:
1. During normal use, press the Ok button on the parent unit to play the recorded videos.
2. Press the
buttons to select the VIDEO folder and press Ok to open it.
This folder contains subfolders named after the date on which the video was recorded. For
example 090101 means that the folder contains videos from january 1st 2009. When you
have recorded a lot of movies; press the button to go to the next page. Press the button
to go to the previous page. Select the main folder
and press Ok to return.
3. Select a folder and press Ok to enter the subfolders. For example 101024_1 means that a
video is recorded at 10:10:24 on camera 1.
4. When you select a video and press Ok, the video will start playing.
MIcRO SD cARD REcORDING AND PLAyING


