QS Timeclock Installation and Operation Guide 16
®
Timeclock Operation
(continued)
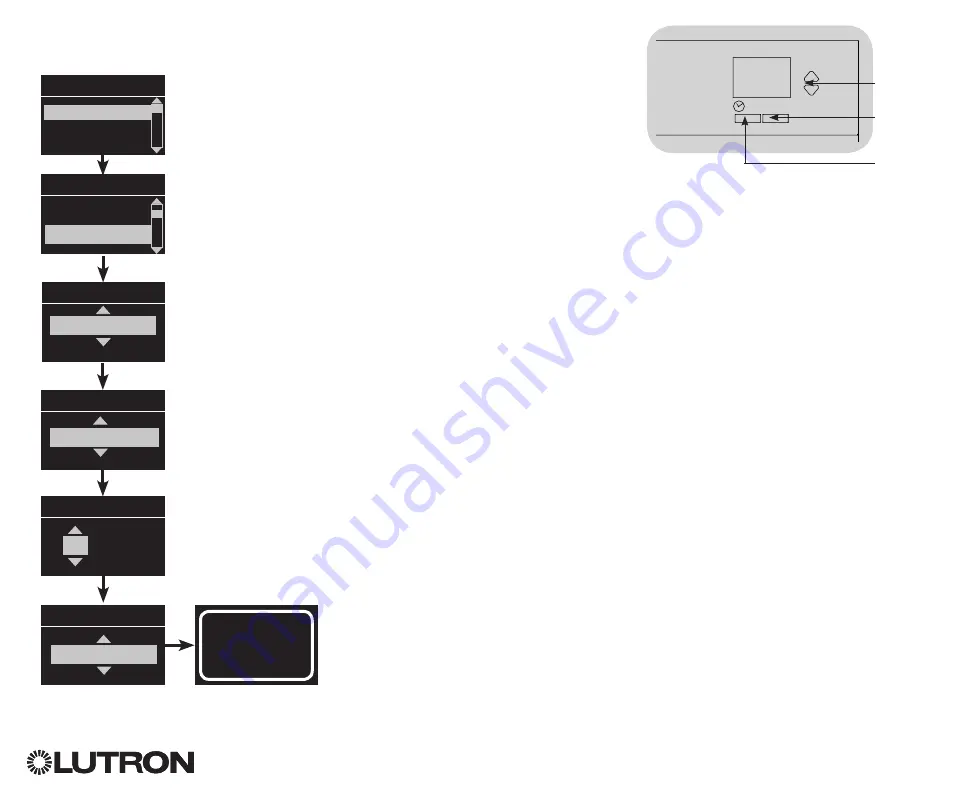
Adding an Event
1. Enter programming mode.
2. Use the Master buttons to highlight “Timeclock” and press the OK
button to accept.
3. Use the Master buttons to highlight “Add events” and press the
OK button to accept.
4. Use the Master buttons to highlight the recurrence for this event:
day of the week, holiday, weekdays or weekends. Press the OK
button to accept.
5. Use the Master buttons to highlight the type of the event (fixed time of day or a relative time to sunrise or
sunset). Press the OK button to accept.
6. For a fixed-time event, use the Master buttons to highlight the hour for your event to begin; press the OK
button to accept. Repeat for the minutes.
For a relative-time event, use the Master buttons and the OK button to set the hour, then the minutes relative
to sunrise or sunset (maximum of 1 hour, 59 minutes before or after sunrise or sunset).
7. Use the Master buttons to highlight the desired action for the timeclock event:
• Scenes 1-16, Off
• Window Treatment Groups 1-3 open, preset, or close
• Start/End Afterhours
8. The info screen will confirm that your event has been saved.
9. Repeat steps 4 through 9 for additional events.
10. Exit programming mode.
Main menu
Timeclock
Scene setup
Timeclock
Add events
Monday
Add events
Time of day
Add events
Scene
Scene 1
Set time
: 00 AM
08
Saved
Timeclock
View events
Add events
OK
1
2
3
4
5
6
Master
buttons
OK
button
Timeclock
(back) button


