2
1. Remove the Lithium battery from its device, place it in the tray (12) of the charger.
2. Check polarity by adjusting the
spring contactors with battery charging connections until the
“Ready” LED indicator (9) turns on.
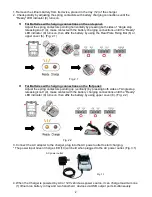
For Batteries with charging connections on the side panel:
Adjust the spring contactors pointing horizontally by pressing both sides of
“Angle stop
releasing knob
” (4), make contact with the battery charging connections until the “Ready”
LED indicator (9) turns on, then affix the battery by using the Rear Plate Fixing Bar (6) or
upper cover (8). (Fig. 2.1)
For Batteries with charging connections on the flat panel:
Adjust the spring contactors pointing up (vertically) by pressing both sides of
“Angle stop
releasing knob
” (4), make contact with the battery charging connections until the “Ready”
LED indicator (9) turns on, then affix the battery by using upper cover (8). (Fig. 2.2)
3.
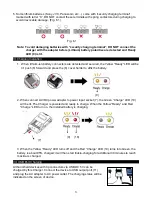
Connect the AC adapter to the charger, plug into the AC power outlet to start charging.
* The power input Green Charge LED (10) will be lit when plugged to the AC power outlet. (Fig. 3.1)
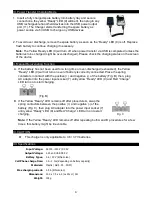
4. When the Charger is powered by AC or 12V vehicle as power source, it can charge maximum one
(1) lithium-ion battery in tray and two hand-held devices via USB output port simultaneously.
Fig. 2.1
Fig. 2.2
AC power outlet
Fig. 3.1


