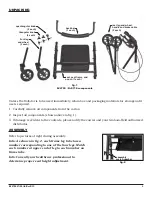
RJ4700-INS-LAB-RevB12
3
install the legs
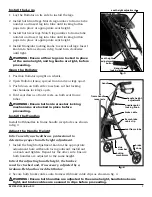
1. Lay the Rollator on its side to install the legs.
2. Install both front legs: Match leg number to frame tube
number and insert leg into tube until locking button
pops into place at appropriate seat height.
3. Install both rear legs: Match leg number to frame tube
number and insert leg into tube until locking button
pops into place at appropriate seat height.
4. Install triangular locking knobs to secure all legs: Insert
knob into hole as shown in ig. 3 and turn clockwise
until tight.
WaRNiNG: ensure all four legs are locked in place
at the same height, and leg knobs are tight, before
proceeding.
open the Rollator
1. Position Rollator upright on wheels.
2. Open Rollator frame; spread front and rear legs apart.
3. Push down on both side crossbars so that locking
mechanisms lock legs open.
4. Fold seat down so that it rests on both seat frame
tubes.
WaRNiNG: ensure both side crossbar locking
mechanisms are locked in place before
proceeding.
install the handles
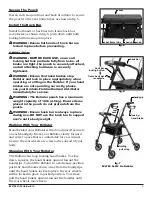
Install both handles in frame handle receptacles as shown
in ig. 4.
adjust the handle height
Info: Consult your healthcare professional to
determine proper handle height adjustment.
1. Install the height adjustment knob in the appropriate
adjustment hole with knob facing outward; install nut
on knob and tighten. Repeat for the other side. Ensure
both handles are adjusted to the same height.
Info: After adjusting handle height, the brakes
must be checked and, if necessary, adjusted by a
Graham-Field authorized distributor.
2. Secure both brake cables onto frame with brake cable clips as shown in ig. 4.
WaRNiNG: ensure both handles are adjusted to the same height, handle knobs are
tight, and brake cables are secured in clips before proceeding.
seat height adjustment
seat height
adjustment
button
triangular
locking knob
fig. 3
handle height
adjustment
frame handle
receptacle
quadrangular
locking knob
brake cable
brake
shoe
frame brake
cable clip
seat frame tube
side
crossbar
locking
mechanism
handle
fig. 4


