


Nordic Installation Instructions
8 |
P a g e
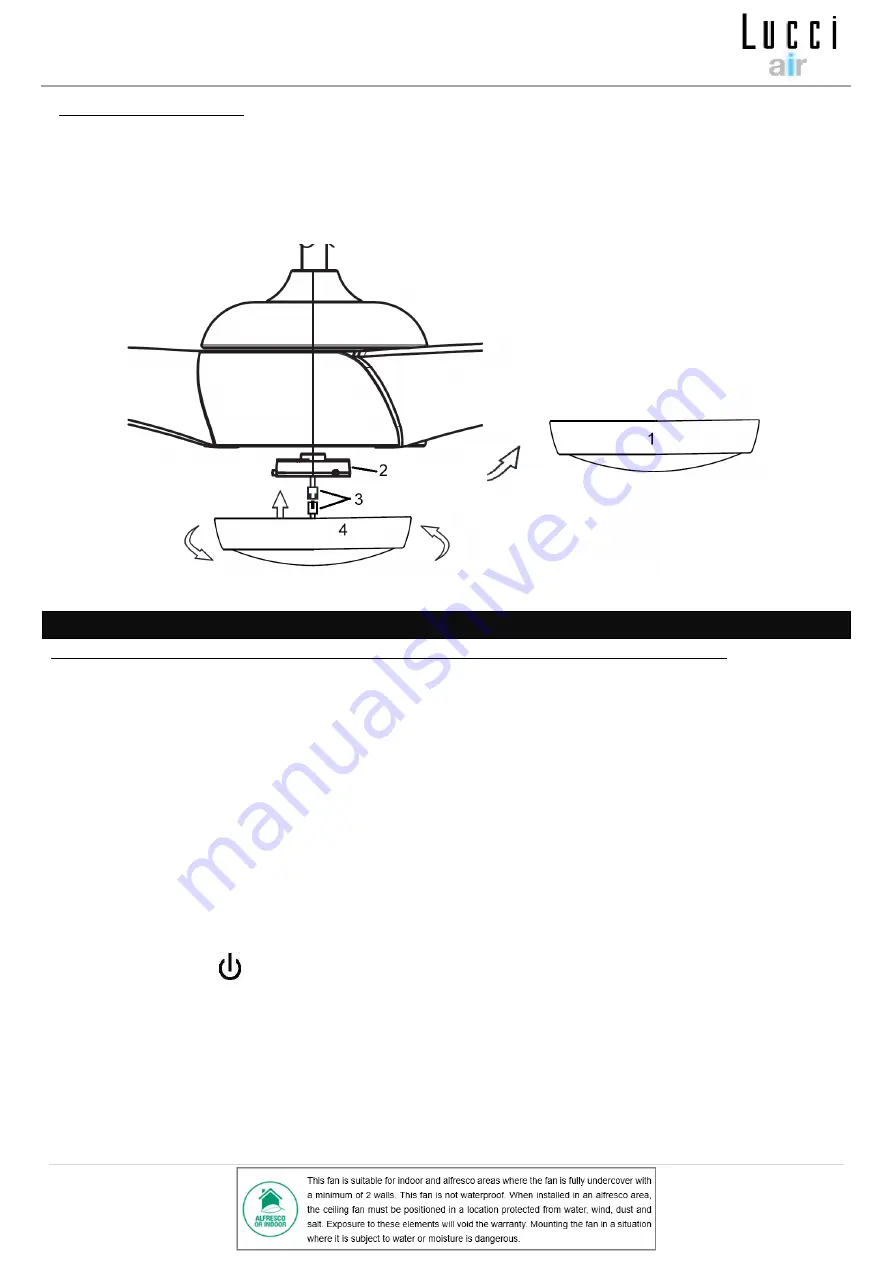
LIGHT KIT INSTALLATION
1. Remove the bottom cover (1) from the body of the fan by rotating it anti-clock wise.
2. Remove the heat shrink insulation tube from connector 3 at fan body end.
3. Plug the connectors (3) together.
4. Attach the LED luminaire (4) to the light kit bracket (2) and secure by rotating it clockwise.
USING YOUR CEILING FAN
Pairing Transmitter and Receiver
– when 2 or more DC ceiling fans are installed in one location
When two or more fans are located near each other, you may want to have the receiver/transmitter for each fan set to a
different code, so that the operation of one fan does not affect the operation of the other fan/s.
NOTE:
Ensure that you have installed a single pole disconnection switch in the fixed wiring for each fan.
NOTE:
Ensure power to the receiver is ON prior to pairing the transmitter with the receiver.
Transmitter / Receiver pairing for Ceiling fan 1:
Turn OFF the mains supply to the receivers of both ceiling fans 1 and 2.
Install the 3V DC battery in the compartment. Please make sure the polarity of the battery is correct. Fig.10
Turn on the power to receiver 1. Keep the power OFF to receiver 2. (Each ceiling fan must have its own isolation
switch, so that only the ceiling fan that needs to be paired with the transmitter will be ON).
Press and hold the
“
” button of
transmitter 1
for 3-5 seconds within 60 seconds of switching the power ON to
the receiver of ceiling fan 1.
The fan will move slightly and stop to indicate the paring process is activated.
If the fan has light kit attached, the light will flash on and off to indicate the paring process is activated.
Turn ON and change the speed of the ceiling fan 1 by the transmitter to check the operation and successful paring.
Fig. 10


