


Installation Guide
24
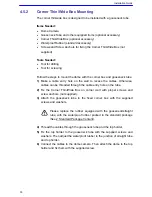
•
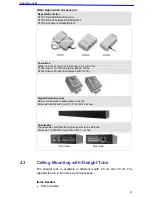
Straight Tube and other equipped items (optional accessory)
•
Waterproof Rubber (supplied)
•
Screws and Screw Anchors for fixing the straight tube onto the ceiling (not
supplied)
Tools Needed:
•
Tool for drilling
•
Tool for screwing
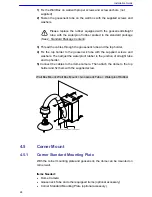
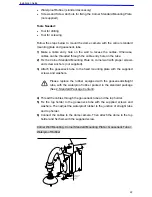
Follow the steps to mount the dome with the straight tube.
1)
Ensure that the ceiling can support the weight of the dome camera and
straight tube.
2)
Make a cable entry hole on the ceiling.
3)
Fix the Straight Tube to the ceiling with proper screws and screw anchors
(not supplied).
Please replace the rubber equipped with the gooseneck/straight
tube, with the waterproof rubber packed in the standard package
(See 2. Standard Package Content).
4)
Thread the cables through the straight tube and the top holder.
5)
Fix the top holder to the straight tube with the supplied screws and
washers. Then adjust the waterproof rubber to the junction of straight tube
and top holder.
6)
Connect the cables to the dome camera. Then attach the dome to the top
holder and fix them with the supplied screw.
Ceiling Mount: Straight Tube + Waterproof Rubber